How to Perfect Sourdough Pizza Proofing Time: A Complete Guide
The right proofing time plays a significant role in creating exceptional homemade sourdough pizza. A perfect proof can turn ordinary pizza dough into a flavorful, digestible crust with ideal texture and characteristic tang. Pizza enthusiasts and professional bakers know that proper fermentation timing distinguishes outstanding sourdough pizzas from mediocre ones.
This piece takes you through every detail of sourdough pizza dough fermentation. You’ll discover its science and become skilled at cold fermentation techniques. The guide shows optimal proofing times for different pizza styles and helps troubleshoot common problems. It also provides tips for maintaining a healthy sourdough starter. The knowledge here will help you achieve consistent, professional-quality results, whether you make Neapolitan-style pizzas or experiment with long-fermented dough.
Understanding Sourdough Pizza Dough
Sourdough Pizza beautifully blends traditional breadmaking with modern pizza crafting. I love its foundation—a symbiotic collection of wild yeasts and Lactobacillus bacteria that produces natural leavening and distinctive flavors.
What makes sourdough pizza unique
Sourdough Pizza stands apart because of its core elements. It shares the simple ingredients with regular pizza—flour, water, and salt—but differs significantly in its leavening agent. The pizza dough rises from a living culture called a starter that contains natural wild yeast and beneficial bacteria, not commercial yeast.
This natural fermentation process creates several remarkable features:
- Complex flavor development with a distinctive tang
- A crispy crust that surrounds a light, airy interior
- Extended shelf life from natural acidity
- Better texture through long fermentation
- A signature flavor profile that reflects the local environment
Benefits of using a sourdough starter
Sourdough starter adds remarkable advantages to pizza making. The extended fermentation process breaks down gluten and phytic acid, making pizza more straightforward to digest, even for people with mild gluten sensitivities. Baked sourdough pizza doesn’t contain active probiotics, but valuable prebiotics remain to support digestive health.
Your pizza’s character changes when you use a starter:
| Aspect | Effect |
|---|---|
| Texture | Creates a more complex gluten structure |
| Flavor | Develops deeper, more nuanced taste |
| Digestibility | Improves nutrient absorption |
| Preservation | Extends freshness naturally |
The ratio of flour to water in the starter will determine your final result. A wetter starter helps lactobacillus grow better and creates more pronounced acidity. A drier starter encourages yeast growth, produces more carbon dioxide, and makes a lighter texture.
Your kitchen’s environment shapes your starter’s characteristics, making each sourdough pizza unique. Artisan bakers call this unique flavor profile terroir—just as with wine-making, local conditions leave their mark on the final product.
Bakers feed their starters fresh flour and water regularly, usually in a 1:1 ratio. This careful maintenance keeps the microorganisms active and will give a perfect sourdough pizza crust.
The Science of Proofing Sourdough Pizza Dough
Microorganisms perform an intricate dance in sourdough pizza dough. These tiny beings create a complex web of biochemical reactions that turn simple ingredients into a flavorful, well-laid-out crust. Bakers can control and perfect their sourdough pizza results by understanding these processes.
Fermentation process
Sourdough pizza dough fermentation showcases a fascinating partnership between wild yeasts and Lactobacillus bacteria. The magic begins as flour combines with water. This combination activates the enzyme amylase that breaks down starches into simple sugars. These sugars become food for both yeasts and bacteria and each microorganism has its unique role:
| Microorganism | Primary Function | Byproducts |
|---|---|---|
| Wild Yeasts | Sugar consumption | Carbon dioxide, ethanol |
| Lactobacillus | Maltose processing | Lactic acid, flavor compounds |
This natural alliance creates a protective environment where good microorganisms flourish, and harmful bacteria stay away. Carbon dioxide bubbles emerge from this process and get trapped in the developing gluten network. These trapped bubbles give sourdough pizza crust its distinctive texture.
Factors affecting proofing time
Temperature is the most critical factor when proofing sourdough pizza. It controls how fast fermentation happens and how flavors develop. Your dough will ferment best between 75-78°F (24-25°C). At this range, yeasts and bacteria work together perfectly.
Here’s what affects how long your dough needs to proof:
Environmental conditions
- Room temperature
- Humidity levels
- Air circulation
Dough characteristics
- Hydration percentage
- Flour type and quality
- Salt content
- Feeding schedule
- Maturity
- Activity level
When temperatures drop below 70°F (21°C), your dough will ferment slowly, so you’ll need more time for proofing. The process speeds above 80°F (27°C), but your dough might become too sour or overproof. A steady temperature throughout the process will yield consistent results and better flavor.
The dough’s hydration level plays a significant role in fermentation speed. Doughs with higher hydration (above 70%) ferment faster and develop more robust sourdough flavors. Lower-hydration doughs need more time to achieve similar results.
Using an instant-read thermometer to check dough temperature helps you track fermentation progress. This lets you adjust proofing times as needed. Temperature control is the foundation of consistently making great sourdough pizza.
Optimal Proofing Times for Different Styles
Different pizza styles need proofing approaches to create unique textures and flavors. Traditional methods and specific baking conditions shape each style’s requirements.
Neapolitan-style pizza
The authentic Neapolitan pizza dough needs specific proofing conditions that create its signature light, airy crust. The dough uses 00 pizza flour and goes through a two-stage fermentation process. The original bulk fermentation takes 2-3 hours at room temperature before the dough balls are proof individually.
Critical characteristics for Neapolitan proofing:
- 70% hydration level for optimal texture
- Room temperature bulk ferment (78°F/25°C)
- Final proof of 3-4 hours before shaping
New York-style pizza
The New York-style pizza stands apart from its Neapolitan roots with unique proofing methods. Many pizza makers might assume otherwise, but sourdough NY-style pizza achieves better results with same-day fermentation instead of long cold proofing. Adding oil and sugar to the dough creates different fermentation patterns.
| Proofing Stage | Duration | Temperature |
|---|---|---|
| Original Rest | 15-20 minutes | Room temp |
| Bulk Fermentation | 3-4 hours | 78°F/25°C |
| Final Proof | 2 hours | Room temp |
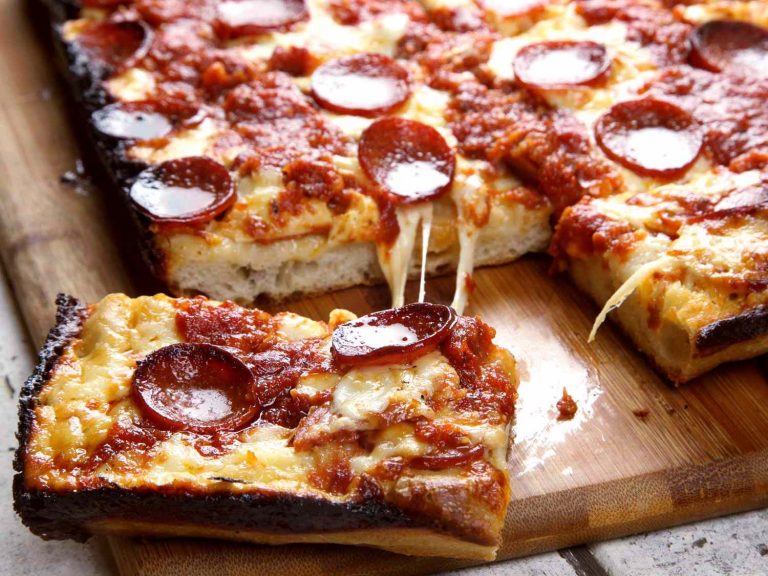
Pan pizza
Because of its unique baking method, pan pizza dough needs specific proofing considerations. A warm environment helps the dough during the proofing stage, and bakers should aim to keep it at 78°F (25°C). This versatile style works well with same-day and overnight proofing options.
Bakers achieve the best pan pizza results by controlling temperature during the final proof, which usually takes 3-4 hours. The dough develops its characteristic thick, airy crust as it proofs directly in the pan. Bakers might need shorter proofing times in warmer months to avoid overfermentation.
Each style becomes successful only when we are willing to spot proper proofing indicators. The dough should feel fluffy and display visible air pockets at the right moment. Par-baked crusts give bakers more flexibility. They can manage to keep their quality up to 6 hours at room temperature or 3 months in frozen storage.
Mastering the Cold Fermentation Technique
Cold fermentation is a revolutionary approach to sourdough pizza making. The process usually takes 48-72 hours and turns simple dough into an outstanding foundation for craft pizzas.
Benefits of cold fermentation
Cold fermentation creates remarkable changes in sourdough pizza dough through several natural processes:
- Improved Flavor Development: Slow fermentation lets enzymes transform starches into complex sugars. This creates rich, nuanced flavors
- Superior Texture: Long cold proofing builds a more robust gluten structure that results in light, airy crumb with perfect chewiness
- Better Digestibility: Long fermentation breaks down complex carbohydrates. This makes the pizza easier for your body to process
- Practical Advantages: The dough becomes more stable and lasts longer. This gives you more flexibility when planning your pizza preparation
Step-by-step cold fermentation process
The soaring win of cold fermentation depends on precise temperature control and timing. The process has two distinct phases that give optimal results:
Phase 1: Original Cool-Down (First 2 Hours)
Put the shaped dough balls in lightly greased containers and leave them uncovered in the refrigerator at 4-7°C (39-45°F). This significant step will ensure uniform cooling and prevent condensation problems that could affect the dough’s texture.
Phase 2: Extended Fermentation (48-72 Hours)
The containers need covers after the original cooling period while maintaining consistent refrigeration. This timeline guides the process:
| Time Period | Action Required | Notes |
|---|---|---|
| 0-2 hours | Uncovered cooling | Prevents condensation |
| 2-48 hours | Covered fermentation | Minimum development time |
| 48-72 hours | Continued fermentation | Optimal flavor development |
The dough needs 2-4 hours to reach room temperature before use. This rest period helps with proper gluten relaxation and final proofing. The dough should feel soft and gently jiggle when you move the container, showing adequate development.
Temperature control plays a vital role throughout the process. The dough needs consistent refrigeration between 4 °C and 7 °C to ensure optimal enzymatic activity and prevent overfermentation. Professional bakers use dedicated refrigeration units, but home bakers can achieve excellent results with standard refrigerators that maintain consistent temperatures.
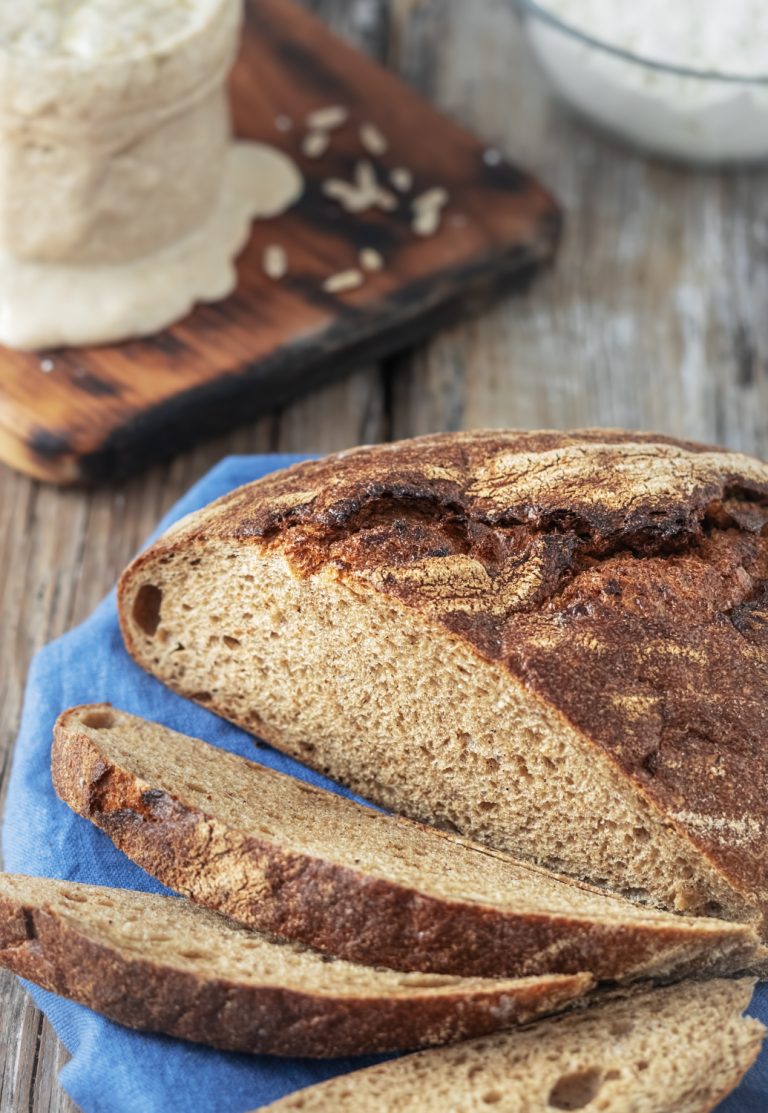
The dough’s appearance gives valuable clues about proper fermentation. A properly cold-fermented dough shows small bubbles across its surface and feels silky. These visual and tactile signs help bakers know when their dough reaches its optimal state for making pizza.
Troubleshooting Common Proofing Issues
Making great sourdough pizza depends on your understanding of common proofing challenges. A baker’s ability to spot and fix these issues will give consistent, high-quality results with each batch.
Overproofed dough
When over-proofed, sourdough pizza dough shows clear signs of excessive fermentation. The dough becomes extremely puffy, with large bubbles forming on its surface, and develops a thin membrane. The poke test reveals that over-proofed dough doesn’t spring back after making an indentation, which suggests a weakened gluten structure.
Visual indicators of over-proofed dough include:
| Characteristic | Description | Impact on Pizza |
|---|---|---|
| Surface Texture | Giant bubbles, thin membrane | Uneven cooking, dense spots |
| Shape Retention | Loses form, spreads easily | Difficult to shape |
| Color | Dull appearance | Pale crust after baking |
| Texture | Sticky or wet to touch | Poor handling properties |
Bakers can rescue over-proofed dough with the knocking-back technique. This method requires gentle deflation and rebelling of the dough. A shorter secondary proof of 30-60 minutes makes the dough ready to use.
Underproofed dough
You can spot under-proofed dough by watching for specific signs. The dough will fight back when stretching because its gluten network hasn’t developed properly. If the dough is under-proofed, your pizza will turn out dense and chewy with uneven air pockets.
Critical characteristics of under proofed dough:
- The dough fights back too much when stretched
- Very few bubbles appear in the dough
- The structure stays dense and tight
- The dough bounces back quickly during the poke test
- Getting the right thickness becomes a challenge
The best fix is simple – give your dough more time to proof. Let it sit at room temperature for another 2-4 hours while you check its progress. Cold fermentation needs more patience – add 12-24 hours at 4-7°C (39-45°F).
Inconsistent results
Temperature changes are the biggest reason for inconsistent proofing results. Professional bakers use dedicated proofing chambers to control temperature, while home bakers can get consistent results by watching temperatures closely and making adjustments.
Your sourdough starter’s strength affects how consistent your proofing will be. A well-fed, mature starter at its peak will give you more reliable fermentation than an underfed or old one. Regular feeding schedules and storage temperatures will help you get better results.
These steps will give you reliable results:
- Watch room temperature during proofing
- Keep flour-to-water ratios the same
- Measure salt exactly
- Write down proofing times and results
- Make changes based on seasons
Humidity and air circulation can also affect proofing. By creating a controlled space, you’ll get uniform results across batches. A proofing box or dedicated area with stable conditions works well.
A proofing log helps track down problems with inconsistent results. Write down the temperature, timing, and starter activity. This method enables you to spot patterns and fine-tune your process. The result? It’s more predictable sourdough pizza every time.
Tips for Perfect Sourdough Pizza Every Time
Excellent sourdough pizza demands precision and basic technical skills. Professional bakers know their success starts with a starter they manage to keep active. Their expertise extends from careful dough handling to exact baking conditions.
How to Keep Your Sourdough Starter Active
A well-maintained sourdough starter serves as the foundation of outstanding pizza dough. Storage conditions and usage patterns determine the maintenance schedule. Bakers achieve the best results by following these feeding ratios and schedules:
| Storage Method | Feeding Ratio (Flour: Water) | Frequency | Temperature |
|---|---|---|---|
| Room Temperature | 1:1:1 (Starter:Flour: Water) | Every 12-24 hours | 70-75°F (21-24°C) |
| Refrigerated | 1:1:1 | Weekly | 38-40°F (3-4°C) |
| Long-term Storage | 1:2:2 | Monthly | 38°F (3°C) |
Your refrigerated starter needs proper revival before pizza making. Here’s what you should do:
- Take the starter out of the fridge 24 hours before use
- Keep only 113g (½ cup) of starter
- Add equal amounts of flour and water
- Let it activate at room temperature for 2-8 hours
- The starter is ready once it doubles in size and shows visible bubbles
Proper dough-handling techniques
To become skilled at sourdough pizza dough handling, you should understand how hydration levels affect dough behavior. High-hydration doughs (70-75%) need different techniques than traditional pizza dough. Professional bakers recommend these steps:
- Use a gentle hand during shaping to preserve air pockets
- Apply the stretch-and-fold method during bulk fermentation
- Keep dough temperature between 75-78°F (24-26°C)
- Let the dough rest adequately between shaping stages
- Use sufficient dusting flour to prevent sticking
The coil fold technique mainly works when developing strength in high-hydration sourdough pizza dough. This method is simple. You lift the dough from the center and let the edges fold underneath naturally. Then rotate 90 degrees and repeat this process 4-6 times during bulk fermentation.
Ideal baking conditions
The perfect sourdough pizza needs the right environment and several key factors. Your final results will depend greatly on temperature control and your chosen equipment. Here are the essential conditions:
- Oven temperature: 500-550°F (260-288°C)
- Baking surface: 45-60 minutes preheat
- Ambient kitchen temperature: 70-75°F (21-24°C)
Equipment Considerations
- Baking Steel or stone placement: Upper-middle rack
- Pizza peel: Wooden for launching, metal for retrieval
- Temperature monitoring: Infrared thermometer recommended
Bakers need to keep temperatures steady throughout the baking process. Baking Steel transfers heat better than traditional pizza stones, which leads to better oven spring and crust development.
Your pizza’s quality depends a lot on the timing of the final proof. Cold-fermented dough should come out of the refrigerator 2-4 hours before baking. This lets it reach room temperature slowly and allows for shared gluten relaxation, giving an even bake.
Expert bakers know that proper hydration levels make all the difference. Traditional pizza dough usually contains 65% hydration, but sourdough pizza works better with higher levels:
- Neapolitan-style: 70-75% hydration
- New York-style: 65-70% hydration
- Pan pizza: 75-80% hydration
Temperature monitoring plays a vital role. An instant-read thermometer helps you maintain these optimal conditions:
- Starter temperature: 75-78°F (24-26°C)
- Dough temperature during bulk fermentation: 75-78°F (24-26°C)
- Final proof temperature: 70-75°F (21-24°C)
- Baking surface temperature: 500-550°F (260-288°C)
Your choice of flour affects dough handling and final results substantially. Expert bakers suggest:
- Type 00 flour for Neapolitan-style pizzas
- Bread flour for New York-style crusts
- All-purpose flour for pan pizzas
- Fresh-milled whole grain additions (up to 20%) to add flavor complexity
Dough temperature control during handling is crucial to achieve the best results. Room-temperature dough needs minimal handling time to avoid getting too warm. Brief manipulation periods help the cold-fermented dough stay within ideal temperature ranges as you shape it.
Conclusion
Perfect sourdough pizza proofing just needs careful attention to several connected elements. Temperature control is the life-blood of successful fermentation. Optimal flavor development and texture depend on proper timing. Bakers achieve professional results by understanding fermentation science, specific pizza style requirements, and controlling environmental conditions throughout proofing.
These core principles are the foundations of exceptional sourdough pizza making. Bakers must master dough handling and troubleshooting skills. Everything starts with a well-managed starter. Passionate bakers who want to raise their bread and pizza game can get an authentic artisanal sourdough starter from The Yeast We Can Do (email john@theyeastwecando.com for this premium starter). Proper proofing techniques combined with patience and practice will revolutionize ordinary ingredients into extraordinary pizzas that rival artisanal pizzerias.
FAQs
What is the ideal duration for proofing pizza dough?
Proofing pizza dough for 24 hours is generally effective, but allowing it to ferment for 2-3 days in a cold environment like a refrigerator can enhance the flavor significantly. After this period, the quality may start to decline.
How long should sourdough pizza dough be cold-proofed?
For cold-proofing sourdough pizza dough, lightly grease a bowl with olive oil, place the dough ball inside, and cover it with a lid, cling film, or a damp towel. Transfer it to the refrigerator for 12 to 24 hours or even longer.
What is the recommended proofing time for sourdough at room temperature?
Proofing sourdough at room temperature is recommended for at least one hour, with three hours being the maximum advisable duration. Extending the proofing time beyond this can cause the dough to develop large gas bubbles and become overly gassy.
Is it possible to overproof sourdough pizza dough?
Yes, sourdough pizza dough can become over-proofed if left at room temperature for too long. Overproofed dough becomes difficult to handle, often tearing and sticking, complicating the shaping process.
What are the benefits of extending the cold fermentation of pizza sourdough?
Allowing pizza sourdough to cold ferment for 48-72 hours can significantly improve its texture, enabling you to stretch the dough very thin while promoting the