How to Perfect a Sourdough Danish Recipe: A Step-by-Step Guide
Becoming skilled at making sourdough Danish pastries brings together natural fermentation‘s artisanal charm with traditional Danish pastry’s delicate layers. The advanced baking technique yields tender, flaky pastries that feature complex flavors. A subtle tang makes them different from regular Danish treats. Your sourdough starter combines with classic lamination methods to create unique pastries that give patient bakers excellent results.
This detailed guide explains each significant step to creating perfect sourdough Danish pastries. You will discover proper sourdough starter maintenance, dough preparation techniques, and the essential lamination process that builds those distinctive layers. The content shows everything from original fermentation to final proofing. You’ll also find step-by-step instructions for shaping, adding fillings, and achieving the perfect bake on these sophisticated breakfast treats.
Ingredients and Equipment Needed
The perfect sourdough Danish pastries depend on selecting the right ingredients and equipment. Each ingredient and tool plays a significant part in the final result. Through this careful selection process, these artisanal treats develop their characteristic flaky layers and complex flavors.
Sourdough Starter
A perfect sourdough Danish starts with an active, mature starter. Your starter needs these conditions:
- Feed it 4-12 hours before you plan to use it
- Look for a starter that has doubled in size and shows plenty of bubbles
- The starter thrives at temperatures between 75-85°F (24-29°C)
- Watch for consistent rising and falling cycles
Flour, Butter, and Other Ingredients
Quality ingredients greatly affect your final pastry. Here’s everything you need:
| Ingredient | Specification | Purpose |
|---|---|---|
| Bread Flour | 12-14% protein | Primary structure |
| European-style Butter | 82% fat content | Lamination |
| Whole Milk | Full fat | Enrichment |
| Eggs | Room temperature | Structure & richness |
| Sugar | Fine granulated | Sweetness & texture |
| Salt | Fine sea salt | Flavor enhancement |
European-style butter is vital for successful lamination. Its higher fat content helps it stay pliable at colder temperatures and creates distinct layers. The butter needs to be cold yet bendable without cracking.
Baking Tools and Equipment
Quality laminated pastries need specific tools to achieve professional results. Here’s what you’ll need:
Temperature Control Tools
- Digital thermometer to check dough temperature
- Proofer or controlled environment (75°F/24°C works best)
- Refrigerator to cold ferment your dough
Dough Manipulation Tools
- Danish dough whisk to mix your dough
- Bench scraper to handle dough
- Heavy-duty rolling pin
- Ruler or measuring tape to layer precisely
Your workspace needs a large, excellent surface to roll and laminate dough. A marble pastry board or stainless steel counter will help keep your dough at the right temperature during lamination.
Bakers also need these items to proof and store their dough:
- Clear glass containers to watch your starter
- Bannetons or proofing baskets
- Plastic wrap or reusable covers
- Baking sheets with deep rims
- Parchment paper or silicone mats
Temperature control becomes crucial during lamination. Your dough should stay between 65-68°F (18-20°C) to keep butter from melting into the layers. A digital scale that measures in 1-gram increments will give you exact ingredient ratios. An instant-read thermometer helps you maintain the dough temperature throughout the process.
Preparing the Sourdough Danish Dough
Exceptional sourdough Danish pastries depend on the meticulous preparation of the base dough and its complementary butter block. This significant preparation creates the characteristic flaky layers that make these artisanal treats unique.
Mixing the dough ingredients
A well-fed sourdough starter at peak activity starts this process. Bakers should combine the ingredients in this specific order to achieve the best results:
| Component | Mixing Stage | Notes |
|---|---|---|
| Starter & Milk | First | Milk should be scalded and cooled |
| Sugar & Cardamom | Second | Traditional Danish spicing |
| Eggs & Salt | Third | Room temperature eggs |
| Flour | Final | Incorporate gradually |
Mix the dough until it reaches a shaggy consistency. Knead it for 5-10 minutes until it becomes smooth and glossy. The texture should be tacky but not sticky, which indicates proper gluten development.
Original Fermentation
The fermentation process happens in two distinct phases:
Room Temperature Rise (3-5 hours)
- Place dough in a covered bowl
- Keep environment at 75°F (24°C)
- Watch for the dough’s size to increase by 1/3
Cold Fermentation (8-12 hours)
- Move dough to refrigerator
- Storage time extends up to 2 days
- Complex flavors develop during this phase
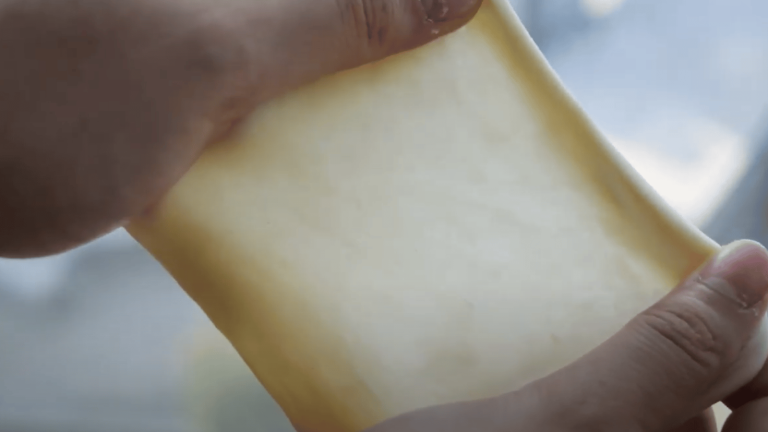
Creating the butter block
An adequately prepared butter block is vital for lamination. You’ll get the best results with European-style butter that contains at least 83% fat. Here’s what you need to do:
- Place cold butter on parchment paper
- Sprinkle with a tablespoon of flour
- Create a parchment envelope (7 inches wide, 8 inches long)
- Pound butter evenly with a rolling pin
- Roll to fill corners completely
- Chill if edges begin softening
Temperature Control Tips:
- Keep butter pliable but cold
- Move quickly to avoid warming
- Pop it back in the fridge if the butter gets too soft
- Sweet spot temperature: 65-68°F (18-20°C)
Your butter block should bend without breaking or cracking. This texture will give you those beautiful layers in the following steps. The block’s temperature needs careful attention throughout the process because it affects your pastry’s quality.
Let the assembled dough rest in the refrigerator for 12 hours before starting lamination. This long cold rest helps develop more decadent flavors and lets the dough relax appropriately for what comes next.
Laminating the Dough
The lamination process turns simple sourdough dough into delicate, flaky Danish pastries through a precise sequence of folding and rolling. This significant technique creates distinctive layers that make Danish pastries light and crispy.
Encasing the butter block
Lamination’s success depends on how well bakers encase the butter block in the prepared dough. The butter and dough should share the same consistency—cool but pliable. A well-prepared butter block must have these characteristics:
- Bends without breaking during flexing
- Stays between 65-68°F (18-20°C)
- Remains firm yet workable
Bakers roll the dough into a rectangle about twice the size of the butter block. They place the butter diagonally in the center and fold the dough’s corners inward, creating a sealed envelope around the butter.
Performing folds and turns
Lamination needs three specific turns to achieve the perfect layer count. Each turn must follow this sequence:
- Shape your dough into a 25x50cm (10x20inch) rectangle
- Make the dough longer instead of wider
- Keep the thickness consistent throughout
- Take the bottom third and lift it to the center
- Bring the top third down to cover the first fold
Temperature Control Guidelines:
| Stage | Temperature | Duration |
|---|---|---|
| Working temp | 65-68°F | During rolling |
| Chilling | 38-40°F | Between folds |
| Rest period | Room temp | 10-15 minutes |
Chilling between folds
The right chilling between folds creates distinct layers in your final pastry. After each fold:
- Wrap the dough tightly in parchment paper or plastic wrap
- Chill for 20-30 minutes between folds
- Let it rest for 10-15 minutes at room temperature before rolling again
- Keep an eye on butter consistency—it should stay cool but pliable
Your butter shattering during rolling means you’ve chilled it too much. The butter melding with the dough shows you need more chilling time. Look out for these signs:
Optimal Conditions:
- Dough rolls out smoothly without resistance
- No butter shows through the dough surface
- Edges stay straight with square corners
- Butter doesn’t leak during folding
After completing all three turns, the dough needs at least 8 hours of rest. An overnight stay in the refrigerator works best. This long chill helps the gluten relax and sets the layers perfectly. Your Danish pastries will have that signature flaky texture.
A well-floured work surface helps throughout the lamination process. Remember to brush away extra flour before each fold to prevent it from getting between your layers. You aim to create even, distinct layers that give your pastries the perfect lift and flakiness.
Shaping and Filling the Danishes
Skilled bakers shape and fill sourdough Danish pastries to turn well-laminated dough into elegant breakfast treats. This significant stage demands attention to detail, requiring precise techniques for professional results.
Cutting and shaping the dough
Bakers must roll the dough into a 12-inch by 8-inch rectangle on a lightly floured surface after the lamination process. A bench scraper or pizza cutter divides the dough into 12 equal pieces. Danish pastries come in several classic shapes that are the foundations of their distinctive appearance:
Square Shape
- Each corner folds into the middle
- Light pressure seals the center points
- The center remains open for filling
Pinwheel Design
- Cuts run from corners toward the center
- Alternate points fold inward
- The spiral pattern emerges naturally
Vol-au-vent Style
- The diagonal triangle takes shape
- Parallel cuts appear near edges
- Both sides fold over the center
Preparing fillings
A delicious cream cheese filling needs these ingredients:
| Ingredient | Measurement |
|---|---|
| Cream cheese | 250g (softened) |
| Granulated sugar | 113g |
| Butter | 19g (softened) |
| Flour | 28g |
| Beaten egg | 21g |
| Vanilla extract | One teaspoon |
Bakers can enhance the filling with these fruit options:
- Fresh berries
- Preserves or jam
- Sour cherries
- Sliced apples
- Poached pears
Assembling the danishes
Danish assembly requires precise timing and proper technique. Place each pastry shape on parchment-lined baking sheets, leaving enough room between them so they can expand during proofing and baking.
Proofing Guidelines:
- Cover shaped pastries with a damp tea towel
- Proof for 3-5 hours until slightly puffy
- Maintain a warm environment
- Watch for visible butter layers
Proper portioning makes a difference with fillings:
- Cream cheese filling: 2-3 teaspoons per danish
- Fruit toppings: 1 tablespoon per piece
- Combined fillings: 1 teaspoon each of cheese and fruit
Your egg wash needs a gentle touch:
- Combine one egg with one tablespoon of water
- Apply thin, even coating
- Avoid drips on cut edges
- Ensure complete coverage
Assembly Tips:
- Work quickly to keep dough temperature stable
- Keep fillings chilled until needed
- Avoid overfilling centers
- Leave space between pastries on the baking sheet
Professional bakers suggest creating different shapes and filling combinations in each batch. This method adds visual appeal and caters to various taste preferences. Success depends on consistent filling and quick work to prevent the laminated dough from getting too warm.
The dough’s temperature needs to be carefully monitored during shaping and filling. Cool temperatures help preserve the butter layers you’ve created. If the dough becomes too soft or the butter starts melting, it should be returned to the refrigerator for 15-20 minutes.
Proofing and Baking
Perfect sourdough Danish pastries just need precise temperature control and careful attention to timing in their final stages. These significant steps change the shaped pastries into golden, flaky delicacies. The results are truly professional quality.
Final proofing
Your sourdough Danish pastries’ success depends on perfect proofing conditions. The butter stays within the carefully crafted laminated layers when temperatures remain below 75°F (24°C). Bakers can choose between two reliable proofing methods:
Overnight Proofing (Recommended)
- Let proof 10-12 hours at 65-70°F (18-21°C)
- Creates deeper flavors
- Add 1 hour in warm conditions if needed
Same-Day Proofing
- Plan 4-5 hours at 70-75°F (21-24°C)
- Watch temperature levels closely
- Expect shorter fermentation time
Your Danish pastries show these signs when proofed correctly:
| Visual Indicator | Description | Action Required |
|---|---|---|
| Size Increase | Double in thickness | Ready for baking |
| Surface Texture | Slightly puffy | Proceed to egg wash |
| Touch Test | Gentle spring back | Perfect proofing |
| Over-proofed | Excessive puffiness | Reduce future-proof time |
| Under-proofed | Dense appearance | Continue proofing |
Egg wash and toppings
Egg wash elevates simple pastries into professional-looking creations. Each combination of egg wash ingredients creates unique effects in both color and shine:
Standard Egg Wash (Recommended)
- Whole egg + 1 tablespoon milk
- Creates golden-brown color
- Provides beautiful shine
- Perfect for general Danish pastries
Alternative Combinations
Whole Egg + Water
- Medium shine finish
- Excellent browning
- Thinner consistency
Egg Yolk + Cream
- Deep golden color
- Maximum shine
- Observe to avoid over-browning
Egg White + Water
- Light golden color
- Clear shine
- Ideal for delicate pastries
Professional results depend on proper application techniques:
- Brush egg wash in thin, even layer
- Cover the entire surface without pooling
- Apply right before baking
- Keep parchment paper free from drips
Baking temperature and time
Sourdough Danish pastries need a two-stage baking process to get the best results:
Original Baking Phase
- Temperature: 420°F (215°C)
- Duration: 20 minutes
- Position: Center rack
- Purpose: Create original rise and set structure
Secondary Baking Phase
- Reduced temperature: 400°F (204°C)
- Additional time: 10-15 minutes
- Monitor closely for the desired color
- Watch for butter leakage
Temperature Monitoring Tips:
- Use oven thermometer for accuracy
- Maintain consistent temperature
- Avoid opening the oven door frequently
- Rotate pan if needed for even baking
The baking process needs careful observation of these visual indicators:
| Baking Stage | Visual Cues | Action Required |
|---|---|---|
| Early Stage | Light golden color | Maintain temperature |
| Mid-Stage | Rising layers | Reduce heat if browning too quickly |
| Final Stage | Deep golden brown | Check internal temperature |
| Completion | Even color throughout | Remove from oven |
The best results come when bakers:
- Preheat oven well (15-20 minutes minimum)
- Use parchment-lined baking sheets
- Bake one sheet at a time
- Allow proper air circulation
Critical Temperature Points:
- Minimum internal temperature: 190°F (88°C)
- Maximum oven temperature: 420°F (215°C)
- Ideal proofing range: 70-75°F (21-24°C)
Each baking sheet should have no more than six Danish pastries. This spacing helps the laminated layers rise correctly and creates the characteristic flaky texture that makes exceptional Danish pastries.
Proper proofing, careful egg wash application, and precise temperature control will give you consistent, professional-quality results. Ambient conditions can greatly affect both proofing and baking outcomes. Bakers should keep detailed records of proofing times and temperatures to improve their future batches.
Finishing Touches and Serving
Professional bakers turn freshly baked sourdough Danish pastries into masterpieces through meticulous glazing, cooling, and storage techniques. Proper execution of these final steps boosts the pastries’ visual appeal and taste while effectively extending their shelf life.
Glazing options
Expert bakers use multiple glazing techniques to create flawless finishes. These classic options give Danish pastries their distinctive look:
Classic Glaze Combinations:
| Glaze Type | Ingredients | Application |
|---|---|---|
| Simple Icing | Powdered sugar + water | Drizzle when cool |
| Vanilla Cream | Crème pâtissière | Apply before baking |
| Apricot Shine | Melted apricot jam | Brush while warm |
The signature professional finish requires melted apricot jam brushed over fruit-filled sections. This classic technique creates an attractive sheen and effectively locks in the fruit’s moisture.
Cooling and storage
Your sourdough Danish pastries need proper cooling to preserve their delicate texture. The cooling process happens in specific stages:
- Original Rest
- Let pastries cool on a baking sheet for 30 minutes
- Move them to a wire rack until completely cool
- Add glaze after pastries have cooled properly
Storage Guidelines Based on Timeline:
Room Temperature (4 hours maximum)
- Perfect for same-day eating
- Keep in a covered container
- Custard-filled varieties work best
Refrigeration (up to 3 days)
- Use an airtight container
- Put parchment paper between layers
- Works best with filled pastries
Freezer Storage (2-3 months)
- Wrap each pastry in plastic
- Store in an airtight container
- Mark the date and contents clearly
Serving suggestions
Sourdough Danish pastries taste and feel best with proper serving techniques. These serving methods will give you the best results:
Reheating Guidelines:
- Fresh pastries: Serve at room temperature
- Refrigerated: Warm at 350°F (175°C) for 5-7 minutes
- Frozen: Thaw overnight, then refresh in the oven for 10 minutes
Professional Presentation Tips:
- Arrange on tiered platters to create visual appeal
- Dust with powdered sugar right before serving
- Pair with fresh seasonal fruits
- Complement with coffee or tea service
Bakers can prepare freeze-shaped, unbaked Danish pastries ahead of time. You can bake these directly from frozen by adding 3-5 minutes to the standard baking time. This approach will give you fresh-baked quality and flexible timing options.
These Danish pastries’ subtle sourdough tang creates a sophisticated flavor that differentiates them from regular versions. The sourness stays subtle but adds depth to the taste, making these pastries stand out from traditional offerings.
Temperature control is vital to serving. Custard-filled varieties need refrigeration after 4 hours at room temperature, while unfilled pastries stay fresh longer. These delicate treats taste best on their first day when the flaky layers and tender crumb reach peak texture.
Professional bakers suggest warming day-old pastries in a moderate oven before serving. This method returns the pastries’ crisp exterior while keeping the delicate interior texture intact. The technique works exceptionally well with refrigerated pastries, where moisture can affect the layers’ flakiness.
FAQs
What are some practical tips for making excellent sourdough bread?
Consider using your starter when it’s most active to enhance your sourdough bread. Moistening the dough’s surface before baking can help it rise better. It’s essential to handle the dough gently to maintain its structure. Using sifted flour can make the bread less dense, and soaking the flour before mixing can result in a lighter loaf. For softer bread, simply add more water.
How does Danish pastry differ from puff pastry?
Danish and puff pastry differ primarily in fat content and yeast usage. Danish pastry has a high fat content, around 40%, and includes yeast, which puff pastry does not. This results in Danish pastry having a less airy but richer texture after baking, whereas puff pastry is more airy and crisp.
How can you make sourdough bread taste stronger?
Adding a small amount of citric acid to the dough can be effective for a more robust flavor in sourdough bread.
What are the basic steps in making sourdough bread?
Making beginner’s sourdough bread involves several key steps: Prepare the levain early in the morning. Follow with an autolyze process around noon, mixing the flour and water and letting it rest. Mix the dough in the early afternoon and let it undergo bulk fermentation for about four hours. After that, divide and preshape the dough, then shape it properly. Allow the shaped dough to rest and proof overnight. Finally, bake the bread the following day after preheating the oven.