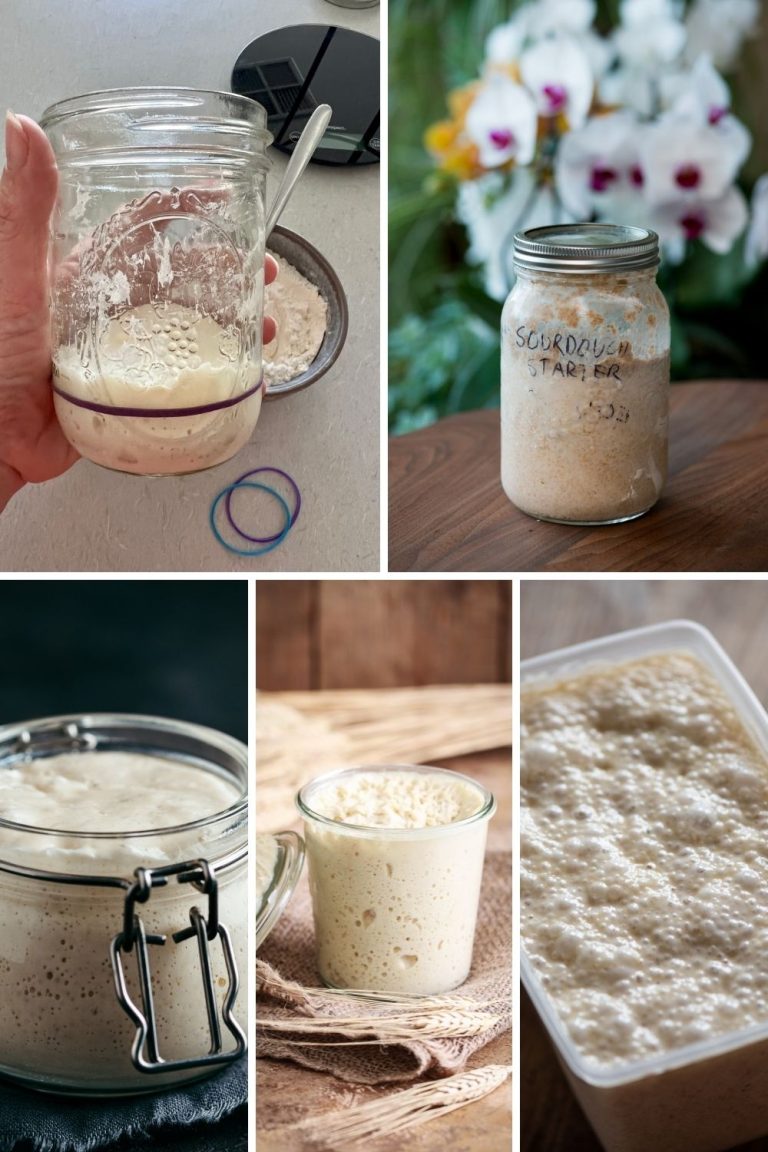
How to Maintain the Perfect Amount of Sourdough Starter and Minimize Waste
Both new and seasoned bakers face a common challenge with sourdough starter quantities. The struggle often involves excessive waste from frequent feedings or keeping more starter than needed for regular baking. The right amount of sourdough starter can reduce waste by a lot and help you maintain a healthy, active culture that delivers consistent results.
Your sourdough starter needs minimal care to stay ready for regular baking. This piece shows you the quickest ways to feed your starter, store it properly, and cut down on waste no matter how often you bake. You’ll discover how to adjust your starter amounts, create better feeding schedules, and keep your starter active without extra discard through efficient feeding schedules.
Creating a Minimal Waste Starter Routine
The quickest way to create a sourdough starter routine depends on using smaller amounts of starter effectively. You can maintain just 25-50g of starter and still bake excellent bread and other goods.
Establishing a consistent feeding schedule
A regular feeding schedule that arranges with your baking frequency is essential for a healthy starter. Daily bakers should keep their starter at room temperature and feed it every 24 hours. The standard 1:1:1 ratio (equal parts starter, flour, and water) delivers reliable results when you maintain your starter at room temperature.
Refrigeration provides a practical solution for less frequent bakers. Weekend bakers will find this method convenient since the starter needs feeding just once per week. The starter needs a 1:2:2 ratio feeding (one part starter to two parts each of flour and water) before it goes into the refrigerator to ensure it has enough nutrition during cold storage.
Scaling starter amounts to your baking needs
Your small starter can grow easily to match larger recipe requirements. The scaling process requires simple calculations. The recipe’s total required amount serves as your starting point. You need to split this amount equally between flour and water additions. These ingredients combine with your base starter.
A practical example makes this clearer. Let’s say you need 200g of starter and have 50g as your base. You should add 100g each of flour and water. This mixture yields 250g total, which gives you 200g to bake with and leaves 50g as your future starter base.
Incorporating discard into your baking
Your excess starter doesn’t need to go to waste – you can put it to creative use instead. Mature starter discard (at least 7 days old) can boost the flavor of many recipes:
- Works great as a thickener in soups and sauces
- Makes delicious pancakes and waffles
- Adds depth to quick breads and muffins
- Transforms into crispy crackers or flatbreads
- Gives pizza dough an extra flavor kick
Your discard acts as a liquid ingredient in recipes. Just subtract half its weight from both the flour and liquid amounts in your original recipe. Sweet baked goods taste better with younger discard (less than one week old) because it’s not too sour.
The quickest way to manage your starter is keeping it small and scaling up as needed. This approach minimizes waste but ensures you’ll have enough starter ready for any baking project. A detailed log of your feeding times and ratios helps you adjust your maintenance routine to fit your baking schedule perfectly.
Mastering the Feeding Process
Sourdough maintenance success depends on understanding the science behind feeding processes. A properly fed starter delivers consistent results and needs minimal troubleshooting as time passes.
Choosing the right flour blend
Your starter’s health and activity depends on the flour you choose. A mix of different flours works better than using just one type. Here’s a perfect blend ratio:
| Flour Type | Percentage |
|---|---|
| Medium protein white flour | 70% |
| Whole-grain rye flour | 30% |
This combination gives your starter the right balance of nutrients and structure. Whole grain flours are rich in nutrients and natural yeasts. Unbleached all-purpose flour provides starch that helps sustain fermentation.
Adjusting hydration levels
Sourdough starter hydration represents the water-to-flour ratio, shown as a percentage. A simple calculation determines this ratio:
(Weight of Water ÷ Weight of Flour) × 100 = Hydration Percentage
Bakers typically maintain their starters at 100% hydration, which means they use equal amounts of flour and water. But you can adjust these levels to address specific needs:
- A starter with higher hydration (>100%) becomes more liquid and ferments faster
- A starter with lower hydration (<100%) stays stiffer and develops deeper flavors gradually
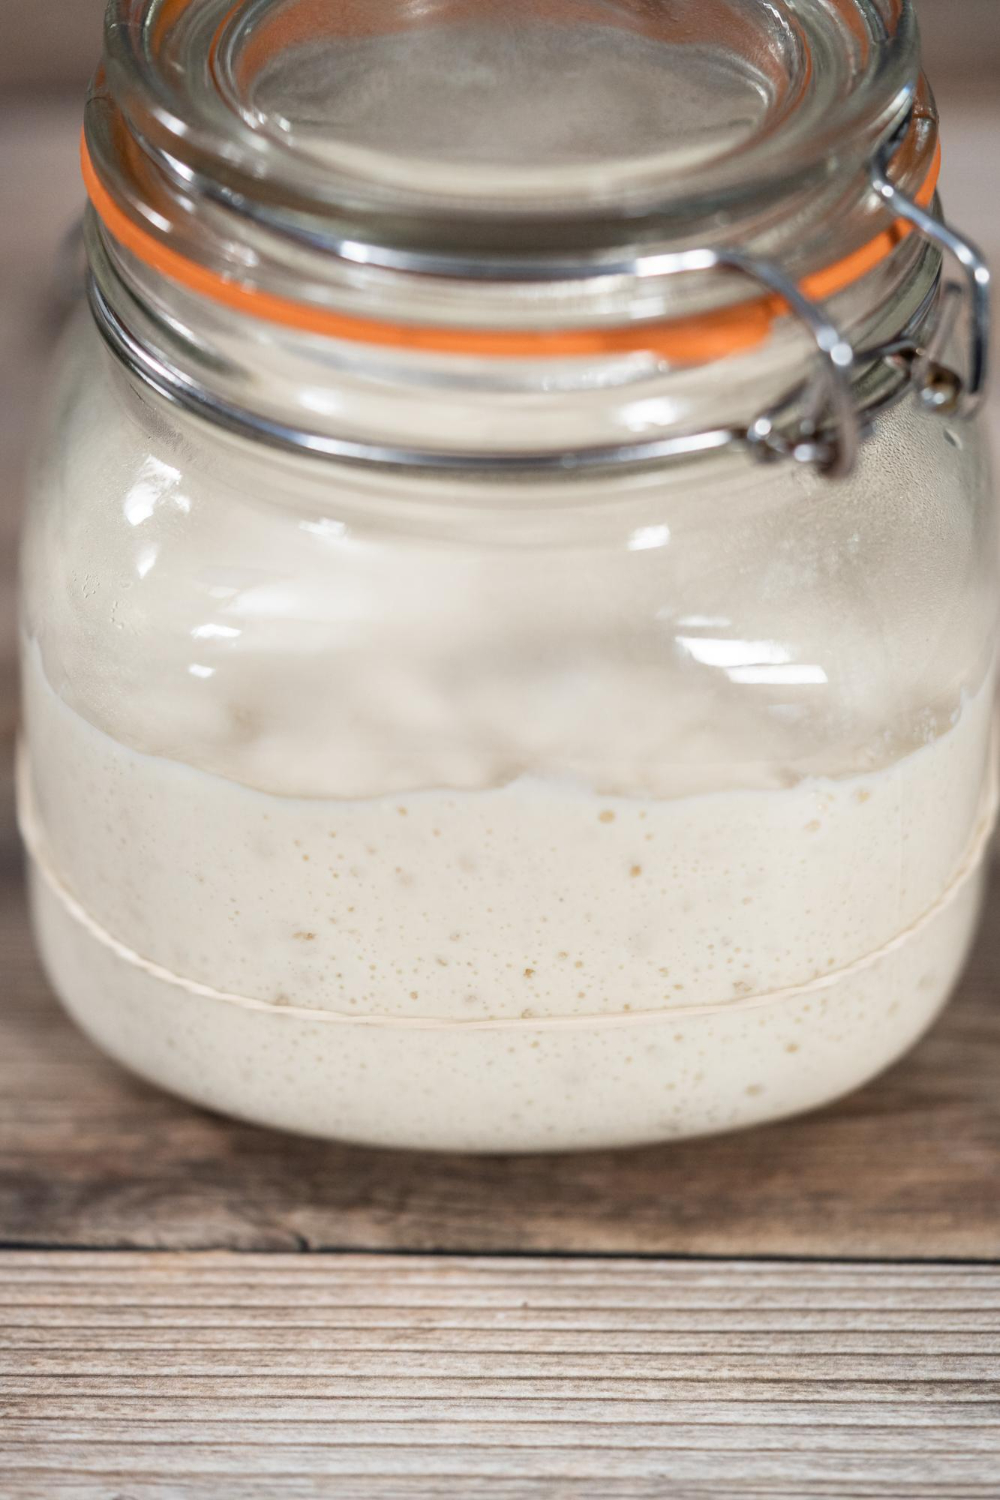
Signs of a healthy, active starter
A mature starter that’s managed to keep shows these consistent signs of vitality:
- Doubles in volume within 4-6 hours of feeding
- Shows a domed surface at peak activity
- Creates a honeycomb-like network of bubbles
- Has a pleasant, yeasty aroma
- Takes on a mousse-like consistency at its peak
Temperature is a vital factor in your starter’s activity. Your starter thrives best at 70°F (21°C), but it can adapt to different conditions. Cold environments slow down fermentation, and warm temperatures speed up the process.
Bakers should pick a feeding ratio between 1:5:5 and 1:2:2 (starter:water:flour) to get the best results. This ratio depends on room temperature and feeding schedule. The microorganisms get enough food this way, and you retain control over the starter amount.
Your starter’s health depends more on consistent feeding times than exact measurements. A starter will perform better if you feed it at the same time daily, even with slight variations in amounts, rather than using precise measurements at random times.
To store your starter in the fridge, feed it at room temperature first and let it start fermenting before refrigeration. This will give a healthy food reserve during cold storage. Let a refrigerated starter warm up fully before feeding it to protect its microbial population.
Long-Term Starter Storage Solutions
Bakers can keep their sourdough starter fresh and active for weeks, maybe even months with the right storage methods. These proven techniques help maintain the starter’s health and reduce the time spent on maintenance.
Refrigeration techniques for infrequent bakers
Refrigeration is a great way to get the most out of your starter when you don’t bake regularly. The process requires feeding your starter with a modified ratio before storing it in the fridge:
| Component | Standard Ratio | Cold Storage Ratio |
|---|---|---|
| Starter | 1 part | 1 part |
| Flour | 1 part | 1 part |
| Water | 1 part | 0.8 part |
The starter’s reduced hydration creates a stiffer mixture that handles cold storage better. Let your starter ferment at room temperature for an hour before placing it in the fridge. Your refrigerated starter will stay viable up to three weeks without needing additional feeds.
Reviving a refrigerated starter
Here’s how to revive your refrigerated starter at the time you want to use it:
- Take the starter out and let it reach room temperature in 1-2 hours
- Keep only 20g of the stored starter
- Add fresh flour and water at room temperature
- Wait 12 hours to complete fermentation
- Feed the starter one more time
- Look for bubbles and other activity signs
The starter needs at least two feedings to reach its peak strength. Temperature control is a vital part of this stage. The ideal environment should stay between 70-75°F (21-24°C) to achieve the best results.
Freezing starter for extended storage
Freezing offers a way to store your starter long-term, but you’ll need to prep and handle it carefully. Mature starters freeze better than young ones. Here’s what you need to do:
- Feed the starter 4-12 hours before freezing
- Wait for peak activity
- Portion into silicone molds or ice cube trays
- Freeze completely (3-4 hours)
- Transfer frozen portions to freezer-safe bags
Your frozen starter should stay good for up to 12 months, though it gets harder to wake up the longer it stays frozen. The starter might be sluggish at first when you thaw it out, so you’ll need several feeding cycles to get it back to full strength.
Adding whole-grain rye flour can boost fermentation as you wake up your frozen starter. Rye’s rich nutrients and minerals kick-start the microbes back into action. But keep in mind that freezing can throw off the balance between bacteria and yeast, which makes it less reliable than keeping your starter in the fridge.
The best approach is to keep both frozen portions and a backup dried starter. This gives you a safety net if the frozen starter doesn’t wake up properly and lets you bake whenever you want. Good storage methods combined with careful revival steps will keep your starter healthy and ready for your baking schedule.
Troubleshooting Common Starter Issues
Sourdough starters can face several problems despite careful maintenance. Bakers who know these common problems and solutions can keep their cultures healthy and reduce waste.
Dealing with mold or off-odors
A healthy starter should never have mold. You must discard the whole starter if you spot any fuzzy patches in green, black, or white. Several factors can cause mold growth:
- Flour or water that’s contaminated
- Containers and utensils that aren’t clean
- Not feeding the starter often enough
- Contaminants from the surrounding environment
Different odors point to specific problems:
- Acetone/nail polish smell shows your starter is hungry
- Gym sock smell indicates your starter’s bacterial balance is off
- Alcohol odor means the starter has overfermented
You can prevent these problems with good hygiene and consistent feeding routines. Clean filtered water and fresh, unbleached flour will help keep your starter contamination-free.
Adjusting for seasonal temperature changes
Temperature substantially affects starter activity and maintenance needs. This detailed guide explains temperature management:
| Temperature Range | Starter Behavior | Required Adjustments |
|---|---|---|
| Below 65°F (18°C) | Slow activity | Use warmer water, increase feeding ratio |
| 70-75°F (21-24°C) | Optimal activity | Standard maintenance |
| Above 80°F (27°C) | Rapid fermentation | Reduce hydration, use cool water |
Summer months require bakers to adjust their methods. The starter needs more frequent feeding to prevent overfermentation. Cool water works best for feeds during this time, and the feeding ratio should be reduced to 1:4:4.
Winter care demands a different approach. Warm water helps maintain activity, and the starter performs better in a warmer spot. The feeding ratio should be increased to 1:2:2 for optimal results.
Reviving a neglected starter
A neglected starter usually develops a dark liquid layer (hooch) and might look dead. But don’t worry – most starters can bounce back with proper care, unless they’re moldy. You’ll need some patience and regular attention to bring it back to life:
- Remove any dark liquid from the surface
- Take a small portion (30g) from the bottom of the jar
- Feed with equal parts flour and water (1:1:1 ratio)
- Keep it at 75°F (24°C) to get the best activity
- Feed every 12 hours until it doubles in size
Signs of successful revival include:
- Bubbles throughout the mixture
- Pleasant, yeasty aroma
- Regular doubling between feedings
- Stable peak times
Whole grain rye flour can kickstart activity in starters that haven’t been fed in ages. Rye flour’s extra nutrients and wild yeast help beneficial bacteria grow and create a healthy balance.
Temperature control is vital during revival. Your starter will thrive in steady temperatures between 70-75°F (21-24°C). Many bakers use a proofing box or find a warm spot near a water heater to keep temperatures stable.
Make small changes to feeding schedules or ratios. Watch how your starter responds before trying anything else. This careful approach keeps your starter stable as you work out any issues.
If your starter keeps giving you trouble, keep a backup culture just in case. You can dry some healthy starter or maintain a separate jar with different feeding ratios. Multiple backup plans will give you access to viable starter whatever challenges come your way.
Conclusion
A successful sourdough starter maintenance depends on finding the right balance between minimal quantities and optimal health. Proper feeding schedules, storage techniques, and waste reduction strategies help bakers keep their cultures thriving while using just what they need. Small starter quantities of 25-50g work perfectly for regular baking with the right scaling methods and storage solutions. This practical approach cuts down waste and ensures active fermentation and reliable results.
Bakers who master these maintenance techniques can create exceptional sourdough products with confidence. A healthy starter opens up endless baking possibilities, from crusty artisan loaves to delicious pizza dough. The authentic taste of traditional sourdough can lift your bread and pizza making to new heights. The Yeast We Can Do offers premium artisanal sourdough starter – reach out to john@theyeastwecando.com to get yours. Quality ingredients and proper knowledge help every baker achieve professional results while taking an environmentally responsible approach to their sourdough trip.
FAQs
Q: How can I minimize waste when maintaining my sourdough starter?
A: To minimize waste, you can reduce the amount of ripe starter left in the jar at each refreshment to as little as 1-2 grams. If the starter is ripening too quickly, store it in a cooler part of your kitchen to slow down its activity.
Q: Is it possible to continue feeding my sourdough starter without discarding any?
A: Yes, you can continue feeding your sourdough starter without discarding if your recipe requires a larger amount of starter. Simply keep feeding it until you reach the necessary quantity, ensuring you have an extra 113 grams to maintain and feed again.
Q: What is the simplest method for maintaining a sourdough starter?
A: The easiest way to maintain a sourdough starter is by feeding it equal parts of water and flour every 12-24 hours, depending on your home’s temperature. Warmer environments or frequent baking might necessitate feeding every 12 hours, while cooler conditions might only require feeding every 24 hours.
Q: How frequently should I discard part of my sourdough starter?
A: You should discard a portion of your sourdough starter and feed it with fresh flour and water every 24 hours. In warmer conditions or if you prefer a quicker fermentation, consider feeding your starter twice a day, approximately every 12 hours, to keep it vigorous and active.
Q: I accidentally made too much starter. How can I reduce the size of my mother starter without wasting it?
A: If you’ve made more starter than needed, you can gradually reduce the quantity by decreasing the amount you keep at each feeding. This process helps in managing the size without having to discard large amounts of starter unnecessarily.