How to Perfect Your Sourdough Starter Consistency: A Visual Guide
The consistency of the right sourdough starter plays a significant role in successful sourdough baking. Bakers often struggle to know when their starter reaches the ideal texture and activity level needed for the best fermentation. Understanding sourdough starter consistency helps create more predictable, reliable results and a healthy culture.
This detailed visual guide gets into the stages of sourdough starter development, proper feeding ratios, and techniques that lead to success. You’ll learn how to fix common consistency problems, see how different flour types affect starter texture, and become skilled at spotting signs of a well-managed starter. The guide shows you how to adjust for seasonal changes and store your starter properly to keep it healthy.
Understanding Sourdough Starter Consistency
Successful sourdough baking depends on maintaining your starter’s consistency. A healthy sourdough starter shows distinct signs that it’s ready to use.
What is the ideal consistency?
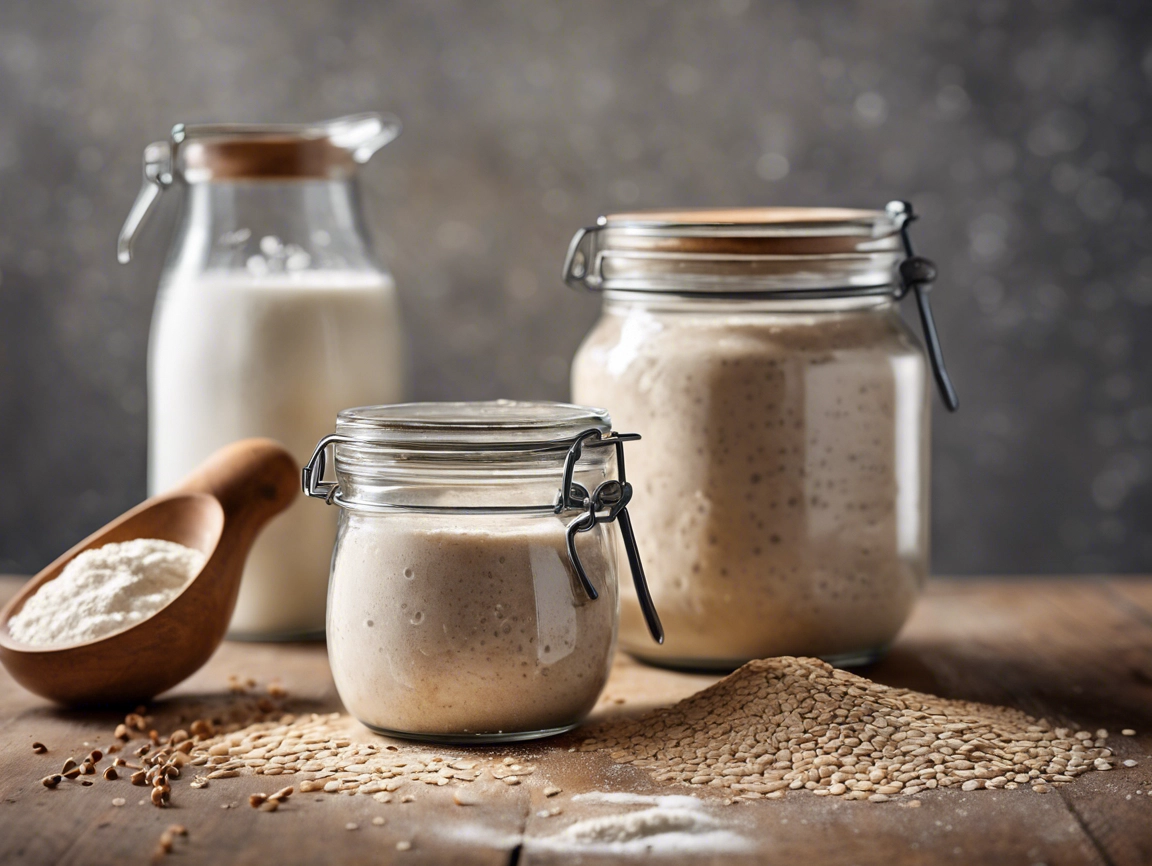
A sourdough starter you’ve managed to keep healthy should feel like thick pancake batter or warm peanut butter. Most bakers use a 100% hydration level with equal parts flour and water by weight. The mixture becomes dense enough to pour while retaining its shape briefly before it spreads. After you lift it with a spatula, the starter should slowly drip back into its container and blend with the main mix.
Factors affecting consistency
These essential elements shape your sourdough starter consistency:
Temperature Control: The best environment stays between 24-28°C (75-85°F). Higher temperatures speed up fermentation and change consistency. Lower temperatures slow down the activity. Your starter’s behavior and feeding requirements become predictable when you keep the temperature steady.
Flour Properties: Each flour type absorbs water differently:
| Flour Type | Absorption Rate | Overall Consistency Impact |
|---|---|---|
| Bread Flour | Quick absorption | Medium thickness |
| Whole Wheat | Slower absorption | Thicker final consistency |
| Rye Flour | High absorption | Dense, sticky texture |
Feeding Schedule: Your starter needs regular feeding to maintain the right consistency. A starter kept on the counter needs feeding every 12 hours. You might need to adjust this schedule based on temperature and flour choice.
Visual cues for proper consistency
Several visual indicators help bakers assess their starter’s health:
- Bubble Formation:
- Surface bubbles show active fermentation
- Bubbles spread throughout the mixture indicate even activity
- Different-sized bubbles reveal diverse bacterial activity
A starter’s appearance evolves throughout its cycle. At peak activity, the mixture should display a slightly domed top with a mousse-like texture. Its color should match the flour used without any strange discoloration. A pleasant, tangy aroma characterizes a healthy starter instead of harsh or unpleasant smells.
The starter should feel light and airy yet remain sticky to the touch during consistency checks. The feeding ratio needs adjustment if the mixture becomes too thick with surface drips that won’t mix in or too thin and separates into layers. A proper texture enables predictable rise and fall patterns that work effectively for timing bread production.
Tools and Ingredients for Maintaining Consistency
You need specific tools and ingredients to keep your sourdough starter quality consistent and create optimal conditions for fermentation. An adequately set up kitchen with suitable materials helps you get predictable results.
Essential equipment
You need these tools to keep your sourdough starter healthy and active:
- Digital Scale: A scale that measures in 1-gram increments will give a perfect feeding ratio
- Glass Containers: Clear containers with straight sides help you watch your starter’s growth
- Temperature Control: Your starter needs a warm spot or dedicated proofer at 75-85°F
- Instant-Read Thermometer: You can check water and room temperature quickly
- Danish Dough Whisk: This tool mixes your starter well without overworking it
- Bench Scraper: This handy tool helps manage your starter and clean containers
Choosing the right flour
Your choice of flour can substantially affect your starter’s consistency and performance. Each type of flour creates unique effects on starter development:
| Flour Type | Characteristics | Best Use Case |
|---|---|---|
| Unbleached All-Purpose | 9-12% protein, accessible to more people | Daily maintenance |
| Whole Wheat | Rich in nutrients, faster fermentation | Original starter creation |
| Rye Flour | High in amylases, quick fermentation | Boosting starter activity |
Most experienced bakers use a 50/50 blend of whole-grain and refined flour. This combination merges the microbial benefits of whole grains with refined flour’s reliable fermentation. The mixture delivers beneficial microbes from whole-grain flour and provides readily available food sources from refined flour.
Water quality and temperature
Water quality is a vital part of starter maintenance. The ideal characteristics include:
Water Quality Parameters:
- pH slightly below 7
- Hardness between 100-150 PPM
- Free from chlorine and chloramine
Temperature control determines consistent fermentation results. The water temperature needs adjustment based on ambient conditions and typically ranges from 75-82°F (24-28°C). Slightly warmer water helps boost activity in cold environments, while cooler water slows fermentation in warm conditions.
Filtered tap or spring water delivers the best results because it contains beneficial minerals without harmful chemicals. The lack of minerals in distilled or reverse osmosis water can inhibit bacterial growth and fermentation, so bakers should avoid using them.
Feeding Your Starter for Optimal Consistency
Feeding techniques are the lifeblood of sourdough starter consistency. Bakers can develop a thriving starter culture by understanding how feeding ratios, schedules, and hydration levels work together.
Feeding ratios
A starter’s behavior and consistency depend heavily on its feeding ratio. The ratio format shows the proportions of starter:water: flour. Common ratios include:
| Ratio | Best For | Peak Time |
|---|---|---|
| 1:1:1 | Quick Activation | 4-6 hours |
| 1:2:2 | Daily maintenance | 8-12 hours |
| 1:5:5 | Extended fermentation | 12-24 hours |
Higher ratios provide more food for the culture, which leads to extended fermentation times and better consistency. A 1:5:5 ratio combines one part starter with five parts each of water and flour to create a stable environment that helps the culture thrive.
Feeding schedule
Your starter’s vitality and fermentation depend on a regular feeding routine. Several factors determine the best schedule:
- Storage location:
- Counter storage: Feed every 12-24 hours
- Refrigerator storage: Feed weekly
- Warm environment (>75°F): Feed every 8-12 hours
Room temperature starters need a consistent daily feeding routine, once or twice a day. Weekend bakers can store their starter in the refrigerator between baking sessions and revive it with feeds 24-48 hours before use.
Adjusting hydration levels
Your starter’s consistency and behavior change greatly depending on the hydration percentage. A 100% hydration creates a batter-like consistency, while less water makes stiffer starters. You can calculate hydration by dividing water weight by flour weight and multiplying by 100.
A stiffer starter at 80% hydration needs 80g of water for every 100g of flour. Some bakers prefer this dough-like consistency because it ferments slower and produces milder flavors. Adding more water beyond 100% makes the starter looser, but you’ll need to feed it more often as it ferments faster.
Temperature is a vital factor that affects consistency at different hydration levels. Warmer weather might require you to reduce water content or feed more frequently to prevent over-fermentation. Your starter might need more water during cold months to stay active.
Make minor hydration adjustments over several feedings so your culture can adapt. Watch how your starter responds through bubble formation, rise time, and texture changes. A healthy starter doubles between feedings and shows steady activity patterns, whatever the hydration level.
Troubleshooting Common Consistency Issues
A sourdough starter‘s consistency can challenge many bakers, but knowledge of common consistency issues and their solutions leads to optimal results. Bakers should identify the specific problem to find the right solution.
Too thick or dry
A starter becomes paste-like with minimal bubble activity if it’s too thick. Several factors can lead to this consistency problem:
| Cause | Solution |
|---|---|
| Not enough water | Add water gradually |
| High-protein flour | Change flour mix or water ratio |
| Dry environment | Use better container coverage |
Bakers can fix a thick starter by adding more water while keeping the proper feeding ratio. The best approach is to add 10-15% extra water with each feed until the starter reaches a thick pancake batter consistency.
Too thin or runny
A runny starter creates multiple problems for bakers. These signs will help you identify the issue:
- Liquid separates too much
- Minimal rise when activity peaks
- Hooch forms frequently
- Smell becomes acetone-like
- Bubbles form less than normal
Your starter becomes runny because of wrong feeding ratios, measurement mistakes, and environmental conditions. Bakers can solve this problem by switching to a 1:2:1 ratio (starter:flour: water) for a while. This creates a thicker consistency that returns to normal after a few feedings.
Inconsistent texture
Changes in texture throughout the feeding cycle might explain why maintenance problems happen. A healthy starter should keep its texture fairly consistent and become slightly looser as fermentation progresses. Your starter’s texture changes by a lot of these factors come into play:
Temperature Control
- Keep environment between 24-28°C (75-82°F)
- Use water at the same temperature
- Keep away from heat sources
Feeding Schedule Adjustments
The feeding schedule has a significant effect on texture consistency. Room-temperature storage requires 12-hour feeding intervals, and refrigerator starters need full revival at room temperature before use.
Flour Selection Effect
Each type of flour changes your starter’s consistency differently. Whole-grain flours soak up more water at first but release moisture during fermentation. If you stick to the same flour blend, your starter’s texture stays stable throughout the feeding cycle.
Here’s what bakers should do to get the best consistency:
- Weigh ingredients exactly
- Keep room temperature steady
- Use quality unbleached flour
- Stick to regular feeding times
- Watch hydration levels
The quickest way to fix consistency problems is to change one thing at a time and watch how your starter responds over several feeding cycles. This step-by-step approach helps you find what works while keeping your starter healthy. Most texture issues clear up within 2-3 feeding cycles after you make the proper adjustments.
Visual Guide to Sourdough Starter Stages
Bakers can track the development of their sourdough starter by watching its visual changes. These visual cues help them spot healthy fermentation patterns and keep their starter consistent. The starter shows unique signs during each growth stage that reveal its maturity level.
Day 1-3: Original mix
The starter experiences remarkable changes in the first three days. Beneficial microorganisms start to colonize the mixture. The original consistency looks like thick pancake batter and develops this way:
| Day | Visual Indicators | Aroma |
|---|---|---|
| 1 | Thick, paste-like appearance | Fresh flour scent |
| 2 | First bubbles appear, false rise | Wet flour smell |
| 3 | Vigorous bubble activity | Slightly sour notes |
Bakers often see a “false rise” during this time. This bacterial bloom creates active bubbling but doesn’t show the starter’s true strength. The texture stays mostly the same, though the mixture might gradually thin out as fermentation begins.
Day 4-7: Early fermentation
The early fermentation phase represents a transition period that makes the starter’s consistency and behavior more predictable. The starter shows these distinct characteristics:
- Visual Changes:
- Decreased bubble activity
- More uniform texture
- Subtle dome formation after feeding
- Occasional liquid separation
The ideal sourdough starter consistency starts to develop at this stage. The mixture should have a smooth, elastic quality and feel like warm peanut butter when stirred. Temperature plays a significant role in the process. The starter ferments steadily at optimal conditions between 75-82°F (24-28°C).
Day 8-14: Maturing starter
During this final maturation phase, a mature starter shows its true health through reliable indicators. You’ll notice predictable rise and fall patterns and consistent texture throughout each feeding cycle.
Key Maturation Indicators:
- Doubles in volume within 4-6 hours after feeding
- Develop a domed surface at its peak
- Shows a honeycomb structure from the side
- Maintains elastic consistency throughout fermentation
- Gives off a pleasant, yeasty aroma
Your starter’s appearance transforms during its feeding cycle. At peak activity, it changes from a thick, just-fed consistency to a lighter, aerated texture. The fermentation process creates a sponge-like network of bubbles that you can see through the container’s sides.
During this phase, the starter becomes more sensitive to temperature, which affects its consistency and fermentation rate. Warmer conditions speed up activity and might thin out the starter. Cooler temperatures slow down fermentation and create a thicker texture.
Your starter should show these reliable patterns by day 14:
- Rises predictably after each feeding
- Maintains consistent texture between feedings
- Develops from sweet to mildly acidic aroma
- Shows even bubble distribution on the surface
- Falls naturally as fermentation ends
Bakers can maintain optimal sourdough starter consistency after feeding by watching these visual cues. A mature starter behaves more predictably, which makes feeding schedules and baking plans easier. The stable microbial community creates reliable fermentation patterns and consistent leavening power.
Maintaining Long-Term Starter Health and Consistency
Your sourdough baking success relies on reliable storage and maintenance routines that help you keep the ideal sourdough starter consistency. A properly managed starter can stay viable for decades and pass down through generations while retaining its unique characteristics.
Storage methods
Storage method choice substantially affects a starter’s consistency and maintenance needs. Bakers can choose between two main storage methods:
| Storage Type | Feeding Schedule | Temperature Range | Best For |
|---|---|---|---|
| Room Temperature | Every 12-24 hours | 70-75°F (21-24°C) | Daily bakers |
| Refrigeration | Weekly | 38-40°F (3-4°C) | Occasional bakers |
Container Selection:
Your storage container should have these features:
- Clear glass or food-grade plastic
- Two to three times the starter volume
- Wide-mouthed for easy feeding
- Fitted with a loose lid to exchange gas
Bakers should move their starter to a clean container monthly to store it properly. This step prevents the dried starter from building up on container walls, which can cause contamination and uneven fermentation.
Reviving a neglected starter
Life gets busy, and even passionate bakers sometimes forget about their starters. Your starter needs patience and regular attention to return to its optimal sourdough starter consistency.
Revival Process:
- Remove any dark liquid (hooch) from the surface
- Take 113g (½ cup) of old starter and put it in a clean container
- Add equal parts flour and warm water (75°F/24°C)
- Keep it in a warm spot (75-78°F/24-26°C)
- Let it rest for 24 hours before feeding again
- Continue this process until your starter doubles within 8 hours
Your neglected starter might need multiple feeding cycles to regain its strength. You can track its recovery through these signs:
- Bubbles appear consistently
- The starter rises and falls in a regular pattern
- A pleasant, yeasty smell develops
- It doubles in size at predictable times
- The texture becomes elastic during stirring
Adapting to seasonal changes
Your sourdough starter’s performance changes with the seasons. Summer heat speeds up fermentation, while cold winter temperatures slow down microbial activity.
- Keep starter carryover to 2-5% of total flour weight
- Cool water works better (65-70°F/18-21°C)
- Lower the whole grain percentage
- You might want to switch to a stiff starter (65% hydration)
- Feed smaller amounts more often
Winter Modifications:
- Bump up starter carryover to 20%
- Warm water works best (80-85°F/27-29°C)
- Let fermentation run longer between feedings
- Add whole-grain content
- Keep hydration levels higher
Bakers with extreme temperature swings might find a dedicated proofing box or temperature-controlled space helpful. This gives steady fermentation rates regardless of the season.
Long-Term Preservation Methods:
Here’s how to preserve your starter when you need to store it:
- Dehydration Method:
- Feed your starter 4-12 hours before drying
- Spread it thin on parchment paper
- Keep temperature under 105°F (40°C)
- Store the dried flakes in an airtight container
- Add warm water to bring it back to life
- Freezing Technique:
- Feed until your starter peaks
- Split it into small containers
- Let it freeze solid (3-4 hours)
- Move it to freezer-safe bags
- Thaw and wake it up with regular feedings
These methods will keep your starter alive for months or even years. It’s like insurance against losing your starter or taking long breaks from baking.
Maintaining Consistency Through Changes:
Watch your starter closely to keep it at its best. Your sourdough starter’s consistency after feeding depends on:
- Writing down feeding times and ratios
- Keeping track of temperature changes
- Taking pictures at peak activity
- Writing down seasonal changes
- Following fermentation patterns
Temperature control is vital for consistency. Keep your starter within 5°F (3°C) of its sweet spot. Adjust feeding schedules and ratios as needed. This careful attention will give you reliable results, regardless of the storage method or season.
Conclusion
Sourdough starter consistency needs attention to detail and an understanding of fundamental principles. Regular feeding schedules, proper temperature control, and careful observation of visual cues create reliable fermentation patterns. Bakers can maintain healthy starters that produce consistent, predictable results by combining these elements with appropriate tools and ingredients. Troubleshooting techniques help solve everyday problems before they affect your baking’s outcome.
Sourdough’s success goes beyond simple maintenance into a rewarding trip of artisanal bread creation. Your starter can produce exceptional loaves with complex flavors and perfect textures when you follow proper consistency guidelines. Lift your bread and pizza game with an authentic artisanal sourdough starter from The Yeast We Can Do. Our small-batch starter will help you create exceptional bread and pizza with perfect tangy flavor and signature crust, whether you’re a passionate home baker or a restaurant owner wanting to add true sourdough’s unmistakable flavor and character to your menu. You can revolutionize your baking by emailing [email protected] to get our premium sourdough starter. Proper starter maintenance builds confidence and improves baking outcomes while creating opportunities to share this craft with future generations.
FAQs
What should the consistency of a sourdough starter be?
A sourdough starter should ideally have a thick but pourable consistency, akin to thick pancake batter. It should be able to hold its shape somewhat but still spread easily. The consistency can be adjusted by altering the flour-to-water ratio, aiming for a hydration level of around 100%, which means equal parts flour and water by weight.
What is the key to a successful sourdough starter?
The secret to a thriving sourdough starter is maintaining it at an optimal temperature, ideally between 75-80ºF (24-27ºC). At this temperature range, the starter ferments rapidly, requiring more frequent feedings and resulting in a slightly more acidic flavor.
Is it a problem if my sourdough starter is too runny?
Yes, a sourdough starter can be too liquidy if it has a high hydration level, meaning there is a large amount of water relative to flour. This results in a thinner, more runny consistency.
How can I correct a sourdough starter that’s too thick?
If your sourdough starter is excessively thick, add more water until it reaches the consistency of thick pancake batter. A general guideline is to maintain a 1:1 ratio of flour to water.
How does the consistency of my starter affect my baked goods?
The consistency of your starter can significantly impact the texture and rise of your baked goods. A too-watery starter might not hold gas well, leading to less rise, while a very thick starter might result in denser bread. Adjusting your starter to a consistency like a milkshake or thicker can help ensure better results in your bak.