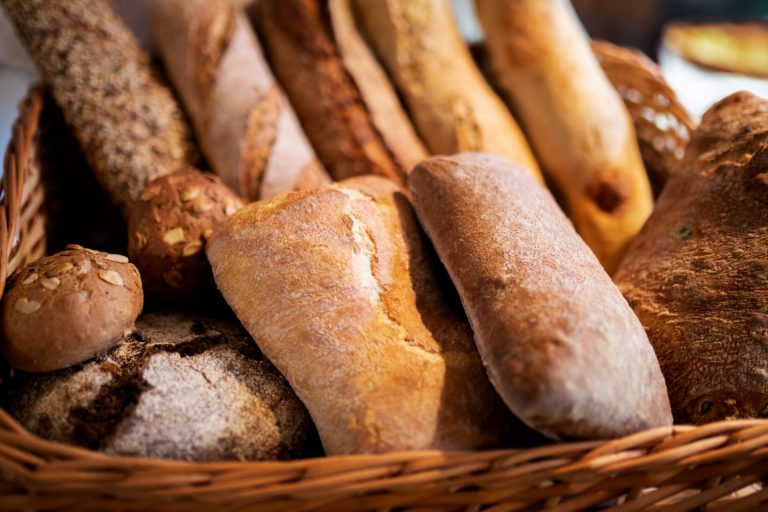
Sourdough Pita Bread Recipe
Ingredients
- 400g bread flour
- 200g active sourdough starter (100% hydration)
- 230g water
- 10g olive oil
- 8g salt
Timeline
- Feed starter: 4-8 hours before making dough
- Mix and knead: 15 minutes
- Bulk fermentation: 4-6 hours at room temperature
- Cold proof: 8-24 hours in refrigerator
- Final shaping and baking: 1-2 hours
Instructions
Day 1: Making the Dough
Feed your starter 4-8 hours before mixing the dough. It should be at peak activity when used.
Mix the dough:
- In a large bowl, combine active starter and water
- Mix in flour, salt, and olive oil
- Knead for 8-10 minutes until smooth and elastic
- The dough should be slightly tacky but not sticky
Bulk fermentation:
- Place in a lightly oiled bowl
- Cover with plastic wrap
- Let rise at room temperature (68-72°F/20-22°C) for 4-6 hours
- The dough should increase by about 50%
Cold proof:
- Place covered dough in refrigerator
- Leave for 8-24 hours
Day 2: Shaping and Baking
Prepare for baking:
- Place a baking steel or stone in the oven
- Preheat to 500°F/260°C for at least 1 hour
Shape the pitas:
- Remove dough from refrigerator
- Divide into 8 equal pieces (about 100g each)
- Shape each piece into a ball
- Let rest 15 minutes
- Roll each ball into a circle about 1/4 inch thick
Bake the pitas:
- Place 2-3 pitas directly on the hot stone
- Bake for 3-4 minutes until puffed
- They should be lightly golden on the bottom
- Remove and wrap in a clean kitchen towel
Tips for Success
- Keep the dough relatively cool during fermentation to develop flavor
- Roll pitas evenly for proper puffing
- Don’t skip the preheating step – a hot oven is crucial
- Stack and wrap pitas in a towel immediately after baking to keep them soft
Storage
- Best eaten fresh
- Keep at room temperature in a sealed bag for up to 2 days
- Freeze for up to 3 months
- Reheat frozen pitas in a 350°F/175°C oven for 5 minutes
Troubleshooting
If pitas don’t puff:
- Oven may not be hot enough
- Dough might be rolled unevenly
- Dough may be over or under-proofed
- Surface might be too dry
How to Master the Ultimate Sourdough Pita Bread Recipe
Did you know 9 out of 10 home bakers fail to create that perfect pocket in their pita bread the first time?
Most of us have experienced it—those flat, disappointing pitas that just won’t puff up. We often wonder what went wrong. Our years of testing different sourdough pita bread recipes have helped us discover the secret to consistently creating those magical, puffy pockets.
Sourdough pita bread requires more than just mixing flour and water. The process combines ancient fermentation techniques with precise temperature control and proper handling. Our tested recipe turns essential ingredients into soft, flavorful bread with the perfect pocket for your favorite fillings.
This piece will guide you through each step of creating authentic sourdough pitas. You’ll learn everything from starter maintenance to achieving the perfect puff. Beginners and experienced bakers alike will find value in this complete guide that helps create bakery-quality pita bread at home.
Ready to become skilled at making sourdough pita bread? Let’s begin!
The Science Behind Perfect Sourdough Pita
Let’s look at the fascinating science that makes sourdough pita bread truly special. My years of perfecting this craft have taught me that these principles will revolutionize your baking results.
Understanding Fermentation and Flavor Development
The magic of sourdough pita starts with fermentation. This process involves a complex dance of beneficial bacteria and wild yeast. Sourdough’s longer rising time (typically 3-5 hours at room temperature) creates superior flavors to commercial yeast. The fermentation process follows these steps:
- Initial feeding activates the starter
- Bacteria produce lactic and acetic acids
- Wild yeast creates carbon dioxide
- Enzymes break down flour proteins
- Complex flavors develop over time
The Role of Gluten in Pocket Formation
Gluten is the architectural framework that creates those perfect pockets in our sourdough pita experience. The mixing process develops a strong gluten network that effectively traps steam. The hydration level is vital here—we want 65% hydration in our dough. Olive oil helps soften the gluten structure, while salt (about 2.6%) strengthens it and enhances the flour’s natural flavor.
Temperature and Humidity Factors
Temperature and humidity are active ingredients in our recipe, not just background conditions. The ideal environment for sourdough fermentation requires the following:
- Temperature: 70-75°F (21-24°C)
- Humidity: 60-80%
- Kitchen monitoring: Use a thermometer for consistency
Warmer conditions speed up fermentation and may require less starter (sometimes as little as 5-10g) to prevent over-fermentation. High humidity means reducing water content by 25g increments to maintain proper dough consistency. Dough temperature monitoring best gauges fermentation progress—a quick refrigerator rest can slow things down without disrupting the process.
The final significant temperature factor emerges during baking. The moisture inside our pita converts to steam faster when it hits a blazing hot surface (ideally 500°F/260°C), creating that signature pocket we want. Preheating our baking surface becomes essential for success.
Essential Equipment and Ingredients
Let me show you how to make perfect sourdough pita bread. You’ll need the right ingredients and tools to get started. My years of baking experience have taught me what works best.
Choosing the Right Flour Blend
The perfect sourdough pita starts with the right flour combination. A blend of bread flour (80%) and whole-grain wheat flour (20%) creates the best structure. Bread flour gives you the strength needed for pocket formation. The entire grain adds rich flavor and nutrition. Here’s why this blend works so well:
- Bread flour gives you the gluten strength you need
- Whole-grain wheat creates earthy, rustic flavors
- Stone-ground varieties help with better fermentation
- Keep total hydration at 65%
Maintaining Your Sourdough Starter
Your sourdough starter’s health makes all the difference. My starter gets fed once a week in the refrigerator. Organic flour gives the best results. Stick to a regular feeding schedule:
A clear container helps you monitor your starter’s activity. Feed it equal parts flour and water by weight. Let tap water sit overnight to get rid of chlorine, which can slow fermentation. Your starter should double in size before you start baking.
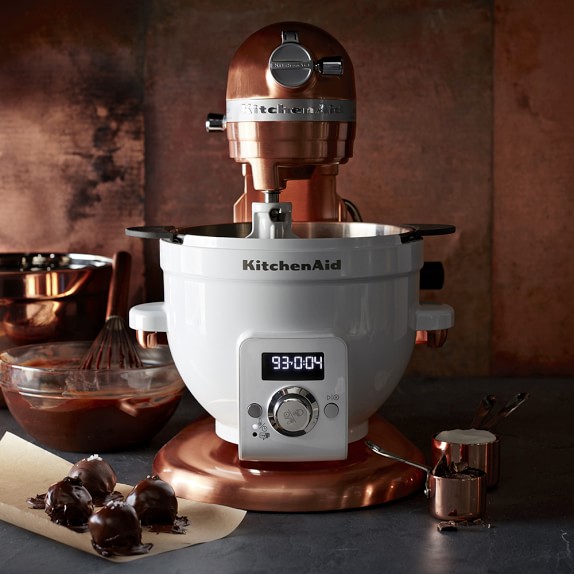
Must-Have Tools and Alternatives
Experience has shown me these tools make a real difference:
- Digital Scale – This tool gives you the accuracy you need
- Baking Stone or Steel – Makes your pitas puff beautifully
- Dough Scraper – Helps handle wet dough easily
- Clear Container – Shows how your dough ferments
- Flour Sack Towels – Keeps dough from sticking
You can still make great pitas without all these tools—a heavy, dark-colored baking sheet works instead of a baking stone. Regular kitchen towels can replace flour sack towels. Any large clear bowl helps you watch your dough rise.
A quality digital scale will change your baking game. This simple tool, paired with a good baking stone or steel, helps you consistently make amazing sourdough pitas.
Mastering the Basic Technique
I’ve spent countless hours perfecting my sourdough pita bread technique and want to share my proven method with you. By following this method and being organized, you can achieve that perfect pocket every time.
Step-by-Step Mixing and Fermentation
Let’s start our trip with proper mixing and fermentation. Here’s my foolproof process:
- Combine flour with olive oil and water until fully hydrated
- Allow a 60-minute rest
- Add salt and sourdough starter and mix well
- Perform one set of stretch and folds
- Let ferment for 4-4.5 hours at 79-81°F
The right temperature during fermentation is vital. Your dough should expand by at least 50% during this time. Note that we want excellent extensibility with moderate elasticity.
Shaping for Perfect Pockets
After fermentation, the dough needs to be divided into eight equal pieces (about 210g each). Perfect shaping depends on these details:
- Shape each piece into a smooth ball
- Rest for 15 minutes under a damp towel
- Roll each ball to 1/8 – 1/4 inch thickness
- Maintain circular shape while rolling
- Make them 6-7 inches in diameter
The dough needs proper relaxation – give it an extra 5-minute rest if it springs back during rolling.
Proper Baking Methods
Your perfect puff depends on the proper baking technique. Heat your oven to 500°F with a baking stone inside. Proper placement and timing make all the difference:
The pita’s edges will rise first on the hot stone, creating a slight cavity in the center. The entire pita should puff up beautifully within 30 seconds. Let it bake for 3-4 minutes more to develop a light golden color and prevent collapse.
Right after baking, wrap the pitas in a clean kitchen towel. This step keeps the perfect texture intact. Steam gets trapped inside the towel, helping keep the pitas soft and pliable.
Advanced Pita-Making Strategies
After becoming skilled at simple techniques, I want to share advanced methods to lift your sourdough pita bread to professional levels. These approaches changed my baking results from good to exceptional.
Long Fermentation Techniques
A longer fermentation time makes the bread taste better and easier to digest. My favorite approach uses a cold fermentation process:
- Mix dough and perform the original fold
- Place in refrigerator for 8-12 hours
- Allow to warm at room temperature
- Shape and bake as usual
This method gives you plenty of flexibility. The dough can stay in the refrigerator for up to three days, and the flavor keeps getting better. Cold temperatures help soften the harsh notes of whole wheat flour, creating a sweet undertone you can’t get with quick fermentation.
Multi-Grain Variations
The most extensive longitudinal studyMultigrainevelop a winning multigrain blend that adds rich depth to traditional multigrain Here’s my tested combination:
- Base flour: 170g whole wheat flour
- Multigrain mix: 57g combined grains including:
- CrackeMMultigrainled oats
- Various seeds (flax, sesame, sunflower)
- Any leftover grain flakes
My pantry has a “catch-all” jar for collecting grain flakes and seeds. This reduces waste and makes each batch taste unique. Freshly milled flour needs a 30-minute rest period to hydrate appropriately.
Achieving Professional-Level Results
Temperature control and timing are crucial for producing professional-quality pitas. For the best results, the fermentation environment should stay at 79-81°F. This temperature range will ensure perfect bacterial activity and flavor development.
The best professional finish comes from preheating the oven to its maximum temperature (usually 550°F) with a baking stone in the upper third. The stone gets blazing hot with a brief switch to broil mode. Just before adding pitas, switch back to baking mode.
Your dough’s temperature history greatly affects its final texture. A room-temperature starter works best, so take it out of the refrigerator several hours before mixing. This simple step makes fermentation much more consistent.
Whole grain variations need special attention to hydration levels. These flours usually need more water, but the amount changes based on your grain blend. Start with the base recipe and adjust slowly. The perfect tacky-but-not-sticky consistency shows optimal hydration.
Troubleshooting Common Issues
My years of baking sourdough pita bread taught me about every possible pitfall. Here are solutions to home bakers’ most common problems and fixes that worked after countless trials.
Why Pitas Don’t Puff
Flat pitas are a battle I know well. Here’s what causes pitas to stay flat:
- Insufficient moisture content
- Temperature issues
- Rolling technique problems
- Improper fermentation
- Incorrect oven setup
Moisture content is vital—your dough should feel a bit wetter than you might expect. My experience with sourdough pitas shows that a tacky but not sticky consistency works best. If your pitas don’t puff, add 25g more water per 500g of flour.
The temperature sweet spot plays an equally vital role. Your oven needs at least 480°F (250°C) to create that steam burst for pocket formation. Preheating your baking stone for 45 minutes will give a consistent heat distribution.
Fixing Texture Problems
Poor fermentation or dough handling often causes texture issues. Tough or chewy pitas usually point to fermentation timing problems. Your dough should increase by about 50% during bulk fermentation – not double like regular sourdough bread.
These solutions work well for dense or gummy pitas:
- Extend the autolyze period to 45 minutes
- Keep dough temperature at 75-78°F (24-26°C)
- Handle the dough gently during shaping
- Let the dough rest properly between rolling
Rolling technique makes all the difference in texture. Rolling from the center outward in smooth, even strokes helps maintain a thickness of about 1/8 inch. The uneven thickness creates inconsistent puffing and texture issues.
Adjusting for Different Environments
Environmental factors can change the results of your sourdough pita dramatically. Humid conditions need 5-10% less water and closer attention to fermentation times. Winter months need some particular strategies:
- Mix with warmer water (85°F/29°C)
- Create a proofing box using a large container and warm water
- Summer needs 15-20% shorter fermentation times
- Adjust hydration based on how your flour absorbs moisture
Kitchen temperature affects both fermentation and dough handling. A warm kitchen (above 78°F/26°C) needs slightly chilled water to maintain the right dough temperature. Cold conditions work better if you first warm your mixing bowl with hot water.
Humidity’s effect on flour absorption is the most significant environmental factor. Dry climates need 2-3% more water, while humid conditions need 2-3% less. This small change helps create that perfect pocket formation.
Note that sourdough starter activity changes with temperature. Warm weather requires frequent starter feeding, and slightly stiffer consistency prevents over-fermentation. These adjustments help maintain consistent results as seasons change.
Conclusion
Perfect sourdough pita bread needs patience, practice, and a solid grasp of core principles. My trip through countless batches has shown that success comes from controlling temperature, getting fermentation right, and using precise dough handling techniques.
The elements we explored – from flour selection to advanced fermentation methods – create those perfect pockets. Your baking environment might need adjustments, yet the basic techniques stay the same.
Quality ingredients set great sourdough apart from the rest. You can raise your bread and pizza game with an authentic artisanal sourdough starter from The Yeast We Can Do. Our small-batch starter helps passionate home bakers, and restaurant owners create exceptional bread and pizza with perfect tangy flavor and signature crust. Reshape your baking results today. Email john@theyeastwecando.com to get our premium sourdough starter.
A final tip: your first few attempts might not be perfect. Keep a close eye on your dough, take notes on what works, and adjust based on results. You’ll soon become skilled at making sourdough pita and enjoy fresh, pillowy pockets from your oven.
FAQs
Is sourdough used in making pita bread?
Yes, sourdough can be used to make pita bread. This variation is prevalent in the Mediterranean diet. Using a homemade fermented sourdough starter enhances the bread’s digestibility.
What’s the key to achieving great sourdough bread?
The key to excellent sourdough bread lies in its hydration. Adding more water to the dough influences the texture, resulting in a more open crumb with larger holes and a softer overall texture.
Is it more economical to bake your sourdough bread than to buy it?
Yes, making sourdough bread at home is generally cheaper than purchasing it from a store.
Can I purchase sourdough pita bread?
Yes, sourdough pita bread is available for purchase. It typically comes round and pillowy soft, ideal for warming up in a toaster and using for various dishes like dips or classic sandwich fillings.