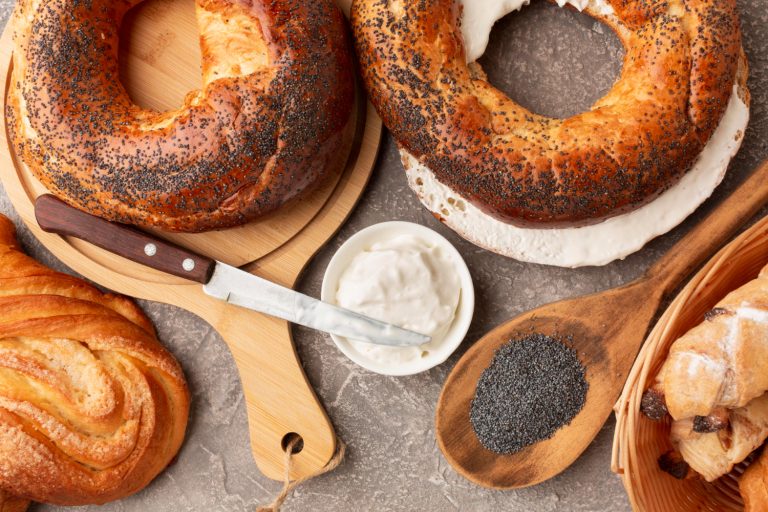
Transform Your Favorite Sourdough Into Gluten-Free Magic!
“Can I enjoy sourdough bread if I’m gluten-sensitive?” We hear this question countless times from our passionate baking community. Traditional sourdough, while delicious, contains significant gluten proteins that many can’t tolerate.
Here’s something exciting – we’ve mastered the art of converting classic sourdough recipes into spectacular gluten-free creations! Our gluten-free versions deliver that same crusty exterior and tender, chewy crumb you’ve been craving. Whether you’re among the 1% with celiac disease or simply choosing a gluten-free lifestyle, your perfect loaf awaits.
We understand the challenges of gluten-free baking. New flours, unfamiliar ingredients, different techniques – it might seem overwhelming at first! That’s why we’ve broken down our proven conversion process into simple, manageable steps that guarantee success.
Ready to create amazing artisanal bread that’s both gluten-free and packed with authentic sourdough flavor? Let’s embark on this delicious baking adventure together and transform your kitchen into a gluten-free artisanal bakery!
Mastering the Art of Gluten-Free Flour Blends!
Traditional sourdough wisdom doesn’t apply to our gluten-free adventures! When converting gluten-free sourdough recipes, we’re excited to share that some aspects become surprisingly simpler – no more wrestling with gluten development!
The Magic Behind Gluten-Free Flours
Here’s what makes gluten-free baking uniquely challenging: No single gluten-free flour captures wheat flour’s natural magic. While wheat flour brings built-in structure and elasticity through gluten, our gluten-free creations need special attention. We’ve discovered that gluten-free flours dance differently with water, demanding precise hydration adjustments.
Our Favorite Flour Champions
We’re passionate about creating perfect flour combinations! Here’s our star-studded lineup:
- Brown Rice Flour: The reliable foundation of our blends, offering clean, neutral notes
- Sorghum Flour: Our secret weapon for that delightful earthy sweetness
- Buckwheat Flour: Brings bold, nutty personality to every loaf
- Millet Flour: Adds a whisper of natural sweetness
- Potato Starch: Creates heavenly lift and perfect balance
Store-bought blends can vary dramatically! Take Cup4Cup – its clever addition of milk powder creates that gorgeous golden crust we all dream about.
Building Structure Without Gluten
Ready to discover our binding secrets? These three champions help create that perfect sourdough texture:
- Xanthan Gum: Our primary dough architect, crafting beautiful elasticity
- Psyllium Husk: Creates amazing structure while adding authentic bread-like flavor
- Guar Gum: Another fantastic elasticity builder with its own unique properties
Pro Baker’s Tip: Too much binding agent leads to gummy bread! Follow our golden rule: ¼ teaspoon xanthan gum per cup of gluten-free flour (unless your blend includes it).
Remember, gluten-free flours are wonderfully unique in their thirsty nature. Trust your baker’s instinct – watch for the right dough consistency rather than following strict measurements. Let’s create something amazing together!
Transform Your Kitchen Into a Gluten-Free Bakery Paradise!
The perfect gluten-free sourdough starts with the right tools. We’ve discovered that proper equipment makes the difference between good bread and spectacular bread.
Essential Baking Tools
These game-changing tools create the foundation for gluten-free sourdough success:
- Digital Kitchen Scale: Precision matters! We never bake without our gram-accurate scale
- Glass Jars: Multiple sizes keep our starter happy and preferments perfect
- Large Glass Mixing Bowl: Our 2.5 Qt bowl provides the perfect mixing space
- Banneton Basket with Liner: Creates those beautiful artisanal shapes we love
- Digital Thermometer: Helps achieve perfect doneness at 210°F every time
Elevate Your Baking Game
Want to take your bread from good to extraordinary? These tools aren’t essential, but they’re worth considering:
A proofing box has revolutionized our temperature control game. While not required, a bread lame creates those stunning professional scores. Our beloved Dutch oven delivers that crusty exterior that makes sourdough irresistible.
Mastering Storage Solutions
Proper storage keeps our gluten-free creations fresh and delicious. We’ve cracked the code on preservation – freezing stands out as our best method for long-term storage.
Our Proven Storage Strategy:
- Fresh Enjoyment: Cool, dry storage for two-day enjoyment
- Freezer Magic: Pre-slice and separate with wax paper before freezing
- Perfect Protection: Choose airtight, freezer-safe containers
Remember this golden rule: Moisture leads to mold in gluten-free bread. We always ensure complete cooling before storage. Surprisingly, refrigeration presents challenges – while it prevents immediate mold, fridge moisture can speed up spoilage.
For ingredient storage, we maintain strict separation between regular and gluten-free flours. Our 5-gallon buckets create the perfect home for bulk ingredients.
Keep in mind that gluten-free sourdough enjoys a shorter shelf life than traditional varieties. That’s why proper storage techniques become crucial for preserving our artisanal creations.
Feed Your Gluten-Free Starter to Life!
Want to know the secret ingredient to amazing gluten-free sourdough? A thriving starter that bubbles with wild yeast magic! Let’s nurture your starter into a powerhouse of flavor and fermentation.
Choosing Your Perfect Flour Blend
Just like selecting the finest ingredients for a gourmet meal, picking the right flour makes all the difference. Our star performers include:
- Brown rice flour – The reliable foundation of our starter family
- Sorghum flour – Brings delightful sweetness to the party
- Buckwheat flour – Our quick-fermenting flavor champion
- Millet flour – The gentle performer in our lineup
Pro Baker’s Warning: Skip those pre-made gluten-free blends with starches and gums – they’ll crash your fermentation party faster than unwanted guests!
Feeding Your Starter With Love
How often should you feed your starter? That depends on your baking schedule! Room temperature starters need daily attention, while refrigerated ones thrive with weekly feeds.
Our Foolproof Feeding Formula:
- Keep 25 grams of starter (that’s all you need!)
- Add 75 grams of gluten-free flour
- Mix in 75 grams of filtered water
- Let the magic happen for 2-4 hours at room temperature
Nurturing Your Starter’s Health
Temperature matters – we keep our starter cozy between 70-80°F (21-27°C). Here’s a game-changing tip: Use filtered water only – chlorine is your starter’s worst enemy!
When your starter seems sleepy, wake it up with twice-daily feeds. A happy starter doubles in size within 4-12 hours. Always save ¼ cup for your next feeding – think of it as your starter’s legacy!
Different flours have different thirsts – sorghum flour loves an 80g flour to 100g water ratio. Maintaining a consistent feeding ratio creates a predictable, reliable starter ready for action in 3-4 hours.
Remember, these gluten-free starters are speedier than their wheat cousins. They’re like energetic puppies – full of life and requiring careful attention, especially during those warm summer months!
Master the Perfect Hydration Dance!
Understanding hydration levels is like finding the perfect recipe – too much or too little water can make or break your gluten-free creation! Our gluten-free flours perform their own unique dance with water, quite different from traditional wheat flour’s waltz.
The Science Behind Water Ratios
Ready to dive into some baker’s math? We calculate hydration percentage by dividing water weight by flour weight, then multiplying by 100. While traditional sourdough thrives at 70-75% hydration, our gluten-free masterpieces crave 120-130% for that perfect crumb.
Our Baker’s Formula:
- Weigh every drop of liquid (starter included!)
- Measure all flour components (don’t forget starter flour!)
- Divide total liquid by total flour
- Multiply by 100 for your hydration percentage
Every Flour Has Its Thirst
Just like different fruits have varying juiciness, our gluten-free flours show unique absorption patterns. Here’s what we’ve discovered:
- Brown rice flour drinks up moisture like a sponge
- Teff and millet flours prefer a lighter sip
- Whole grain flours need an extra splash
- Starches require perfect balance – like a perfectly stirred cocktail!
Finding Your Dough’s Sweet Spot
What’s the perfect consistency? Think thick pancake batter or Greek yogurt. Trust your baker’s instincts over strict percentages!
We start conservatively – about 20-25% less liquid than suggested. Like adding seasoning to soup, we can always add more water, but we can’t take it away! Watch for these signs:
- Dry and crumbly? Add more water
- Soupy mess? You’ve gone overboard!
Temperature plays its part too – warmer days need less water. Higher hydration leads to faster fermentation, like a well-oiled machine!
Troubleshooting Tips:
- Collapsing dough during poke test? Under-hydrated
- Dense crumb got you down? More water needed
- Gummy results? Reduce water or extend baking time
Remember, finding that perfect hydration level is like mastering any art – it takes practice and patience. Keep notes like a scientist – every climate and flour brand brings its own personality to the mix!
Perfect Your Proofing Timing Magic!
Think of proofing gluten-free sourdough like conducting a delicate symphony – timing and temperature create the perfect harmony! Our gluten-free creation dances to its own rhythm during fermentation, demanding a conductor’s precise attention.
First Rise Secrets
During bulk fermentation, we’re not chasing dramatic volume increases. Here’s our game-changing discovery: Our gluten-free dough needs just 3-4 hours at room temperature. Unlike traditional sourdough’s dramatic doubling act, we’re looking for a modest 20-30% increase.
Temperature precision becomes our best friend – we maintain a cozy 75°F to 78°F (24-25°C). This sweet spot ensures:
- Perfect fermentation without rushing
- Rich flavor development
- Reliable rise timing
Mastering the Second Rise
After bulk fermentation, our cold proof in the refrigerator works wonders! While traditional sourdough lounges for 16-24 hours, our gluten-free beauty needs just 7-12 hours of beauty sleep.
Watch for these golden signals:
- Pillowy soft when touched
- Bounces back like a gentle spring
- Subtle but noticeable growth
- Elegantly domed surface
Temperature’s Dancing Partner
Temperature orchestrates our proofing ballet. At 78°F (25°C), bulk fermentation completes its performance in 3.5 to 4 hours. But when temperatures dip below 70°F, expect an extended show!
Our Temperature Troubleshooting Guide:
Too Warm (Above 80°F):
- Shorten bulk fermentation to 2-3 hours
- Cool down your water
- Reduce your starter portion
Too Cool (Below 70°F):
- Extend your fermentation
- Warm up your water
- Find a toastier spot
Warning Signs of Overproofing: Watch for that telltale hole at the top and dense, gummy bottom. Catch it early? Quick rescue with gentle deflation and a shorter second rise!
Remember, gluten-free sourdough transforms from perfect to overproofed in the blink of an eye. We always lean towards slight underproofing – it’s like leaving a party early rather than staying too late! When uncertain, trust the poke test – gentle spring-back with a slight indent means you’re right on schedule.
Perfect Your Baking Temperature Dance!
Temperature control becomes your most powerful ally in creating exceptional gluten-free sourdough! We’ve discovered the perfect symphony of heat, steam, and timing that transforms good bread into spectacular artisanal loaves.
Temperature Magic
When converting traditional sourdough recipes to gluten-free, temperature control makes or breaks your success. Our proven temperature choreography delivers perfect results:
- The Hot Start: Preheat that oven to 500°F (260°C) with your Dutch oven inside – give it a full 45 minutes to reach peak heat!
- First Heat Dance: Load your bread and drop to 450°F (232°C) – timing is everything!
- Steam Symphony: 40 minutes covered, then 10-20 minutes uncovered for the perfect finish
- Temperature Truth: Never skip checking for that crucial 210°F internal temperature
Steam Secrets Revealed
We’ve mastered two foolproof methods for creating professional bakery-style steam:
Dutch Oven Magic Our favorite approach! A 4-5 quart Dutch oven creates the perfect steam chamber. Think of it as your bread’s personal spa treatment!
Pizza Stone Prowess No Dutch oven? No problem! Position your pizza stone on the middle rack, add a shallow pan below, and create steam with boiling water. It requires more attention, but the results will amaze you!
Crafting That Perfect Crust
Ready for that Instagram-worthy crust? Here’s our battle-tested strategy:
- Steam Phase: High moisture for 20-30 minutes creates that professional shine
- Golden Glory: Watch the magic happen as your crust develops
- Temperature Balance: Dark bottom but gummy inside? Lower heat and extend time
Our Secret Cooling Method:
- Crack that oven door 2 inches
- Let your masterpiece cool completely inside
- The hardest part? Waiting several hours before slicing! (overnight brings pure perfection)
Baker’s Secret: A baking stone revolutionizes your results. For Dutch oven method enthusiasts, remember – preheat is non-negotiable!
Pro Tips for Perfect Results
- Use that digital thermometer – it never lies about doneness
- Score decisively at 45 degrees – create your signature pattern!
- Start with Dutch oven method – it’s more forgiving for beginners
- Listen for that hollow sound when tapping the bottom
Remember, gluten-free sourdough demands patience. Better a few extra minutes in the oven than a gummy center! Trust your instincts, follow our temperature guides, and watch your bread transform into artisanal perfection.
Your Gluten-Free Sourdough Adventure Awaits!
Ready to rise to new heights in your gluten-free baking journey? What seemed like a mountain of challenges has transformed into an exciting adventure! Through our exploration of flour combinations, essential tools, starter care, hydration magic, and baking techniques, we’ve created your roadmap to gluten-free sourdough success.
Think of your baking journey like creating the perfect recipe – every ingredient matters! The secret sauce combines:
- Precise flour blends that dance together perfectly
- Careful measurements that hit the sweet spot
- Just the right binding agents to hold everything together
- Temperature control that keeps your dough happy
We’ve discovered that gluten-free sourdough has its own personality – it’s not just a copy of traditional recipes! Like learning any new dance, it requires different steps, especially when it comes to water content and proofing rhythms.
Your kitchen will become your personal laboratory – each environment brings its own special touch to the process. Don’t let early attempts discourage you! Keep notes like a master chef developing their signature dish. Need more guidance? Visit us at Theyeastwecando.com for extra tips and troubleshooting support.
Remember, even the most celebrated bakers started somewhere! With practice and patience, you’ll soon create gluten-free masterpieces that make everyone say “I can’t believe this is gluten-free!” Your dedication will reward you with crusty, flavorful bread that brings joy to every table – dietary restrictions or not!
FAQs
Q1. How can I convert my regular sourdough starter to gluten-free? You can convert your regular sourdough starter to gluten-free by feeding it with gluten-free flours like brown rice, sorghum, or buckwheat. This process may take about two weeks of daily feedings before the starter is ready for baking gluten-free bread.
Q2. Is traditional sourdough bread safe for people with celiac disease? No, traditional sourdough bread is not safe for people with celiac disease as it still contains gluten. However, gluten-free sourdough bread can be made using specially formulated gluten-free flour blends and a gluten-free starter.
Q3. How does using gluten-free flour affect the recipe? Gluten-free flours absorb water differently and lack the natural binding properties of wheat flour. This means you’ll need to adjust hydration levels, often increasing to 120-130%, and use binding agents like xanthan gum or psyllium husk to achieve the right texture and structure.
Q4. What’s the ideal proofing time for gluten-free sourdough? Gluten-free sourdough typically requires shorter proofing times than traditional sourdough. The first rise (bulk fermentation) usually takes 3-4 hours at room temperature, while the second rise (cold proof) is best done in the refrigerator for 7-12 hours.
Q5. How should I adjust baking techniques for gluten-free sourdough? For gluten-free sourdough, start by preheating the oven to 500°F (260°C), then reduce to 450°F (232°C) when loading the bread. Bake in a Dutch oven for 40 minutes covered, then 10-20 minutes uncovered. Always check that the internal temperature reaches 210°F before removing from the oven.