How to Master Sourdough Temperature Control: An Advanced Guide
Temperature is a vital part of successful sourdough baking. Your control over sourdough temperature affects fermentation speed, final bread structure, and flavor development. Professional bakers understand that becoming skilled at temperature management makes the difference between exceptional and mediocre loaves.
Temperature and sourdough interact at several significant stages. Your sourdough needs specific temperature ranges when you keep an active starter, manage bulk fermentation, and control the final proof. This piece gets into optimal temperature ranges for wild yeast activity. You’ll learn to maintain ideal conditions for lactic acid bacteria and discover professional techniques that deliver consistent, high-quality results.
Understanding the Importance of Temperature in Sourdough Baking
Temperature control is vital to making sourdough bread and directly affects fermentation activity. Temperature changes create unique responses from wild yeast and beneficial bacteria in sourdough. This dynamic relationship shapes the bread’s structure and influences flavor development.
How temperature affects fermentation
Temperature plays a crucial role in sourdough fermentation. Wild yeast metabolic activity doubles with every 15°F rise in temperature. Warmer conditions help yeast convert sugars faster, while cooler temperatures slow the process and create complex flavors. The bacteria that give sourdough its signature tang react differently to temperature changes and produce unique acid combinations based on their environment.
The role of temperature in dough development
Temperature substantially affects dough development by influencing gluten formation and enzymatic activity. The autolysis process is significant to proper gluten development and works best with water temperature between 80-85°F. The dough structure and eventual oven spring improve because this temperature range activates flour enzymes effectively.
Optimal temperature ranges for sourdough
Bakers want to maintain specific temperature ranges throughout the bread-making process to get consistent results:
- Starter Maintenance: 76-78°F – Optimal for balanced yeast and bacterial activity
- Bulk Fermentation: 75-78°F – Ideal for proper dough development
- Final Proofing: 74-80°F – Supports strong fermentation without over proofing
- Water Temperature: 90-95°F – When working with cold ingredients to achieve desired final dough temperature
Most sourdough applications need a final dough temperature (FDT) between 75-78°F. This range creates the perfect balance between fermentation speed and flavor development. Fermentation slows below 70°F, while temperatures above 85°F can cause too much bacterial activity and potential overproofing.
Predictable results depend on consistent temperature throughout the process. Many experienced bakers use a simple formula: (Flour Temperature + Ambient Temperature + Water Temperature) ÷ 3 = Final Dough Temperature. This calculation helps them adjust the water temperature to reach the target dough temperature.
Flavor development varies with temperature. Cooler temperatures (60-72°F) create both lactic and acetic acid, which results in complex flavors. Warmer temperatures (86-99°F) produce mainly lactic acid, leading to milder taste profiles. Bakers can adjust their process based on desired flavor outcomes using this temperature-dependent behavior.
Mastering Starter Temperature Control
The success of sourdough baking depends on precise control over the starter’s temperature. Slight temperature variations can substantially affect fermentation activity and bread quality. An adequately managed starter creates the foundation for exceptional sourdough bread. Temperature management becomes a vital skill that every baker needs to master.
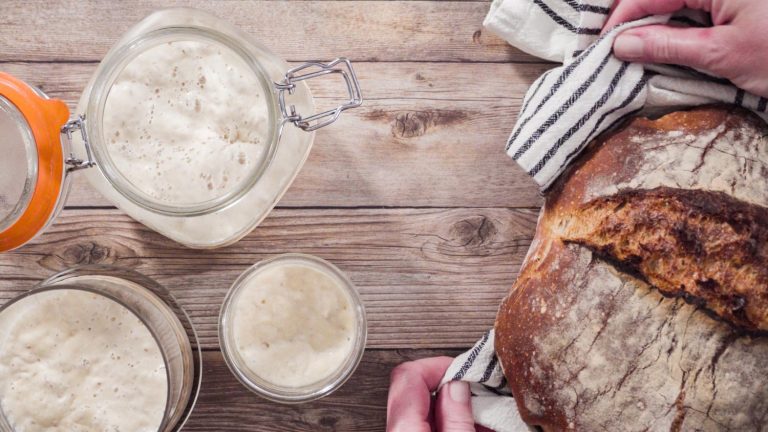
Maintaining a consistent starter temperature
Your sourdough starter thrives at 76-78°F (24-26°C). Wild yeast and beneficial bacteria create perfect fermentation conditions at this temperature range. A reliable thermometer helps you track your starter’s temperature because seasonal changes significantly affect its performance.
You can keep temperatures steady through several practical methods:
- Use warm water during feeding cycles
- Wrap the starter jar in insulating materials
- Place the container in a warm spot away from drafts
- Create a DIY warming setup using kitchen appliances
- Use temperature-controlled environments
Using a proofing box or dedicated starter home
Professional bakers use specialized equipment like proofing boxes or dedicated starter homes that give them perfect temperature control. These devices are a great way to get several benefits:
| Feature | Benefit |
|---|---|
| Precise temperature control | Maintains a consistent 76-78°F environment |
| Humidity management | It prevents starter from drying out |
| Programmable settings | Allows schedule optimization |
| Temperature monitoring | It will give a stable environment |
The Sourdough Home works specifically for starter maintenance and can keep temperatures between 41-122°F (5-50°C). This flexibility helps with different feeding schedules. You can also create a DIY proofing box with a heating pad and thermometer that works just as well and costs less.
Adjusting feeding schedules based on temperature
Temperature directly influences feeding frequency and ratios. Starters need more frequent feeding with higher ratios to maintain balance in warmer conditions. A typical feeding schedule at 78°F (26°C) might look like:
- Morning feeding: 1:2:2 ratio (starter:flour: water)
- Evening feeding: 1:2:2 ratio
- Peak activity monitoring: typically 4-6 hours after feeding
Bakers should adjust their approach in more relaxed environments below 70°F (21°C) by:
- Reducing feeding frequency to once daily
- Using warmer water during feedings
- Increasing the starter portion in the feeding ratio
- Allowing more extended fermentation periods
Temperatures above 85°F (29°C) call for these adjustments:
- Increasing feeding frequency
- Using cooler water
- Adopting higher feeding ratios (1:5:5 or higher)
- Monitoring more frequently for signs of over-fermentation
Temperature and feeding schedules share a consistent relationship. Warmer temperatures speed up fermentation and need more frequent refreshments. Cooler temperatures slow down activity and allow more extended periods between feedings. Bakers can maintain their starter’s vitality by understanding these patterns and adapting to environmental conditions.
Perfecting Dough Temperature During Bulk Fermentation
Bulk fermentation is critical in determining your bread’s quality through temperature control. Professional bakers know that precise temperature control at this stage helps them produce consistent, high-quality bread.
Creating an ideal environment for bulk fermentation
The optimal temperature range for bulk fermentation lies between 75-78°F (24-25°C). This range delivers the perfect balance between fermentation activity and dough development. Bakers need to think about these critical factors at the time they set up their fermentation environment:
- Room temperature fluctuations
- Heat retention of fermentation vessels
- Duration of bulk fermentation
- Desired flavor profile
- Available temperature control methods
Using water temperature to control dough temperature
Water temperature is the main way to control the final dough temperature (FDT). Water makes up the largest part of the dough, so its temperature greatly affects the overall dough temperature. Here’s a simple way to adjust water temperature:
| Dough Condition | Required Water Temperature | Expected Outcome |
|---|---|---|
| Cold ingredients (<70°F) | 90-95°F | Balanced fermentation |
| Room temp ingredients | 75-78°F | Optimal activity |
| Warm ingredients (>80°F) | 65-70°F | Controlled fermentation |
Bakers should follow these steps to calculate the proper water temperature:
- Measure room temperature
- Check flour temperature
- Account for friction factor from mixing
- Adjust water temperature based on these factors
Monitoring and adjusting ambient temperature
Your dough’s temperature needs constant monitoring during bulk fermentation for the best results. The dough’s temperature and fermentation progress are connected in specific ways:
Temperature-Based Rise Guidelines:
- At 70°F (21°C): You want a 75% rise
- At 75°F (24°C): You need a 50% rise
- At 80°F (27°C): Keep it to a 30% rise
Bakers use several methods to keep temperatures steady during bulk fermentation:
- Electric Proofer: This gives you exact temperature control and consistent results
- Oven with Light: Your oven light creates a perfect warm environment
- Microwave Chamber: This works as an insulated space to hold temperature
- Strategic Kitchen Placement: You can use naturally warm spots in your kitchen
You should make these adjustments as needed:
- Cool your overheated dough in the refrigerator for 15-30 minutes
- Move cold dough to a warmer spot or use a proofer
- Check temperature every 30-60 minutes
- Change fermentation time based on temperature readings
A digital probe thermometer helps you get accurate temperature readings. Measurements from your dough’s center are used to make changes based on these readings instead of time, which gives consistent results regardless of the environment.
Your dough ferments after bulk fermentation, especially during shaping and final proof. Warmer doughs (above 78°F) will ferment faster in these stages, so you must step in earlier during bulk fermentation. Cooler doughs (below 75°F) ferment most in the bulk phase.
Optimizing Baking Temperature for Perfect Oven Spring
Perfect oven spring depends on precise temperature control during the most significant phase of sourdough baking. Through the orchestration of heat, steam, and timing, raw dough becomes a crusty loaf.
Preheating techniques to get optimal results
Great sourdough bread starts with the right preheating approach. Expert bakers suggest these temperature ranges based on your choice of baking vessel:
| Baking Method | Preheat Temperature | Preheat Duration |
|---|---|---|
| Dutch Oven | 450-500°F (232-260°C) | 45-60 minutes |
| Baking Stone | 450-500°F (232-260°C) | 60 minutes |
| Steel Baking Sheet | 430-450°F (220-232°C) | 30-45 minutes |
Your oven should be 50°F higher than its target baking temperature. This simple step will give your oven a perfect spring because it compensates for the heat that escapes while you load your dough.
How Different Baking Vessels Affect Your Bread
Baking vessels create unique environments that shape your bread’s oven spring and crust development:
Cast Iron Dutch Ovens
- Hold heat exceptionally well
- Create a natural steam chamber
- Darker color absorbs more heat
- Smaller sizes bake hotter
Enameled Dutch Ovens
- Distribute heat more evenly
- Reduce chances of bottom scorching
- Light color reflects some heat
- Need longer preheating
The vessel’s size significantly affects baking dynamics. Your smaller Dutch ovens (5-quart) concentrate heat more intensely than larger ones (7-quart). When using smaller ships, you might need to lower temperatures by 15-25°F.
Adjusting baking temperature and time for the desired crust
The temperature control during baking involves two distinct phases:
Initial High-Heat Phase (First 20-25 minutes):
- Maintain temperature at 450-475°F (232-246°C)
- Keep the lid on the Dutch oven or steam source active
- Allow for maximum oven spring
- Monitor internal vessel temperature
Crust Development Phase (Remaining 20-30 minutes):
- Reduce temperature to 425-450°F (218-232°C)
- Remove the lid or steam source
- Monitor crust coloration
- Bake until internal temperature reaches 200°F (93°C)
Bakers who want darker, more reliable crusts should maintain higher temperatures during the second phase. A lighter crust needs an additional 25°F of temperature reduction. The relationship between temperature and steam is vital in crust development. Steam during the first phase helps keep the dough’s surface pliable and allows maximum expansion.
Several factors determine the need for temperature adjustments:
- Higher room temperatures need shorter preheating
- Lower temperatures require extended preheating
Dough Temperature
- Cold dough from refrigeration needs higher initial heat
- Room temperature dough works well with standard temperatures
Loaf Size
- Larger loaves need lower temperatures for a longer duration
- Smaller loaves handle higher temperatures well
Desired Crust Characteristics
- Thick, dark crusts need sustained higher temperatures
- Thin, light crusts require reduced temperature after the original spring
Oven thermostats often show inaccurate readings. An infrared thermometer helps measure vessel temperature and provides reliable data for consistent results. The actual temperature inside a Dutch oven can be 60-100°F lower than the oven setting during preheating, so timing adjustments become necessary.
The cold start method works differently. This approach requires:
- Setting original temperature to 450°F (232°C)
- Adding 15-20 minutes to total bake time
- Checking internal temperature more often
- Making final browning adjustments as needed
Conclusion
Temperature control is the lifeblood of exceptional sourdough baking that needs careful attention at each stage. Professional bakers get consistent results by keeping specific temperature ranges – from the 76-78°F sweet spot for starter maintenance through the vital 75-78°F zone during bulk fermentation. Finally, the intense 450-500°F to achieve the perfect oven spring. These adjusted temperatures create the ideal environment for wild yeast and beneficial bacteria, resulting in bread with superior structure, complex flavors, and beautiful esthetics.
Quality tools and knowledge help you succeed with sourdough; each loaf allows you to improve your temperature management skills. Professional bakers know that consistent results come from precise control and careful monitoring. [Raise your bread and pizza game with an authentic artisanal sourdough starter from The Yeast We Can Do – email john@theyeastwecando.com
to get your hands on our premium starter and revolutionize your baking with perfect tangy flavor and signature crust.] Home bakers can produce loaves that rival professional bakeries with proper temperature knowledge and quality ingredients, making each bake a true expression of artisanal craftsmanship.
FAQs
What is the ideal temperature range for sourdough bread baking?
Sourdough bread thrives best within a temperature range of 74-86 degrees Fahrenheit, with the optimal range being 76-80 degrees Fahrenheit. It’s essential to maintain this temperature range as consistently as possible during the baking process.
How can I maintain my sourdough starter at the correct temperature?
To keep your sourdough starter active and flavorful, maintain it at a warm temperature, ideally between 78 and 85 degrees Fahrenheit. If you’re not baking frequently, storing your starter in the refrigerator is advisable. However, for a sweeter, more flavorful bread, remove the starter from the fridge and allow it to sit at room temperature for 3-5 days, feeding it regularly before use.
Is a temperature of 100 degrees Fahrenheit too high for a sourdough starter?
Yes, a temperature of 100 degrees Fahrenheit is excessively high for maintaining a healthy sourdough starter. Temperatures above 120 degrees Fahrenheit (50 degrees Celsius) can kill the wild yeast in the starter, as yeast cells die at temperatures around 140 degrees Fahrenheit (60 degrees Celsius) or higher.
What device can help control the temperature of a sourdough starter?
Devices like the Sourdough Home allow precise control over your sourdough starter’s temperature, which can range from 5 to 50 degrees Celsius (41 to 122 degrees Fahrenheit). This enables you to maintain a consistent temperature or adjust it to influence your bread’s growth rate, aroma, and flavor.