How to Master Sourdough Pita Bread Recipe: Traditional Middle Eastern Style
Pita bread has remained a cornerstone of Middle Eastern cuisine for over 4,000 years. Did you know that?
Making authentic sourdough pita bread at home can seem daunting. Home bakers often struggle to achieve the perfect pocket with its distinctive chewy texture and subtle tang, making Middle Eastern pita bread unique.
Our team spent years perfecting this sourdough pita bread recipe. We combined traditional Middle Eastern techniques with modern sourdough practices to create a foolproof method. Now, you can make restaurant-quality pitas right in your home oven.
This detailed guide will help you become skilled at sourdough pita making. You’ll learn everything from keeping the perfect sourdough starter to the traditional hand-rolling techniques. Both seasoned bakers and newcomers to sourdough will find value in these instructions.
Are you ready to create perfectly puffed, tender pitas that would make any Lebanese grandmother proud? Let’s get started!
Understanding Sourdough Pita Fundamentals
Let’s examine what makes sourdough pita bread special. This Middle Eastern staple has captured bakers’ hearts worldwide, and its fascinating world has made it a favorite of many.
What Makes Traditional Middle Eastern Pita Different
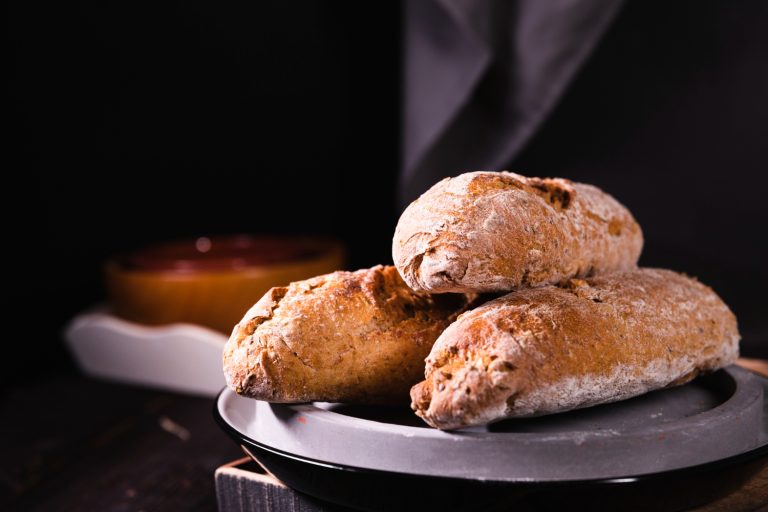
TPitational Middle Eastern Pita stands out from other flatbreads because of its distinctive pocket and unique preparation method. Arabic Pita, especially Lebanese style, is thinner and more pliable than its Greek counterpart. The central cavity makes it perfect for stuffing with falafel or creating shawarma sandwiches.
Essential Equipment and Ingredients
You’ll need these items to create authentic sourdough pita bread:
- A baking stone or steel for consistent high heat
- Digital scale for precise measurements
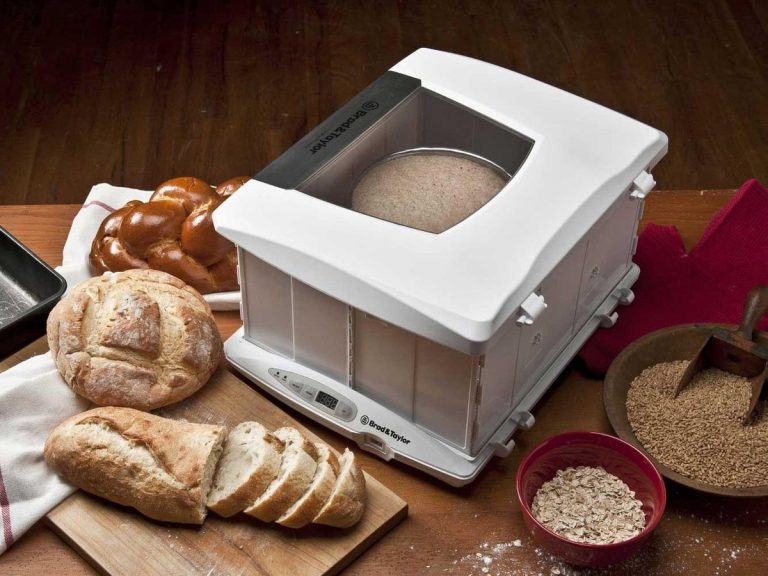
- Clear, straight-sided vessel for fermentation
- Non-stick flour-sack towels
- Bench scraper for dough handling
- Rice flour for dusting
Simple ingredients are the foundation:
| Ingredient | Purpose |
|---|---|
| Active sourdough starter | Leavening and flavor |
| Bread flour | Structure and strength |
| Whole wheat flour (20%) | Nutty flavor |
| Water | Steam and hydration |
| Salt | Taste and dough strength |
| Olive oil | Tenderness and crust |
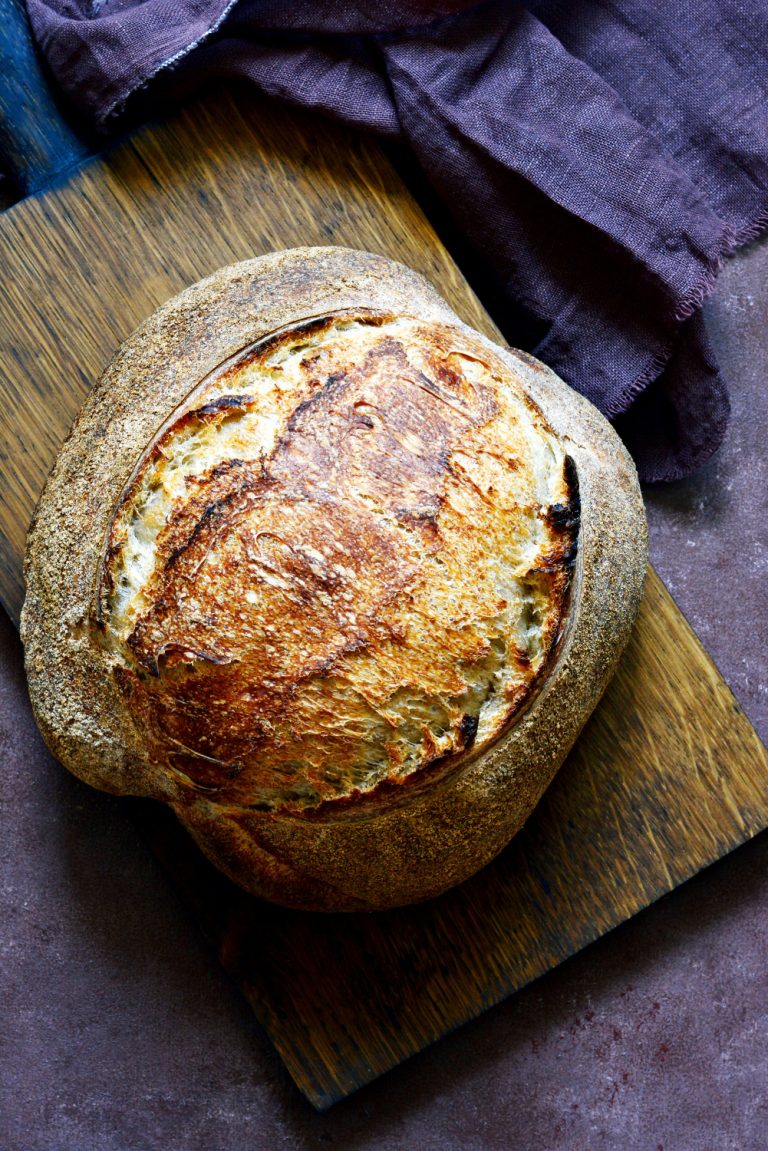
The Science Behind Perfect Pita Pockets
I love the science behind pita making, especially the science behind the perfect pocket formation. Steam power makes it all happen. The moisture inside the dough turns to steam at high temperatures (260°C/500°F), creating pressure that pushes the two surfaces apart and forms that signature pocket.
The dough’s structure and thickness play vital roles. A quarter-inch thickness works best—thicker dough won’t heat properly, while thinner dough won’t form the right pocket. The gluten network needs strength to trap steam yet must stay flexible enough to expand. This comes from proper kneading.
Temperature, moisture, and timing must line up perfectly. The magic happens when these elements come together, and the pita puffs up like a balloon in the oven. This creates the perfect pocket ready for your favorite fillings.
Mastering Your Sourdough Starter
A great sourdough pita bread starts with its starter. Creating a solid starter for Middle Eastern bread requires an extraordinary approach that blends traditional and modern techniques.
Creating and Maintaining a Middle Eastern Style Starter
The sort of thing I love about Middle Eastern starters came from an exciting find: traditional Arabic bread makers kept a simple ball of fermented dough preserved in flour. We adapted this age-old method to work in today’s kitchens, which gives us a starter that works perfectly for sourdough pita bread.
These ratios will give a perfect starter:
| Component | Ratio | Weight |
|---|---|---|
| Ripe starter | 1 part | 20g |
| WaterFive | 5 parts | 100g |
| Flour mixFive | 5 parts | 100g |
A 70% bread flour blend and 30% whole wheat flour works best. This mix matches traditional Middle Eastern grains and ensures good fermentation.
Signs of Peak Fermentation
Your starter’s readiness to make perfect Lebanon bread shows through these reliable signs:
- Double in volume within 4-6 hours of feeding
- Dome-shaped surface with smatinybbles
- Pleasant sour aroma without acetone notes
- Passes the float test in room temperature water
- Loose, batter-like consistency like thick pancake mix
Troubleshooting Common Starter Issues
Over the last several years of baking sourdough pita bread, we’ve fixed many starter problems. A sluggish starter usually needs warmth at 74-76°F (23-24°C). Adding some whole-grain rye flour often boosts activity by providing extra nutrients.
A strong vinegar smell or liquid on top (called “hooch”) means your starter needs more food. More frequent feeding and a steady temperature usually fix this. A healthy starter can bounce back quickly—we’ve brought starters back to life after weeks in the refrigerator.
Middle Eastern pita bread turns out best when you feed the starter twice daily on the counter or weekly in the refrigerator. This schedule keeps your starter nourished and flavorful, which helps create those perfect pita pockets.
The Art of Pita Dough Development
Science meets artistry as you create the perfect sourdough pita dough. Your pitas’ success and pocket formation depends on how well you handle this vital phase.
Traditional Kneading Techniques
Our work with Middle Eastern bread shows that hand kneading works better than machine mixing. The process starts when you combine your mature starter with flour and water to create a “shaggy mass.” You’ll see the magic unfold as you knead the dough in the bowl for about 10 minutes. A fold-and-push motion builds gluten without adding extra flour.
Your stand mixer can help, too. Here’s how:
| Stage | Speed | Duration |
|---|---|---|
| Initial Mix | Low | 5 minutes |
| Development | Medium | 3-4 minutes |
| Final | Low | 1 minute |
Reading Dough Temperature and Hydration
The ideal hydration level for pocket formation sits between 70-75%. You can calculate it easily: Hydration = (Total Water Weight ÷ Total Flour Weight) × 100
Temperature is vital—your dough should reach 76-78°F (24-26°C). This range lets fermentation work its magic while keeping the structure intact. Middle Eastern-style pitas need slightly warmer dough (around 78°F) that stretches better and creates that signature pocket.
Proper Bulk Fermentation Signs
Your dough will tell you when it’s ready. Look for:
- Smooth and elastic dough with defined edges
- A 50% increase in volume
- A slight dome on the surface
- A gentle jiggle when moved
- Edges that pull away from the bowl slightly
Room-temperature bulk fermentation takes 2-4 hours. During the first 90 minutes, perform gentle stretch-and-folds every 30 minutes. This builds strength and maintains the delicate gluten network that gives Lebanese bread its texture.
The dough changes from a rough mass into a silky, strong creation. A gentle pull should meet slight resistance, and the dough should feel like a soft pillow. These signs tell you your sourdough pita dough has developed perfectly, and you can move to the next step.
Shaping and Baking Techniques
The trip from perfectly developed dough to beautifully puffed sourdough pita bread depends on becoskill innificant shaping and baking techniques. Success comes down to getting these final steps just right.
Hand Rolling vs Machine Rolling Methods
We tested hand-rolling and machine methods over the last several years of making traditional Middle Eastern pita bread. Commercial bakeries typically use dough sheeters. Hand rolling gives you better control and connects you to this ancient craft. Here’s how both methods stack up:
| Aspect | Hand Rolling | Machine Rolling |
|---|---|---|
| Texture | More rustic, varied | Uniform thickness |
| Control | Better edge control | Consistent results |
| Learning curve | Steeper | Minimal |
| Connection to tradition | Authentic | Modern efficiency |
Our hand-rolling technique uses quick, smooth strokes from the center outward. This helps achieve that perfect 1/4-inch thickness without overworking the dough.
Temperature Control for Perfect Puffing
Getting that magical pocket formation in sourdough pitas depends on precise temperature control. Here are our tested temperature guidelines:
- Preheat oven to 500°F (260°C) for at least 30 minutes
- Keep temperature steadythroughoutt baking
- Let each Pita bake 3for -5 minutes until it puffs dramatically
- Take it out when it is slightly golden but not browned
Traditional vs Modern Baking Surfaces
We tested several baking surfaces after baking countless batches of sourdough pita bread. Our traditional baking stone works excellently, and modern alternatives also proved successful. Each surface has its advantages:
Baking Stone: This is our top choice for traditional results. Its heat reaction is excellent, and it has the perfect bottom crust. A 45-minute preheat gives the best results.
Baking Steel: This modern option has grown on us. Heat transfers faster than stone, so pitas puff up quicker. It works excellent for large-batch baking.
Cast Iron: A preheated cast iron skillet works well for smaller batches. It will produce the beautiful charred spots that make traditional Lebanese bread unique.
Parchment paper cut to size makes transfers easier. Right after baking, wrap the pitas in a clean kitchen towel—a technique Middle Eastern bakers have used for generations. This traps just enough moisture while letting the bread breathe, creating that perfect authentic Arabic bread texture.
Note that placing shaped pitas face down on the baking surface helps create even pocket formation. Those first few minutes of baking are magical as flat disks transform into puffy pockets.
Advanced Troubleshooting Guide
Becoming skilled at sourdough pita bread requires you to understand common challenges and their solutions. Our experience with traditional Middle Eastern bread over the last several years has helped us face every possible pitfall and create reliable fixes.
Why Pitas Don’t Puff Properly
Many bakers struggle to create the perfect pocket for sourdough pita bread. The success of puffing depends on three significant factors:
Moisture Content: Our tests show that dough hydration works best between 70-75% to achieve optimal puffing. Slightly wetter dough creates more steam in sourdough pita bread, forming the perfect pocket.
Temperature Control: The perfect puff requires these specific temperature points:
| Stage | Temperature | Duration |
|---|---|---|
| Oven Preheat | 475-500°F | 30+ minutes |
| Baking Stone | 450-475°F | Consistent |
| Original Bake | 475°F | 2-3 minutes |
Rolling Technique: Uneven thickness often ruins the puffing process. Our Lebanon bread’s success depends on consistent pressure that prevents thin spots from compromising pocket formation.
Fixing Texture and Taste Issues
Texture problems in sourdough pitas require the fermentation process to start first. A dense, gummy texture indicates under-fermentation. Adding 30-minute increments to bulk fermentation solves this problem.
The taste improves with:
- Regular feeding to keep the starter healthy
- Fermentation temperature at 75-78°F
- 20% whole wheat flour toenhancee flavor
- Proper proof time (30-60 minutes) before baking
Storage and Reheating Solutions
Our authentic Arabic bread texture stays perfect with the proper storage methods. Sourdough pitas remain soft and pliable for up to three days with proper storage. The best results come from:
- Complete cooling before storage
- Parchment paper between stacked layers
- Room temperature storage in airtight containers
- Freezing for up to three months if needed
Different situations call for different reheating methods. Our sourdough pita bread’s best results come from the hot skillet method:
Stovetop Technique: A dry skillet overPitaedium heats each Pita for 30 seconds per side. Light water spritzing before heating adds extra softness.
Oven Method: Multiple pitas wrapped in foil warm at 350°F for 5-7 minutes. This method keeps moisture in and brings back that fresh-baked texture.
Frozen pitas should thaw overnight in the refrigerator before reheating. Direct reheating from frozen creates uneven warming and tough spots in Middle Eastern pita bread.
Our tests show that partially baked pitas (puffed but not browned) finish fresh later. This technique lets us serve hot, fresh sourdough pitas anytime while keeping our traditional Arabic bread’s authentic texture.
Conclusion
Authentic sourdough pita bread demands patience, practice, and attention to detail. We’ve shared our time-tested methods for creating that perfect pocket, from keeping a resilient starter to becoming skilled at hand-rolling. These techniques passed down through generations of Middle Eastern bakers, create pitas with authentic texture and taste.
The recipe works best when you understand each significant element —roper fermentation, precise temperature control, and careful dough handling. Our troubleshooting guide helps with common challenges so your pita-making experience stays on track despite obstacles.
Want to begin your sourdough pita adventure? Raise your bread and pizza game with an authentic artisanal sourdough starter from The Yeast We Can Do. Our small-batch starter helps create exceptional bread and pizza with perfect tangy flavor and signature crust. This applies whether you bake at home or own a restaurant wanting to add authentic sourdough flavor to your menu. Change your baking today by emailing john@theyeastwecando.com to get our premium sourdough starter.
Note that every batch of pita bread brings you closer to expertise. These techniques will help you create perfectly puffed, tender pitas that honor Middle Eastern bread-making traditions.
FAQs
What disdistinguishesddlPitastern Pita from GPita pita?
Middle Eastern Pita is typically thinner and has a pocket, making it ideal for positionings, whereas Greek Pita is softer, handier, and generally has a pocket. Greek Pita is commonly used for gyros or souvlaki wraps.
What are the various names for Middle Eastern pita bread?
InglisPitat is commonly known as Pita, and irIrabict is called khubz. Other names include Manakish, Barbari, and Lavash, each with distinct characteristics and culinary uses throughout the Middle East.
Is sourdough used in making pita bread?
Yes, sourdough pita bread is a variation of tthetraditionalast-risen Pita. Using a homemade fermented sourdough starter enhances the bread’s digestibility.
What ingredients are used in traditional pita bread?
Traditional pita bread is primarily made from whole wheat, with the option of adding all-purpose flour. It also contains salt and yeast and can be cooked on a grill, stovetop, or oven.