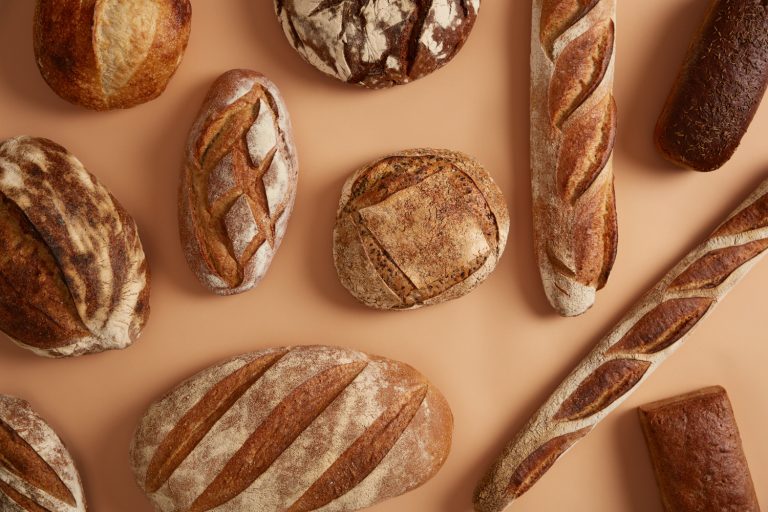
Step-by-Step: Sourdough Mixing Techniques for Artisan Bakers
A surprising 87% of home bakers find achieving the perfect sourdough texture on their first try challenging.
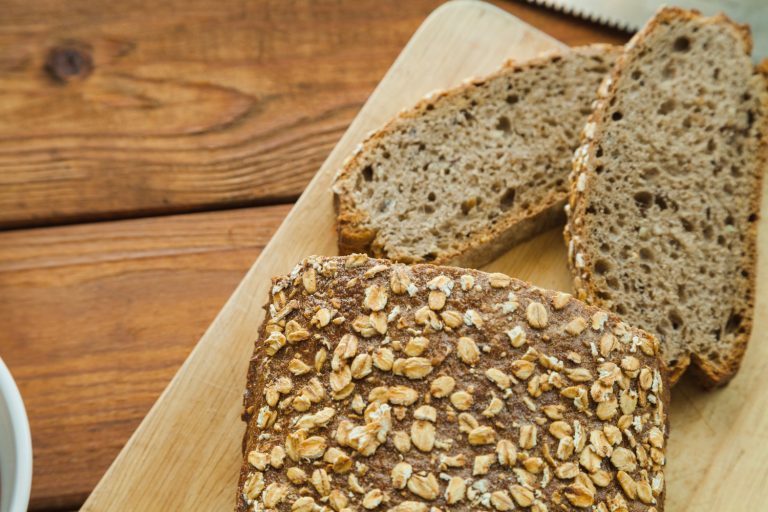
Most of us have experienced it—watching video after video of perfectly mixed sourdough, only to end up with either a sticky mess or a dense, tough loaf. Creating those beautiful artisan breads with an open crumb and crispy crust depends on becoming skilled at sourdough mixing techniques.
The proper mixing techniques can dramatically improve your baking results. This applies whether you’re starting your first sourdough or trying to perfect your whole wheat recipe. We’ll walk you through each step of the process, from simple hand mixing to advanced methods like the Rubaud technique.
Want to discover the full potential of professional-level sourdough mixing? Let’s look at how to improve your bread-baking skills!
Understanding Sourdough Mixing Fundamentals
Let’s take a closer look at the fascinating science behind sourdough mixing. These fundamentals will show you why understanding these concepts matters so much to create that perfect artisan loaf.
The Science Behind Gluten Development
Something magical happens when flour and water mix together. Two proteins, glutenin, and gliadin, combine to form what we know as gluten. These proteins build an intricate network through hydrogen bonds and disulfide cross-links, giving our dough its characteristic elasticity and strength. This network acts like a microscopic web to capture the carbon dioxide bubbles produced during fermentation.
Role of Temperature and Hydration
Temperature control stands out as one of our best tools in sourdough mixing. The ideal final dough temperature ranges between 75°F to 78°F (24-25°C). Temperature affects our dough in several ways:
- Warmer doughs (around 80°F/27°C) encourage faster fermentation
- Cooler temperatures (below 75°F/24°C) slow down the process
- Room temperature fluctuations can affect consistency
- Mixing friction typically increases temperature by one °C per minute
Hydration is just as vital. Our doughs fall into three hydration levels:
- Low hydration (65% and below): Limited gluten mobility
- Moderate hydration (65-80%): Optimal for gluten development
- High hydration (80% and above): Creates very stretchy dough
Essential Equipment and Tools Needed
Excellent sourdough mixing doesn’t need many tools, but some items are essential. Here are our top recommendations:
- Kitchen Scale: Precision leads to consistent results
- Glass or Ceramic Mixing Bowl: Preferably with straight edges
- Dough Scraper: For handling and shaping
- Temperature Probe: To monitor dough temperature
- Banneton: For proper proofing structure
The beauty of sourdough mixing lies in how these elements work together. The right temperature, hydration, and proper tools create the perfect environment for gluten development and fermentation.
Hand Mixing Techniques for Home Bakers
Making hand-mixed sourdough becomes easier once you understand the fundamentals. These three powerful techniques will help you create that perfect artisan loaf.
Simple Hand Mixing Method
The foundational technique sets the stage for your sourdough experience. You combine water and the starter in a large bowl and break the starter into small pieces. Add flour and salt, then mix until you achieve a shaggy mass. This method’s magic lies in the 30-minute rest period after final mixing. The flour hydrates thoroughly during this time and does most of the work, which makes the next mixing steps more accessible and more effective.
Rubaud Method Step-by-Step
High-hydration doughs work best with the Rubaud method. Here’s the proven process:
- Start with a wet hand, reaching down the side of your mixing bowl
- Scoop a portion of dough while gently stretching it away
- Create a “C” motion with your hand as you lift and fold
- Maintain a quick, rhythmic motion for 8-10 minutes
- Look for the dough to become smoother and more elastic
This method works exceptionally well with whole-grain flour because it helps develop optimal extensibility without overworking the dough.
Slap and Fold Technique
Advanced bakers can benefit from the slap-and-fold technique. This French-inspired method excels with doughs between 65-75% hydration. The process starts by dumping the dough onto a clean counter, then lifting and slapping it down while folding it over itself.
Success depends on timing. The technique usually takes 5-8 minutes, and you should watch for these vital signs:
- The dough becomes smoother and less sticky
- It develops a slight shine
- It starts holding its shape better
- The surface becomes more uniform
Regular hand-wetting prevents excessive sticking and allows better dough manipulation. If the dough starts to tear, it might need a brief 5-minute rest.
Note that these techniques do more than just mix—they develop the perfect gluten structure for your artisan sourdough bread. Each fold and turn brings you closer to creating that ideal loaf.
Machine Mixing Methods and Tips
Machine mixing offers amazing advantages when scaling up sourdough production or wanting consistent baking results. Let’s explore how stand mixers and commercial equipment can help you achieve professional-quality results.
Stand Mixer Guidelines
The right attachment makes all the difference with stand mixers for sourdough. The paddle attachment works best to start the mixing process, especially when mixing the starter with water. After your ingredients become a shaggy mass, switch to the dough hook to develop the dough.
Here’s our proven mixing sequence:
- Pre-mix ingredients with a paddle (1-2 minutes)
- Switch to the dough hook at speed 2
- Mix in 2-minute intervals
- Rest for 5-10 minutes between intervals
- Total mixing time: 4-6 minutes
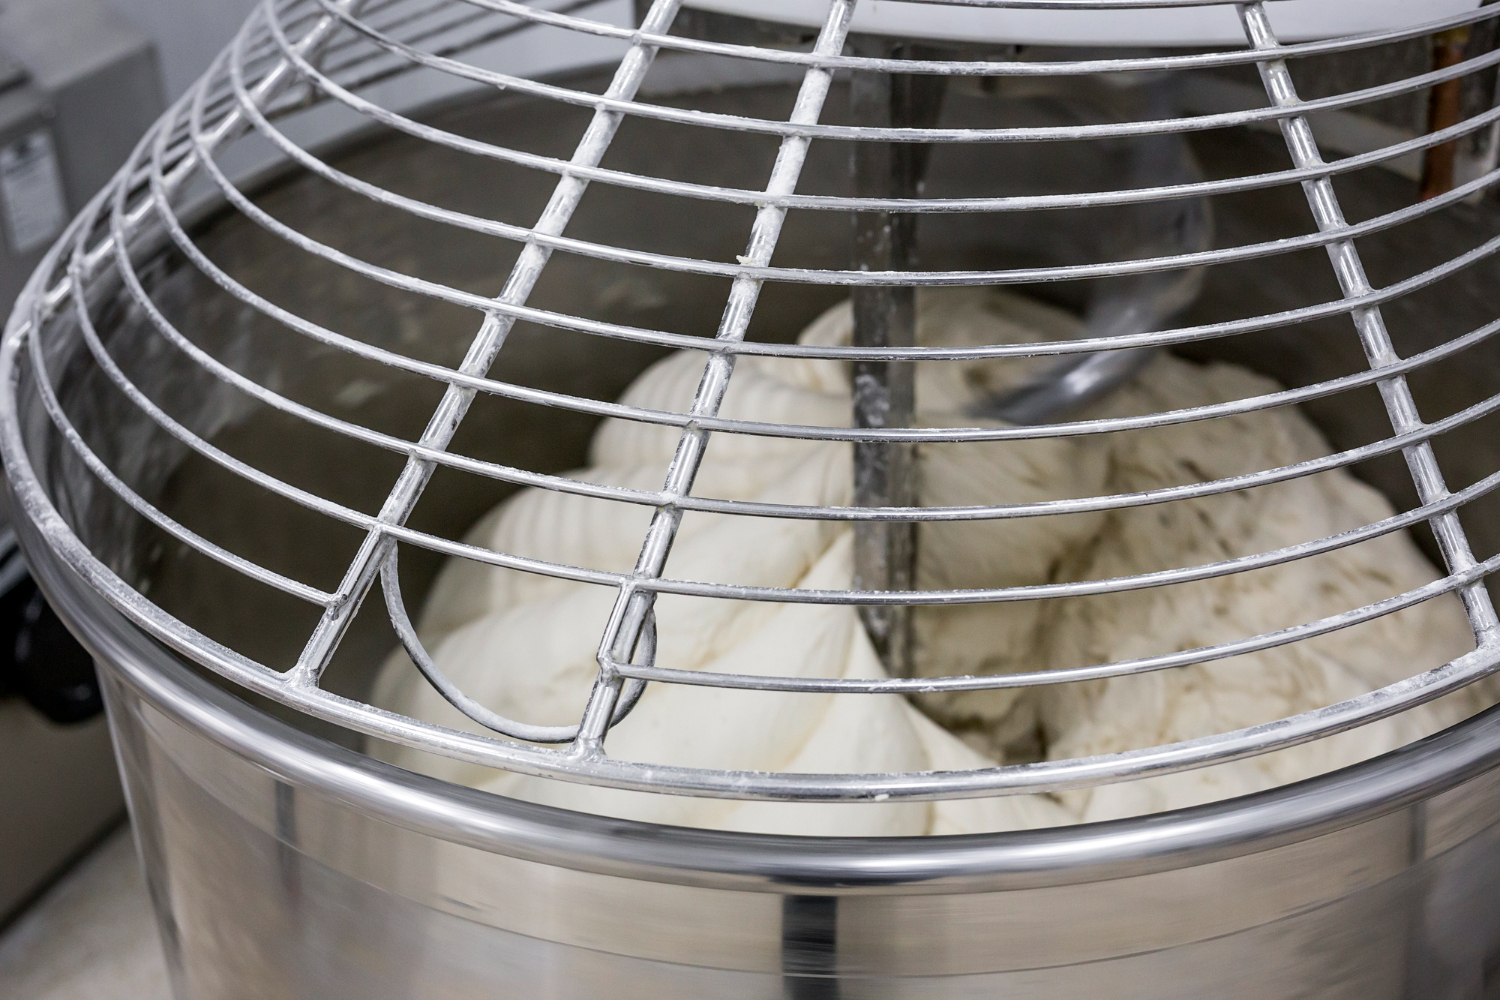
Commercial Mixer Techniques
Spiral mixers are incredibly efficient at developing gluten structure. These machines add more air into the dough and help create a more open crumb structure.
Success with commercial mixers depends on understanding the two-speed system:
- First speed: Use for ingredient incorporation (2-3 minutes)
- Second speed: Reserve for final gluten development (1-3 minutes)
Optimal Speed and Duration
Temperature control is vital during machine mixing. The friction from mixing can raise dough temperature by about 1°C per minute, so we oversee this. For the best results, your dough temperature should stay between 75-78°F (24-25°C).
Stand mixer users should never exceed speed two on the dough hook set – this protects the motor and dough structure. Depending on the mixing phase, spiral mixers typically run at 80-240 RPM.
We’ve found that less is more with machine mixing. Over-mixing can lead to oxidation and reduced flavor, so look for these development signs:
- Dough clearing the sides of the bowl
- Smooth, slightly shiny surface
- Gentle elasticity when pulled
Add flavoring ingredients toward the end of mixing for enriched doughs like sourdough cinnamon rolls. This ensures even distribution without overworking the dough. Clean your equipment immediately after us. The dough becomes more challenging to remove and can affect future batches.
Mastering Dough Development Stages
Creating perfect sourdough bread requires an understanding of dough development stages. This knowledge acts like a map that guides us. We have found that becoming skilled at these stages can turn good bread into exceptional artisan loaves.
Visual Indicators of Progress
Over the last several years of baking, clear visual markers tell us when our sourdough develops properly. The appropriately start right after mixing, and these signs tell us everything we need to know:
- Surface texture becomes smoother and more uniform
- Dough develops a subtle sheenTinyl bubbles of Tinyr on the surface
- Edges become rounder and more defined
- The dough starts to dome slightly in the bowl
Tactile Assessment Methods
Touch gives us the complete picture of dough development. The windowpane test remains our gold standard for checking gluten development. Here’s how we test it effectively:
- Take a small piece of dough (about the size of a ping pong ball)
- Gently stretch it between your fingers
- Hold it up to light – properly developed dough creates a thin, translucent membrane
- Look for even, gradual stretching without immediate tearing
- Check for a smooth, consistent texture throughout
The poke test shows that well-developed dough should slowly spring back and leave a slight indentation. This indicates optimal fermentation and gluten structure.
Common Development Mistakes
Our extensive experience with sourdough reveals several critical errors that can ruin even promising batches. The biggest problem we see is underdevelopment—bakers rush through the process before proper gluten forms. Many cases of overoxidation happen from too much mixing, which bleaches the dough and reduces flavor.
Temperature control is vital. We keep our dough between 75-78°F (24-25°C) to develop optimally. Temperatures outside this range significantly change development time and dough strength.
TI lovespotting the difference between extensibility and elasticity. Our dough should stretch while maintaining enough strength to hold its shape. This perfect balance comes from careful observation and practice.
Dough development needs the right environment and an eye for subtle changes that show progress. These assessment techniques help us consistently achieve that perfect balance of strength and tenderness in our sourdough bread.
Advanced Mixing Strategies
After mastering the simple techniques, you’re ready to explore advanced mixing strategies that will lift your sourdough game. These sophisticated techniques help you achieve that perfect balance of texture and flavor in your artisan loaves.
Autolyze Integration
Proper autolyze integration is the lifeblood of superior dough development. This technique combines flour and water before adding other ingredients; timing makes all the difference. Here’s our proven process:
- Mix flour and water until just combined
- Rest for 30 minutes to 4 hours (longer for whole wheat)
- Monitor dough temperature (ideal: 75-78°F)
- Look for smoothness and slight elasticity
- Add remaining ingredients strategically
Your whole wheat sourdough bread needs an extended autolyze period to allow proper bran hydration. This dramatically improves dough extensibility.
Double Hydration Method
The double hydration method (bassinage) has transformed our approach to high-hydration doughs. We start with a lower hydration mix and gradually incorporate the remaining water. This technique gives you several advantages:
- Better gluten development at initial stages
- Improved dough handling characteristics
- Knowing how to achieve higher final hydration
- More open crumb structure
- Improved dough strength
The second addition needs about 10-15% of the total water, which we add only after developing the original dough strength. This approach works exceptionally well with different flour combinations.
Salt and Levain Addition Timing
Our salt and levain addition strategy comes from the most extensive study. Adding salt after the autolyze period with a small portion of reserved water provides optimal results. The key is timing – we wait approximately 30 minutes after combining our levain with the autolyzed dough before adding salt.
This timing serves multiple purposes:
- Allows proper flour hydration
- Promotes initial fermentation activity
- Creates ideal conditions for gluten development
- Maintains appropriate dough temperature
Whole-grain flours need special attention to keep salt separate during the autolyze phase. This way, the bran gets full access to available water, which leads to better overall dough development.
Temperature control is vital throughout these processes. We keep our dough between 75-78°F (24-25°C) and adjust the water temperature to compensate for friction during mixing. This precise control helps achieve consistent results, especially when applying these advanced techniques in our sourdough mixing process.
Troubleshooting Mixing Challenges
Expert bakers still face mixing challenges with their sourdough. Our years of troubleshooting have yielded reliable solutions for common mixing problems that affect our cherished loaves.
Addressing Under-mixed Dough
Several telltale signs reveal an under-mixed dough:
- Visible flour patches remaining
- Uneven, lumpy texture
- Lack of surface tension
- Poor gluten development
- Inconsistent hydration spots
The windowpane test serves as our first diagnostic step. A dough that tears easily needs additional mixing. Whole wheat sourdough bread’s bran requires extra hydration time, so extending the mixing time by 2-3 minutes often solves these problems.
Fixing Over-mixed Dough
In stark comparison to this common belief, over-mixing doesn’t spell disaster. The dough’s recovery becomes possible through these techniques if it becomes overly sticky or loses structure:
- Rest the dough in the refrigerator for 30-45 minutes
- Reduce hydration by 2-3% if needed
- Perform gentle stretch and folds instead of additional mixing
- Monitor dough temperature closely
- Extend bulk fermentation time slightly
Stand mixer’s higher speeds make the dough more prone to over-mixing, so lower speeds work better.
Environmental Adjustments
Temperature and humidity substantially affect the sourdough mixing process. Warm conditions (above 78°F) require these vital adjustments:
For high temperatures:
- Use cold water in the initial mix
- Reduce mixing time by 10-15%
- Lower the hydration by 2% for every 5°F above optimal
- Keep the sourdough starter at a stiffer consistency
Success in high humidity conditions comes from:
- Reducing overall hydration by 25g increments
- Using less starter (as little as 5-10g) for overnight fermentation
- Monitoring dough consistency more frequently
- Adjusting flour absorption rates accordingly
Optimal results come from maintaining dough temperature between 75-78°F. A thermometer helps monitor both ambient and dough temperatures in challenging environments.
Reducing hydration can solve the problems of weak flour. Water reduction starts at 25g, followed by an assessment of the dough’s strength before further adjustments.
Note that these troubleshooting techniques work best during the early mixing stages. Early problem detection guides better outcomes than attempting corrections in later fermentation phases.
Conclusion
Learning sourdough mixing techniques can turn ordinary bread into exceptional artisan loaves. We’ve explored everything from simple hand mixing to advanced methods like the Rubaud technique and double hydration. Your success depends on proper temperature control, optimal hydration levels, and careful attention to gluten development signs.
Our experience with these techniques proves that great sourdough doesn’t need fancy equipment. Patience, practice, and understanding how your dough responds to different mixing approaches matter most. Through regular practice with these methods, you’ll develop a natural feel for your dough’s needs.
The Yeast We Can Do offers an authentic artisanal sourdough starter to improve your bread and pizza-making skills. Our small-batch starter creates exceptional bread and pizza with perfect tangy flavor and signature crust. This product serves passionate home bakers and restaurant owners who want to add true sourdough’s unmistakable flavor and character to their menu. Your baking can reach new heights today. Contact john@theyeastwecando.com to get your hands on our premium sourdough starter.
Note that each loaf teaches something new about sourdough baking. Start with the fundamentals, perfect one technique at a time, and your confidence will grow along with your bread-making skills. Your perfect sourdough loaf awaits – happy baking!
FAQs
How do professional bakeries produce sourdough bread on a large scale? They often use a modified process for mass-producing sourdough bread. This may include the Chorleywood bread process, which employs carbonated water to create bubbles in the crumb, simulating the effects of traditional proofing. However, artisan bakers focus on traditional methods that involve proper fermentation and gluten development for authentic sourdough flavor and texture.
What are the most effective mixing techniques for sourdough bread? There are several effective mixing techniques for sourdough bread. The article discusses three main methods: the primary hand mixing method, the Rubaud method, and the slap-and-fold technique. Each method has its advantages depending on the hydration level of the dough and the baker’s preference. Machine mixing using stand or commercial mixers is also an option for larger batches or consistent results.
What are the primary approaches to making sourdough bread? The three main approaches to making sourdough bread are the no-knead method, the kneaded method, and the stretch-and-fold method. The no-knead method relies on time for gluten development. In contrast, the added method involves more active manipulation of dough manipulation, and the hod is a popular technique that balances minimal handling with effective gluten development.
Is it possible to over-mix sourdough in a stand mixer? Yes, it is possible to over-mix sourdough in a stand mixer. Over-mixing can damage the gluten structure, resulting in a flat loaf with a tight crumb. To avoid this, mix until the dough becomes elastic and passes the windowpane test. The article recommends mixing in short intervals and never exceeding speed two on the dough hook setting to protect the mixer and the dough structure.
How can I tell if my sourdough is correctly developed during mixing? There are several visual and tactile indicators of proper dough development. Visually, look for a smoother and more uniform surface texture, a subtle sheen, and tiny bubbles appearing on the surface. The dough should also start to dome slightly in the bowl. Tactilely, perform the windowpane test by gently stretching a small piece of dough – properly developed dough should form a thin, translucent membrane without tearing immediately.
What is the autolyze technique, and how does it benefit sourdough mixing? The autolyze technique involves combining flour and water before adding other ingredients, allowing them to rest for 30 minutes to 4 hours. This process improves dough extensibility, especially for whole wheat flour, and enhances overall dough development. It allows for better flour hydration and creates ideal conditions for gluten formation before the addition of adding.
How should I adjust my mixing technique for high-hydration sourdough? The article recommends using the double hydration method (bassinage). This technique involves starting with a lower hydration mix and gradually incorporating the remaining water. It allows for better initial gluten development and improved dough handling. The Rubaud method is also particularly effective for high-hydration doughs, as it helps develop optimal extensibility without overworking the dough.
What should I do if my sourdough is under-mixed or over-mixed? Extend the mixing time for under-mixed dough, especially for whole wheat dough. Perform the windowpane test to check for proper gluten development. For other ver-mixed dough, rest it in the refrigerator for 30-45 minutes, reduce hydration if needed, and perform gentle stretches and folds instead of additional mixing. Constantly monitor dough temperature closely and adjust bulk fermentation time as necessary.