What Your Sourdough Crumb Structure Reveals About Your Baking Skills
The sourdough crumb structure reveals a baker’s skill and deep knowledge of fermentation. Each slice shows significant details about hydration levels, fermentation time, and shaping methods during the baking process. Skilled bakers examine these patterns to review bread quality and spot ways to improve their technique.
Looking closely at crumb characteristics helps bakers solve common problems and refine their methods. The way open and closed crumb patterns interact, hole distribution, and texture quality teach us about fermentation control and dough handling. This knowledge makes shared adjustments possible, leading to consistent and excellent results.
Understanding the Basics of Sourdough Crumb
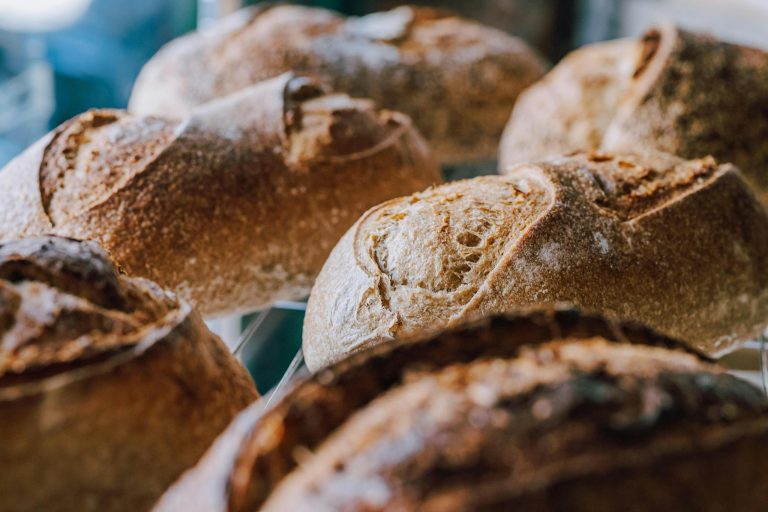
The sourdough crumb shows the bread loaf’s internal texture and structure. It reveals a complex network of holes and patterns that develop as the bread bakes. The crumb structure varies from tight and uniform to open and irregular. Each pattern tells a story about the baker’s skill and technique.
The crumb structure is important, and for good reason. It affects the bread’s texture and how it feels in your mouth, substantially changing your eating experience. Bread with properly spaced holes retains moisture better and stays fresh longer. The fermentation creates unique patterns throughout the loaf, developing complex flavors.
Many connected factors shape the crumb structure. Hydration levels determine the final texture:
- 65-70% – Low hydration, resulting in a closed crumb
- 70-75% – Moderate hydration, beginning to open up
- 75-80% – High hydration, creating an open crumb structure
- 80-90% – Very high hydration, requiring high-protein flour
Fermentation management is a vital part of crumb development. Most of what you see in the final crumb takes shape during bulk fermentation, which builds the dough’s texture and strength. How bakers handle and shape the dough also marks the final crumb pattern.
The type of flour you choose affects the possible crumb structure. Flours with higher protein (11-13%) usually create more open crumb patterns. Whole grain flours make denser structures because of their bran content. Flour type and hydration work together closely – what’s perfect for bread flour might not work with all-purpose flour.
Temperature control and proofing time shape the final crumb structure. The right fermentation temperature creates the perfect environment for gas bubbles, which form the characteristic holes in sourdough bread. Bakers balance these elements carefully to achieve their desired crumb structure, from open artisanal loaves to tighter sandwich breads.
Decoding Different Crumb Structures
The sourdough’s visual language becomes apparent when you examine its distinctive crumb patterns during baking. These patterns tell a story about the intricate relationship between fermentation, hydration, and baking techniques.
Open vs. closed crumb
The difference between open and closed crumb structures goes beyond aesthetic preference. An open crumb showcases well-defined holes throughout the bread, indicating robust fermentation and proper dough strength. Many bakers chase the coveted open crumb, yet a closed crumb structure proves equally desirable, especially when you have sandwich bread or work with whole-grain flour.
Even vs. uneven crumb distribution
The bread’s even crumb distribution is a vital sign of baking expertise. A perfectly baked loaf shows:
- Holes that maintain consistent sizes throughout
- Even spread from the edges to the center
- No dense patches or large empty spaces
Bakers who find uneven distribution can trace it back to specific technical problems. Dense areas surrounding large holes usually mean the dough must be fermented more. The bread’s lacy texture with irregular holes suggests the dough fermented too long.
Hole size and shape analysis
A bread’s crumb structure reveals intricate details about dough handling and fermentation management through its holes’ size and shape. Optimal hole formation happens when fermentation timing lines up perfectly with dough strength. Professional bakers examine holes that maintain a relatively uniform size range, though not similar, which creates what’s often called a “honeycomb” pattern.
Temperature control is vital to hole development. The starter doesn’t properly inoculate the flour at low dough temperatures, which results in fewer openings. High fermentation temperatures can produce a yellow-tinged crust and an overly lacy interior structure. The relationship between hole formation and oven temperature is significant because insufficient heat creates large holes near the crust while the center remains dense.
Common Crumb Issues and What They Indicate
Bakers who study crumb problems can identify and fix issues in their sourdough process. These telltale signs help them make precise adjustments that improve their results.
Signs of underfermentation
Sourdough bread shows clear signs when it needs to ferment more. A gummy, wet texture stands out as the clearest indicator that remains after the bread cools down. The bread’s interior shows an irregular pattern with dense sections next to random large holes. The crust stays pale and won’t brown nicely in the oven or toaster because the dough needs more fermentation.
These signs point to underfermentation:
- The loaf’s sides tear in random places
- A dense, spongy texture that looks like a kitchen sponge
- Big tunnels form at the top while the bottom stays dense
- The loaf feels heavy and appears smaller than normal
Indicators of overfermentation
Experienced bakers can identify fermented dough through its distinct characteristics. The dough’s gluten structure weakens and causes the loaf to collapse. This results in a flatter appearance than desired. A clear sign of overfermentation shows in the separation between crust and crumb. The loaf’s interior reveals predominantly small holes that display ragged edges throughout.
Problems related to shaping technique
Poor shaping technique demonstrates specific patterns within the crumb structure. Insufficient surface tension during shaping guides the dough to spread after removal from the banneton and creates a closed crumb pattern. The dough might develop properly during bulk fermentation but becomes unmanageable during shaping. This often points to overproofing or inadequate dough strength development. The connection between the shaping technique and the final crumb structure becomes apparent, especially when you have high-hydration doughs. Proper handling remains significant in achieving the desired crumb patterns.
Perfecting Your Crumb Structure
The perfect sourdough crumb structure depends on several factors working together. Bakers need to coordinate the proper levels of hydration and fermentation. These techniques combine with proper shaping methods to create their desired results.
Optimizing hydration levels
Perfect crumb structure starts with the right amount of water. Different hydration levels shape unique crumb patterns:
- 65-70% – Beginners achieve consistent results at this level
- 70-75% – This range hits the perfect balance for open crumb
- 75-80% – The dough develops irregular, open patterns
- 80-85% – Bakers need advanced skills at this level
Becoming skilled at bulk fermentation
Bulk fermentation is the lifeblood of proper crumb development. Temperature control is a significant factor, and optimal results typically occur between 74-78°F (23-25°C). Bakers need to watch for specific indicators during this phase.
The dough becomes noticeably smoother and more elastic as fermentation progresses. Signs of proper fermentation show up through a domed surface where the dough meets the container and visible bubbles form throughout the mass. The gluten network strengthens and dough temperature equalizes when bakers perform stretching and folding during this period.
Refining shaping and proofing techniques
Bakers need to create the framework for optimal crumb development through proper shaping. A gentle yet confident touch helps create surface tension without degassing the dough. The pre-shape stage allows you to transform the dough into a more cohesive mass before final shaping.
Your dough should reach 75-80% of its full potential during the final proof. This sweet spot will give enough energy for a proper oven spring and help maintain structural integrity. Temperature management during proofing will substantially affect the final crumb structure. Warmer temperatures speed up fermentation, while cooler temperatures let the dough develop more slowly and predictably.
Your shaping technique and hydration level are vital when working with high-hydration doughs. To protect their delicate gluten network, you should handle these wetter doughs more gently. A bench scraper helps you retain control while minimizing direct contact with sticky dough.
Conclusion
Sourdough crumb structure needs attention to several connected factors, from precise hydration levels to expert fermentation management. Each bread slice tells the baker’s story and shows their decisions. Professional bakers see these patterns as indicators of specific techniques. This knowledge helps them refine their methods and get consistent, quality results through observation and adjustments.
Great sourdough comes from understanding these basic principles and using proper techniques. Quality ingredients combined with technical skills are the foundations for outstanding results. Bakers who want to begin their sourdough experience can raise their bread and pizza making with an authentic artisanal starter from The Yeast We Can Do. Our small-batch starter will help you create exceptional bread and pizza with perfect tangy flavor and signature crust. This applies to passionate home bakers and restaurant owners who want to add true sourdough’s distinct flavor to their menu. You can change your baking by emailing john@theyeastwecando.com to get our premium sourdough starter.
FAQs
What does an ideal sourdough crumb structure look like?
An ideal sourdough crumb structure is often referred to as an “open crumb,” which is highly sought after by many sourdough bakers. This structure features a light and airy texture, indicative of well-fermented, shaped, and baked dough.
What does ‘crumb structure’ mean in baking?
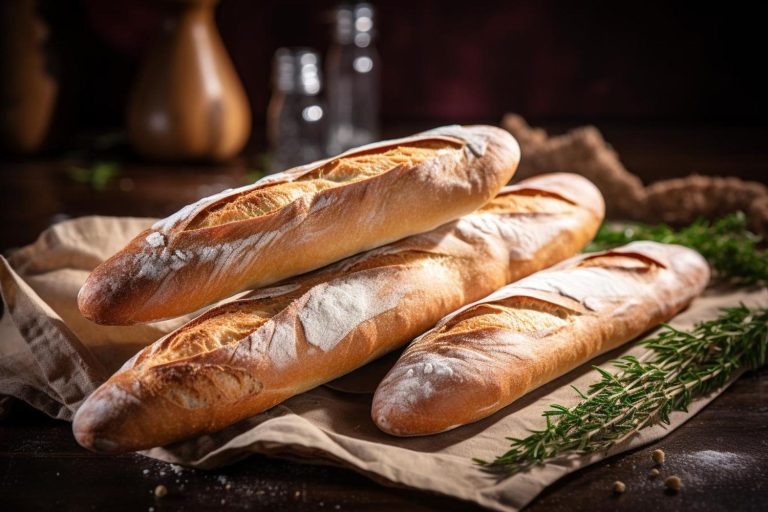
In baking, ‘crumb structure’ refers to the internal texture and quality of a baked product, which varies depending on the type of bread. Sandwich loaves typically have a finer crumb, while French baguettes and croissants feature a more aerated structure. Middle Eastern flatbreads, on the other hand, are known for their dense and finely structured crumb.
What are the essentials for successful baking with sourdough starters?
Successful baking with sourdough starters involves a few essential practices: firstly, stir the starter well before measuring to eliminate air pockets; maintain the starter at room temperature and feed it every 12-24 hours if baking daily, or store it in the refrigerator for less frequent baking.
Why might my sourdough have a dense crumb structure?
A dense or tight crumb in sourdough often results from the dough being too cold, which inhibits the starter from effectively fermenting the flour. Keeping the dough at an optimal temperature, around 75 degrees Fahrenheit, encourages better activity from the starter and leads to a lighter crumb.