How to Create a Simple Sourdough Bread Schedule for Working People
People often think baking sourdough bread takes endless hours in the kitchen. A smart sourdough bread schedule helps busy professionals make great loaves and balance their work life. Success comes from knowing when each step happens and fitting the process into your daily routine.
Our complete guide shows you everything about sourdough baking. You’ll learn about keeping your starter healthy and creating the quickest baking timeline that works. The guide teaches you to prep dough at night and let fermentation happen while you sleep. You’ll also find practical ways to store your starter between bakes and adapt the schedule to your work hours.
Preparing Your Sourdough Starter
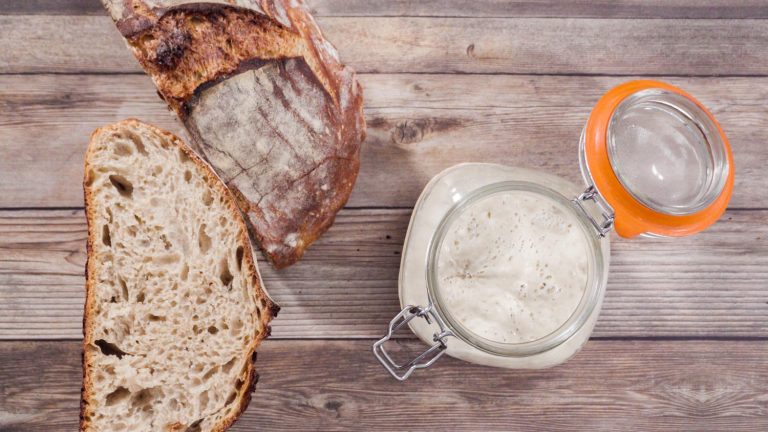
The sourdough starter is essential to make naturally leavened bread. Bakers can get starter cultures from experienced bakers or make their own from scratch. Making a starter is simple – just mix equal parts of flour and water and let the mixture ferment for 7-14 days.
Getting or creating a starter
Bakers can create a starter by mixing equal amounts of unbleached flour and water – 100 grams each. A clean glass or ceramic container works best for this process. The combination of all-purpose and whole wheat flour produces excellent results. Simply cover the mixture with a breathable cloth and make sure to keep it at around 75°F (24°C).
Feeding schedule for optimal activity
A consistent feeding schedule plays a significant role in your starter’s health. This simple feeding ratio table shows the proportions:
| Component | Amount |
|---|---|
| Existing Starter | 20g |
| Fresh Flour | 100g |
| Water | 100g |
Most working professionals find that feeding their starter once daily works well at room temperature. The starter can live in the refrigerator and needs feeding just once per week if you bake less often.
Signs of a healthy starter
A starter that’s managed to keep healthy will show these key signs:
- Doubles in size within 4-6 hours after feeding
- Shows consistent bubbles throughout
- Develops a pleasant, slightly sour aroma
- Forms a dome-shaped surface when peaked
- Passes the “float test” when ready for baking
Your starter’s consistency should be like thick pancake batter. A liquid appearing on top (known as “hooch”) signals hunger and requires feeding. Proper temperature management will give a vigorous starter that’s ready to bake anytime.
Weekend Prep: Setting Up for Success
Successful sourdough baking starts with weekend preparation and a well-laid-out approach will give bakers everything needed to achieve consistent results throughout the week.
Gathering ingredients and equipment
A digital scale is a vital tool to make consistent sourdough bread. You need these items ready before you begin:
| Essential Equipment | Purpose |
|---|---|
| Digital Scale | Precise measurements |
| Glass Jar (500ml) | Starter storage |
| Banneton Basket | Dough proofing |
| Dutch Oven | Steam creation |
| Dough Scraper | Handling dough |
| Parchment Paper | Transfer support |
Creating a baking timeline
The sourdough bread schedule changes with your kitchen’s temperature and daily commitments. Bakers should align their bulk fermentation with their daily schedule to achieve the best results. A typical weekend baking plan looks like this:
- Saturday morning: Feed starter and gather supplies
- Saturday afternoon: Mix dough and monitor bulk fermentation
- Saturday evening: Shape and cold proof
- Sunday morning: Final bake
Prepping your workspace
A clean workspace that streamlines processes leads to better results. Bakers should get their area ready with these points in mind:
- Pick a warm spot to manage dough temperature
- Make room on the counter to mix and shape
- Create a specific space for tools and ingredients
- Keep equipment within arm’s reach
- Make sure you have good lighting to watch dough development
Temperature management plays a significant role in fermentation. Bakers need to find warm spots in their kitchen’s layout. The ideal temperature range stays between 68-72°F (20-22°C) for optimal bulk fermentation. You can create perfect conditions with a proofing box or by using a turned-off oven with its light on when room temperature changes.
Weekday Baking: A Step-by-Step Guide
Making delicious sourdough bread on weekdays depends on careful timing and temperature control. A baker’s success comes from the bulk retardation technique that allows dough to ferment overnight under controlled conditions.
Evening dough preparation
Bakers start their dough preparation after their workday, usually between 5:00 PM and 7:00 PM. Here’s the evening schedule to follow:
| Time | Activity |
|---|---|
| 5:00 PM | Mix dough and begin autolyze |
| 5:30 PM | Add salt and perform first fold |
| 6:00 PM | Second stretch and fold |
| 6:30 PM | Final stretch and fold |
| 7:00 PM | Begin bulk fermentation |
Overnight fermentation techniques
Temperature control plays a significant role in successful overnight fermentation. Your dough needs these specific conditions:
- Keep at room temperature (68-72°F) for the original 2-3 hours
- Move to refrigeration (38-40°F) for the remaining overnight period
- Maintain steady temperature without changes
- Cover with plastic to protect from drafts
The bulk retardation process helps develop complex flavors in your dough and prevents over-fermentation. This method works great especially when you have a busy schedule and can’t watch your dough all day.
Morning shaping and baking routine
Your final phase starts about an hour to 90 minutes before you head to work. Start by preheating the oven to 450°F (230°C) with the Dutch oven inside. Take your dough out of the refrigerator and complete the final shaping as the oven heats up.
The dough needs 20-60 minutes of rest after shaping, which you can adjust based on your morning schedule. Make decisive cuts to score the dough and transfer it carefully to your preheated Dutch oven. The bread bakes for about 20 minutes with the lid on. Remove the lid and bake for another 10-15 minutes until you achieve the perfect crust color.
These simplified processes help working professionals enjoy fresh sourdough bread without disrupting their daily schedule. The cold fermentation not only fits busy lifestyles but also creates better flavors and makes the final loaf easier to digest.
Maintaining Your Sourdough Routine
A sourdough routine needs proper storage methods and feeding schedules that adapt to different lifestyles. Your starter management will give reliable results for every bake, whatever your work schedules or time constraints.
Storing your starter between bakes
Your chosen storage method will affect how often you need to feed and maintain your starter. Here’s a complete guide to storage options:
| Storage Method | Feeding Frequency | Maximum Storage Time |
|---|---|---|
| Room Temperature | Every 24 hours | 2-3 days |
| Refrigeration | Weekly | 3 weeks |
| Freezing | Upon revival | 6 months |
| Dehydration | Upon revival | 1 year |
Your starter needs feeding before it goes into the refrigerator. Keep it in an airtight container during storage. You might notice a gray liquid (hooch) on top that suggests your starter is hungry. Simply discard this liquid before the next feeding.
Adjusting schedules for different work shifts
Different work patterns affect sourdough bread schedules by a lot. Night shift bakers can keep their starter healthy through these steps:
- Take the starter out and feed it before leaving for work
- Let the fermentation happen during work time
- Work with the dough after coming home
- Use cold fermentation while sleeping
Temperature management makes all the difference. Fermentation slows down in cool conditions and speeds up when it’s warm. Bakers should match their feeding amounts to room temperature and their work schedule.
Incorporating sourdough into your lifestyle
A well-planned sourdough routine needs careful attention and regular maintenance. Your starter demands daily care, just like a pet needs feeding and attention. Successful bakers should follow these guidelines:
- Keep a backup culture in the refrigerator
- Maintain a feeding log to track activity
- Monitor pH levels for optimal health (4-5 range)
- Use clean utensils and containers
- Store cultures at consistent temperatures (60-70°F)
Bakers can extend their starter’s storage life during long breaks. The process involves reducing the starter amount and using a larger feed ratio (e.g., 25g starter to 400g feed) before refrigeration. Your starter can stay healthy for up to a month without attention this way.
Temperature control plays a significant role in your starter’s activity. Many home bakers choose to refrigerate their starter between baking sessions and take it out the day before use. This simple approach gives you flexibility and ensures your starter stays ready for future bakes.
Conclusion
Proper planning and smart timing reshape the scene of sourdough bread baking. What seems impossible becomes a daily routine for working professionals. Temperature management is the life-blood of successful fermentation. Overnight retardation adds flexibility that busy schedules need. These techniques work together with consistent starter maintenance. Bakers can produce high-quality artisanal loaves without compromising their professional commitments.
Quality sourdough requires the right foundation and proper techniques throughout the process. Home bakers and restaurant owners want to create exceptional bread and pizza with authentic tangy flavor. They can start their experience with a premium sourdough starter from The Yeast We Can Do. A simple email to john@theyeastwecando.com provides this essential foundation. Regular feeding schedules combine with proper storage methods and temperature control. These practices ensure reliable results and make sourdough baking an environmentally responsible part of any lifestyle.
FAQs
What is the ideal feeding schedule for a sourdough starter?
To maintain a sourdough starter at room temperature, it should be fed equal parts of water and flour every 12-24 hours. The exact frequency depends on the room temperature; warmer environments might require feeding every 12 hours, while cooler ones might suffice with every 24 hours. If stored in the refrigerator, the starter generally needs feeding once a week.
How can I integrate yeast bread baking into a hectic lifestyle?
Opt for a no-knead bread recipe which minimizes active involvement. Simply mix the ingredients and allow the dough to rise slowly, typically overnight. This method requires minimal hands-on time, making it ideal for busy schedules.
What are some serving suggestions for sourdough bread at social gatherings?
Sourdough bread can be served sliced with a variety of accompaniments such as butter, cheese spreads, and a mix of olive oil with balsamic vinegar and spices. Offering different flavored butters or oils can enhance the experience.
Can you outline a basic timeline for preparing sourdough bread?
A typical sourdough bread preparation might look like this: Start the levain at 8:00 a.m., begin autolyze by 12:00 p.m., mix ingredients by 1:00 p.m., allow for bulk fermentation from 1:10 p.m. to 5:10 p.m., divide and preshape at 5:15 p.m., shape by 5:35 p.m., rest and proof from 5:40 p.m. to 9:30 a.m. the following day, and finally bake the next morning starting with preheating the oven at 8:30 a.m. and baking at 9:30 a.m.
How can I maintain a sourdough baking routine with a strict 9-5 job?
Adjusting your sourdough routine to fit a 9-5 schedule might involve preparing the starter the night before and letting the dough ferment overnight. In the morning, shape and bake the bread. Alternatively, consider simpler recipes like pizza dough that can be refrigerated and used as needed, which accommodates a tighter schedule without early mornings or late nights dedicated to baking.