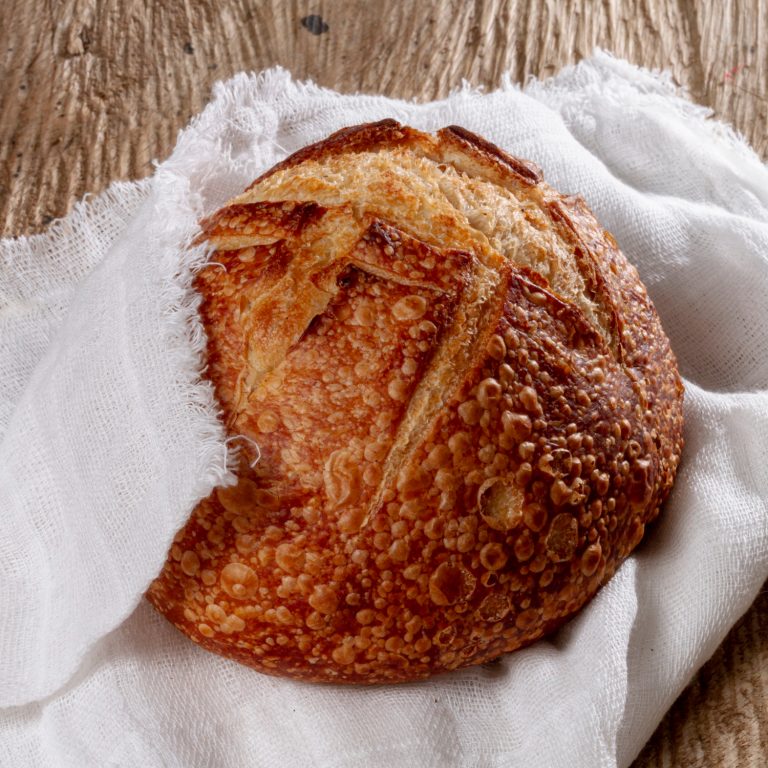
How to Make Simple Whole Wheat Sourdough: A Beginner’s Recipe
Whole wheat sourdough bread brings together whole grain flour’s nutritional benefits with natural fermentation’s digestive advantages. Bakers can create a healthier alternative to conventional bread and become skilled at artisanal bread making basics with this whole wheat sourdough recipe. Health-conscious home bakers love whole wheat sourdough because it offers complex flavors, better digestibility, and more available nutrients.
This piece guides readers step by step to make successful whole wheat sourdough bread, starting from building a strong starter all the way to getting that perfect crust. You’ll discover everything about proper hydration levels, quickest ways to knead, and optimal proofing times that work best with whole wheat flour. Bakers often face common challenges with whole wheat flour, so we’ve included practical tips to help you achieve consistent results.
Understanding Whole Wheat Flour in Sourdough
Whole wheat flour behaves uniquely when used in sourdough baking. The flour’s composition substantially affects your baking process and the quality of your final bread.
Benefits of whole wheat
Whole wheat flour brings together all parts of the wheat berry that includes the bran, germ, and endosperm. These three components work together to create amazing benefits:
- Rich in nutrients: Your body gets B vitamins, iron, copper, zinc, magnesium, and antioxidants
- Higher fiber content: You feel fuller longer and your digestion works better
- Complex flavor profile: The taste ranges from sweet caramel notes to earthy undertones
- Better fermentation: Your starter gets more nutrients to work with
- Natural preservation: The flour’s beneficial compounds help your bread last longer
Challenges with 100% whole wheat
Whole wheat flour creates unique challenges that bakers must understand. Bran and germ’s presence affects gluten development because these components interfere with gluten strand formation. The flour needs more water than white flour, so bakers need to adjust hydration carefully.
Whole wheat’s rich nutrients guide fermentation to become more active, which makes timing a vital part of bulk fermentation. Bakers should focus on the dough’s behavior instead of time, because whole wheat doughs overferment quickly. The dough’s volume remains a tough challenge to master, as bran particles disrupt the gluten network’s proper formation.
Ideal flour ratios
The perfect sourdough needs the right balance of whole wheat and bread flour. Most bakers use a 50/50 ratio of whole wheat to bread flour that delivers these benefits:
| Flour Type | Percentage | Purpose |
|---|---|---|
| Whole Wheat | 50% | Nutrition and flavor |
| Bread Flour | 50% | Structure and rise |
This blend preserves nutritional benefits and creates better dough handling properties. Beginners should start with this ratio to understand how the dough behaves. As bakers become more confident, they can adjust the whole wheat percentage based on their skill level and priorities.
Bread flour creates a stronger gluten network that leads to better rise and more open crumb structure. Stoneground whole wheat flour brings deeper, more complex flavors than roller-milled options, though both varieties produce excellent sourdough loaves.
Creating and Maintaining Your Sourdough Starter
Your whole wheat sourdough starter is the foundation of exceptional bread baking. This process needs attention to detail and a simple understanding of fermentation, but your efforts will be rewarded.
Making a whole wheat starter
A whole wheat sourdough starter needs just two basic ingredients: whole wheat flour and water. The entire process takes 7-14 days and requires daily attention. You should mix 60g whole wheat flour with 60g water in a clean container at a temperature of 75°F (24°C). This mixture will develop natural yeasts and beneficial bacteria from the surrounding environment.
Feeding schedule
A healthy starter needs regular feeding to stay strong. Your feeding schedule will change based on where you store it and how often you bake:
| Storage Method | Feeding Frequency | Temperature Range |
|---|---|---|
| Room Temperature | Every 12-24 hours | 68-78°F (20-26°C) |
| Refrigerated | Once weekly | 38-40°F (3-4°C) |
You should follow these measurements to feed your starter:
- 20g mature starter
- 100g flour (70g bread flour, 30g whole wheat)
- 100g water
This 1:5:5 ratio keeps fermentation active and prevents too much acid from building up. You can slow down fermentation by using just 5g of mature starter when temperatures rise during summer months.
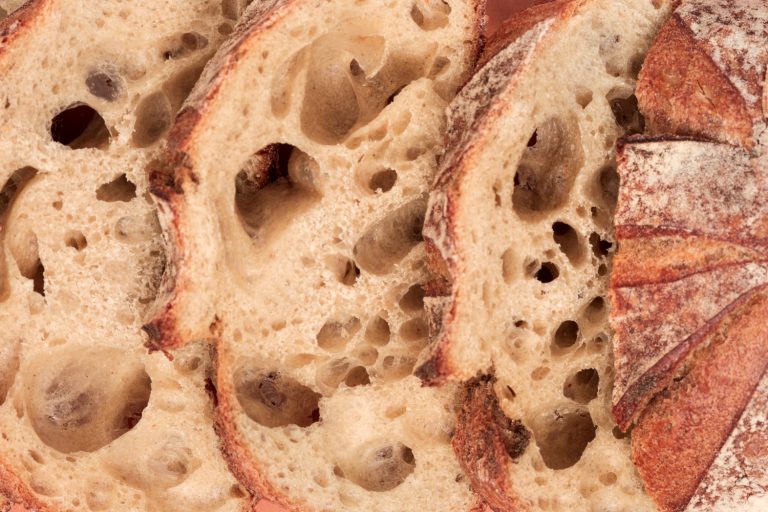
Signs of a healthy starter
A properly managed whole wheat sourdough starter shows distinct characteristics that indicate its readiness to bake:
- Visual Indicators:
- Doubles in size within 4-6 hours
- Consistent bubble formation throughout
- Domed surface when peaked
- Honeycomb structure visible from jar sides
Your starter’s aroma should be pleasantly sour with sweet undertones, never acetone-like or unpleasantly sharp. The texture resembles thick pancake batter after feeding and becomes more elastic and aerated at its peak.
Temperature plays a significant role in your starter’s behavior. The dough needs consistent warmth around 75°F (24°C) to promote reliable fermentation cycles. You can use an oven with the light on or a proofing box to create optimal conditions, especially in cooler environments.
Refrigeration works well to store your starter long-term. The starter needs 2-3 feeding cycles at room temperature before you use it in bread making. This process will give a proper fermentation strength to help your bread rise successfully.
Mixing and Developing the Dough
A gluten network development plays a significant role in creating exceptional whole wheat sourdough bread. The bread’s final structure and texture depend on proper mixing and development techniques.
Autolyze technique
The autolyze process plays a significant first step in dough development. Bakers combine whole wheat flour and water and let them rest for 20-60 minutes before adding the starter and salt. This straightforward method brings multiple benefits:
- Boosts flour hydration and gluten development
- Reduces required kneading time
- Improves dough extensibility
- Preserves carotenoid pigments for better flavor
- Creates smoother, more manageable dough
Whole wheat sourdough needs an autolyze period of 30-45 minutes. The dough might develop excessive enzyme activity if left longer, especially when you have freshly milled flour.
Incorporating the starter
The baker adds the active sourdough starter into the dough after the autolyze period. Saving 20g of water from the original mix helps dissolve the starter before mixing it in. Both the starter and dough need temperatures between 75-78°F (24-26°C) for the best fermentation results.
Gentle handling preserves the developed gluten structure during mixing. The baker’s hands should stay wet to avoid sticking while they stretch and fold the starter into the dough smoothly.
Kneading vs. no-knead methods
You can develop whole wheat sourdough using different methods, and each comes with its own benefits:
| Method | Time Investment | Technique Level | Best For |
|---|---|---|---|
| Traditional Kneading | 10-15 minutes | Intermediate | Quick development |
| Stretch and Fold | 2-3 hours | Beginner | Better structure |
| No-Knead | 12-18 hours | Simple | Minimal handling |
The stretch and fold technique works great with whole wheat sourdough, and you’ll need four sets of folds with 30-minute gaps between them. This method builds strength in your dough while protecting its integrity – a crucial factor when you’re dealing with whole wheat flour’s bran particles.
The no-knead method needs longer bulk fermentation time to let enzymes naturally develop the gluten. Your dough temperature should stay between 68-72°F (20-22°C) throughout the process.
Whatever method you pick, your dough will show these signs of proper development:
- A smoother and more cohesive texture
- Better elasticity
- Window pane test confirms good gluten formation
- Better surface tension as you handle it
Temperature makes a big difference in how your dough develops. It affects both fermentation speed and gluten formation. A steady room temperature helps you get consistent results, especially when you have whole wheat flour with its higher enzyme activity.
Mastering the Bulk Fermentation
Bulk fermentation is the most important phase that gives whole wheat sourdough its unique flavor and structure. The dough transforms naturally when bakers control temperature and handle it properly.
Temperature considerations
Optimal temperature conditions determine the success of bulk fermentation. A dough temperature between 75°F to 78°F (24°C to 25°C) creates perfect conditions for fermentation activity. Temperature variations can substantially affect fermentation speed, so bakers must monitor the dough temperature throughout the process:
| Temperature Range | Fermentation Speed | Adjustment Needed |
|---|---|---|
| Below 70°F (21°C) | Very slow | Extend bulk time |
| 75-78°F (24-25°C) | Optimal | Standard timing |
| Above 82°F (28°C) | Too fast | Reduce bulk time |
Whole wheat sourdough that ferments too quickly needs placement in a cooler spot or refrigeration for 15-30 minutes to regulate the process. A sluggish dough works better in a warmer location.
Stretch and fold technique
The stretch and fold method plays several key roles in whole wheat sourdough development during bulk fermentation. Bakers perform this technique at 30-minute intervals. Each set includes four folds that follow cardinal directions.
This technique makes the dough structure stronger and helps maintain even temperature throughout. The process adds air to achieve better volume and lets bakers get a full picture of fermentation progress.
Whole wheat sourdough usually needs three to five sets to reach adequate strength. The original dough strength and flour composition determine the exact number needed. Movements should remain gentle but decisive to protect the developing gluten network from tears.
Judging fermentation progress
Successful bulk fermentation depends on several key indicators. Whole wheat sourdough usually takes 3-3.5 hours to ferment properly, but environmental conditions can affect this timeline. Bakers need to watch for these signs:
Visual Indicators:
- The dough expands by 30-40%
- A smooth surface develops with a slight shine
- Edges form a dome where the dough touches the container
- Bubbles appear throughout the dough
Tactile Assessment:
- The dough becomes elastic and strong
- Surface texture turns smooth instead of rough
- The container’s contents move with a light jiggle
- The dough stays in shape during handling
Temperature control is a vital part of bulk fermentation. Bakers should use an instant-read thermometer between stretch and fold sessions to ensure ideal conditions. Whole wheat sourdough performs better at slightly lower temperatures between 24°C-26°C because whole grain flour shows increased enzymatic activity.
Your dough needs to show clear fermentation signs without becoming too puffy or loose. White flour doughs might show more dramatic volume changes, but whole wheat sourdough’s transformation during bulk fermentation remains subtle.
Shaping and Proofing Your Loaf
The right shaping and proofing techniques change whole wheat sourdough into beautiful, professional-looking loaves. These significant steps need attention to detail and understanding because whole wheat dough behaves differently from conventional sourdough.
Pre-shape and bench rest
Bakers start the pre-shaping process right after bulk fermentation. The dough’s proper development and strength signal the right moment. They should scrape the dough onto a clean work surface with care to protect the gas bubbles that have developed. A bench knife and slightly wet hands help create loose rounds through gentle folding movements.
The dough needs 30-45 minutes to rest and prepare for its final shape. Leaving it uncovered at this time makes the surface dry slightly and makes the final shaping easier to handle.
Final shaping for whole wheat dough
Whole wheat sourdough needs specific shaping techniques to get the best results. Rice flour application in your banneton plays a significant role to prevent sticking. You can choose between two methods that work well:
Simple Method:
- Pull and roll the dough to create tension with easy movements
- A bench scraper helps tuck edges into a round shape
- Handle the dough gently to keep fermentation intact
Advanced Method:
- Stretch carefully to create a larger surface area
- Use the stitching technique to build better structure
- Roll and shape to develop more tension
Your chosen method should create a tight outer skin that supports proper oven spring. The dough’s surface needs smooth, decisive movements that build tension without tears.
Proofing methods and timing
Your whole wheat sourdough needs careful attention to temperature and timing. These indicators will help you determine if your dough has proofed correctly:
| Proofing Stage | Characteristics | Action Required |
|---|---|---|
| Under-proofed | Firm dough, rapid spring-back | Continue proofing |
| Properly proofed | Slow spring-back, slight indent remains | Ready to bake |
| Over-proofed | Permanent indentation, weak structure | Reduce proof time |
Cold fermentation works especially when you have whole wheat sourdough. The process usually takes 10-14 hours at 38°F (3°C). This method will:
- Boost flavor development
- Improve dough handling characteristics
- Extend shelf life
- Make scoring easier
Whole wheat dough behaves differently from white flour varieties, so you’ll need to adjust the traditional finger-poke test. The dough’s overall feel and appearance matter more than just the indentation response. A properly proofed dough feels alive and puffy with a slight dome.
You should keep the temperature steady during proofing. A clear plastic bag over the banneton prevents the surface from drying. The right combination of shaping tension and controlled proofing conditions substantially affects your bread’s final quality. This becomes crucial with whole wheat flour’s unique characteristics.
Baking the Perfect Whole Wheat Sourdough
Perfect whole wheat sourdough bread just needs precise temperature control and careful attention to detail in its final stage. A hot oven and proper scoring techniques will turn a well-proofed loaf into an artisanal masterpiece.
Oven setup for home bakers
The perfect baking environment needs good equipment and the right temperature control. A Dutch oven or challenger bread pan works best to create steam that helps develop a great crust. Here’s how the baking temperature should flow:
| Stage | Temperature | Duration | Purpose |
|---|---|---|---|
| Preheating | 500°F (260°C) | 45-60 min | Heat Dutch oven thoroughly |
| Initial bake | 475°F (246°C) | 20 min | Create steam (lid on) |
| Final bake | 450°F (232°C) | 20-25 min | Develop crust (lid off) |
Your Dutch oven should sit on the center rack while preheating. Steam generation gets better when you spray water (about 15 sprays) on the Dutch oven’s lid before closing it. You can also drop in some ice cubes instead.
Scoring patterns for whole wheat
A sharp razor blade, bread lame, or ultra-sharp knife makes beautiful scoring patterns on whole wheat sourdough bread. Professional results depend on the right tools and proper techniques. Bakers need these preparations:
- Rice flour dusting creates visual contrast on the loaf surface
- Cold dough produces cleaner cuts
- Scoring tools should stay within arm’s reach
- Parchment paper underneath makes loaf transfer easy
Different patterns need specific cutting depths:
- Expansion scores: A 1/2 inch deep cut lets the bread expand properly
- Artistic scores: Decorative patterns work best with 1/4 inch shallow cuts
Quick and confident movements lead to successful scoring. The bread should move straight to the preheated Dutch oven after completing the scoring pattern. This prevents the dough from spreading and maintains its shape perfectly.
Cooling and storing your bread
Your bread’s texture and shelf life depend on proper cooling and storage. Whole wheat sourdough needs extra care during these final steps:
Cooling Process:
Let your bread cool on a wire rack for at least an hour before cutting. This vital step allows:
- Internal structure stabilization
- Moisture redistribution
- Crust development
- Flavor improvement
Storage Options:
You can store whole wheat sourdough several ways depending on how you plan to use it:
Short-term Storage (2-3 days):
- Room temperature storage in a bread box works well
- The original Dutch oven with a slightly open lid does the job
- Clean kitchen towels or linen bread bags protect the loaf
Long-term Storage:
- Wrap whole loaves in plastic and seal them in freezer bags before freezing
- Cut the bread into slices before freezing for easy portions
- Frozen bread stays good for up to 3 months
- Move it to the fridge overnight to thaw
Sourdough’s natural acidity helps fight mold, keeping your loaf fresh for 5-7 days with proper storage. Skip the refrigerator as it makes bread go stale faster. The freezer remains your best bet for longer storage.
Climate plays a big role in choosing the right storage method. Humid weather might mean more frequent freezing or shorter counter storage. Dry climates need sealed containers to keep moisture in.
Frozen bread comes back to life after 15-20 minutes at 300°F (150°C), giving you a crispy crust and fresh interior. Whole wheat sourdough tastes even better 2-3 days after baking, especially loaves with more whole grain flour.
Conclusion
Whole wheat sourdough bread making just needs careful attention during several significant stages. Each step builds on the previous one. You’ll progress from creating a vigorous starter to getting that perfect bake through precise temperature control and timing. Bakers who practice patiently with the right techniques create nutritious, flavorful loaves with reliable crusts and well-developed crumb structures. Your success depends on knowing whole wheat flour’s unique traits and adjusting traditional sourdough methods.
Baking whole wheat sourdough at home provides excellent nutritional benefits and connects you to age-old bread-making traditions. The Yeast We Can Do’s authentic artisanal sourdough starter helps passionate home bakers and restaurant owners create exceptional bread and pizza with perfect tangy flavor and signature crust. Quality ingredients and proper knowledge enable any dedicated baker to make professional-grade whole wheat sourdough that beats commercial options in flavor and nutrition. Ready to start? Email john@theyeastwecando.com to get your premium starter.