How to Scale Up Bakery Sourdough Bread Production: From 5 to 25 Loaves Daily
Small-scale bakers have discovered new opportunities because customers need authentic artisan bread. Many bakeries need help scaling up their sourdough bread production. They must maintain their bread’s high quality and distinctive flavor, which customers love. This transition works best with careful planning and systematic adjustments to current processes.
Success depends on mastering several vital elements. Bakers should perfect dough hydration, controlled fermentation, and consistent proofing techniques. This piece explains everything in increasing daily production from 5 to 25 loaves. You’ll learn about equipment upgrades, starter maintenance, batch mixing methods, and the quickest way to schedule baking. Each section offers practical tips that help maintain your bread’s artisan quality as you grow.
Preparing Your Equipment and Workspace
Sourdough bread production scaling demands smart equipment upgrades and an organized workspace. Your production capacity grows with the right equipment selection. A thoughtful workspace layout and proper tools are the foundations of successful scaling operations.
Upgrading your oven capacity
Professional bakery production needs reliable ovens with consistent temperatures and proper steam levels. A quality convection oven should have precise temperature control between 190-450°F. This temperature range helps you achieve an excellent oven spring and develop perfect crusts. Bakers should think about ovens with built-in steam injection systems. Small operations can also use multiple Dutch ovens. The Doyon JAOP3 Jet Air Oven/Proofer combination works great for growing operations. Deck ovens retain heat better and work best for artisan bread production.
Investing in more giant mixing bowls and containers
Quality mixing equipment plays a significant role in production scaling. Professional bakers need commercial-grade stainless steel mixing bowls of different sizes:
- Primary mixing bowls (20-60 quart capacity)
- Secondary containers for bulk fermentation
- Multiple proofing baskets or bannetons
- Storage containers for ingredients
- Cooling racks and storage bins
Vollrath’s stainless steel mixing bowls are a reliable choice. Their flat-bottom design provides stability during mixing and fermentation processes, and their durability makes them perfect for commercial use.
Setting up an efficient production line
A well-laid-out workspace affects production efficiency and product consistency. The kitchen layout should flow logically from mixing to shaping to baking. Timing is significant in a busy bakery, and a structured workspace helps you maintain proper scheduling and quality standards.
Your production process becomes smoother with designated zones for different activities:
- A mixing and fermentation area that provides quick access to ingredients
- A shaping station with enough counter space
- A temperature-controlled proofing area
- A baking station with an organized oven system
- A dedicated cooling and storage zone
Stackable containers and clear storage solutions help you maximize vertical space while keeping ingredients available. The practice of mise en place proves valuable as production scales up. This ensures tools and ingredients remain ready at each station.
Temperature control across the workspace determines consistent fermentation results. A proofing box, such as the Brød and Taylor folding model, maintains stable conditions for multiple batches. Managing increased production volumes where precise timing and temperature affect product quality becomes essential.
Scaling Up Your Sourdough Starter
Scaling up sourdough starter production requires precise calculations and systematic management that helps maintain consistency in larger batches. The starter you manage to stay healthy becomes the cornerstone of quality bakery sourdough bread production.
Increasing starter volume gradually
Success in scaling depends on proper ratio maintenance as you increase volume. Bakers achieve consistent results with a 1:2:2 ratio (starter:flour: water) during standard production increases. The 1:3:3 ratio works better when more significant volume jumps are needed. Let’s look at a practical example of scaling up from 50g to 200g of starter:
- Use 50g mature starter
- Add 100g flour
- Add 100g water
The process yields 250g total, which gives you 200g for production and leaves 50g for future batches.
Maintaining starter health in more significant quantities
Monitoring your starter’s health becomes significant as production scales up. Your healthy starter should display these indicators when working with larger volumes:
- Volume doubles between 4-6 hours
- Bubble formation remains consistent
- Hydration level stays balanced
- Peak times follow a predictable pattern
- Fermentation activity remains reliable
Temperature control is vital to your starter’s health. Active fermentation requires a temperature range of 20-30°C (68-86°F). Temperature-controlled storage containers help maintain consistent activity levels for larger quantities.
Proper feeding schedule for higher production
Your production volume will determine how often you need to feed your starter. Here’s a simple guide based on daily output:
| Production Level | Feeding Schedule | Starter Amount |
|---|---|---|
| 5-10 loaves | Every 24 hours | 500g-1kg |
| 11-15 loaves | Every 12 hours | 1kg-1.5kg |
| 16-25 loaves | Every 8-12 hours | 1.5kg-2kg |
Bakers must keep their starter at 100% hydration (equal parts flour and water by weight) to get reliable results. The starter works best at peak activity, usually 4-6 hours after feeding in warm conditions.
Cold fermentation makes handling larger quantities easier. If you store portions in the refrigerator at four °C (39°F), your starter stays healthy, which helps you plan production better. Remember that a refrigerated starter needs two to three feeding cycles at room temperature before it’s ready for large-batch baking.
The best results come from preparing your scaled-up starter a day before baking. This gives enough time for fermentation and peak activity to develop. Your customers will get consistent-quality sourdough loaves with all the distinctive characteristics they expect.
Batch Mixing Techniques
When scaling their sourdough bread production, bakers must become skilled at batch-mixing techniques. Quality control becomes significant during this process. The baker must maintain precise calculations and consistent methods while controlling temperature carefully to ensure product quality in larger batches.
Ingredient ratios for larger batches
Scaling ingredients correctly will give consistent results when making multiple loaves. A baker’s percentage system helps bakers calculate amounts reliably. Here’s how to scale a recipe from 2 to 25 loaves:
| Component | Base Recipe (2 loaves) | Scaled Recipe (25 loaves) |
|---|---|---|
| Flour | 1000g (100%) | 12500g (100%) |
| Water | 700g (70%) | 8750g (70%) |
| Starter | 225g (22.5%) | 2812g (22.5%) |
| Salt | 20g (2%) | 250g (2%) |
The quickest way to mix consistently
The mixing process demands close attention to both technique and timing for larger batches. Bakers achieve the best results through a specific sequence. The process starts with autolyzing flour and water for 20-30 minutes. The next step involves adding starter and salt in small amounts after the autolyze period. Mix everything at the first speed for 4-5 minutes and check the dough’s strength before moving forward. Second speed becomes necessary only in specific cases and should be 3-5 minutes at most.
Large-quantity mixing works better when the total batch is split into smaller portions. Most commercial mixers perform best with a maximum of 20-25kg per mix. This approach ensures proper gluten development and protects the equipment from strain.
Managing dough temperature in bigger batches
Temperature control plays a vital role as production scales up. Your final dough temperature should stay between 75-78°F (24-25°C). Several factors affect dough temperature, and bakers need to oversee these.
Larger batches create more heat from mixing friction. Bakers adjust their water temperature with the Desired Dough Temperature (DDT) formula to balance this out. Calculating the target temperature of 78°F (25°C) requires considering room temperature, flour temperature, and friction.
Professional bakers check the dough temperature at three significant points:
- After the first mix
- During bulk fermentation
- Before they divide the dough
The mixing process works best with room temperature between 68-72°F (20-22°C). Hot dough needs 15-30 minutes in a temperature-controlled space before bulk fermentation starts. This helps achieve consistent results.
Bulk Fermentation Strategies
Bulk fermentation is critical when bakeries scale up their sourdough bread production. Time, temperature, and space management lead to consistent results. Success depends on choosing suitable containers and maintaining proper environmental conditions that allow large volumes of dough to ferment evenly.
Using larger containers for bulk fermentation
The choice of containers for bulk fermentation affects dough development and helps streamline processes in the workspace. Professional bakers should select their containers based on total dough weight and desired batch size:
| Dough Weight | Container Size | Material Recommendation |
|---|---|---|
| 2-4 kg | 6L | Food-grade plastic |
| 5-8 kg | 12L | Polycarbonate |
| 9-15 kg | 22L | Commercial grade |
Container material plays a crucial role in temperature retention and fermentation consistency. Thick-walled containers effectively provide more stable temperatures, while thin-walled vessels respond quickly to ambient conditions. The best results come from containers that give the dough enough space to rise 30-50% without overflow.
Monitoring fermentation progress
Professional bakers track multiple indicators that show proper dough development during bulk fermentation.
- The dough’s volume increases by 20-50% based on flour type
- Surface texture transforms from shaggy to smooth
- Dough strength and elasticity build up gradually
- Small bubbles appear on the surface
- Dough’s edges develop distinct characteristics when they touch the container
Temperature monitoring is significant for larger batches. The dough ferments best between 75-78°F (24-26°C). Professional bakers should document fermentation times and temperature readings to create reliable patterns that work in their production space.
Techniques for even fermentation in bigger batches
Dough temperature is crucial in how evenly large masses of dough ferment. The math is simple – fermentation time doubles or halves with every 15°F/8°C change in temperature.
These steps help bakers get even fermentation in large batches:
- Give your dough gentle folds every 30 minutes for the first 2 hours
- Keep room temperature steady throughout the process
- Large batches need temperature-controlled proofing boxes
- Check dough temperature at different spots in the container
Cold fermentation at 39°F/4°C works well for longer periods. This method builds complex flavors but needs careful monitoring. Large dough masses can take up to 10 hours to reach full refrigeration temperature, and fermentation continues.
The aliquot method makes tracking large-batch fermentation easier. You keep a small dough sample in a separate container that shows how fermentation progresses without disturbing the main batch.
Bright bakers adjust their bulk fermentation based on their starter quantity, dough temperature, and room conditions. More starters speed things up, while fewer starters allow you to better control the process. Success comes from finding the balance that fits your production schedule and quality standards.
Efficient Shaping and Proofing
Bakers need solid shaping and proofing techniques to scale their sourdough bread production from small to larger batches. These techniques become crucial factors in determining success. A well-planned system helps maintain consistency and handles multiple loaves effectively.
Assembly line approach to shaping
Professional bakers use a systematic way to shape multiple loaves. It would be best if you had a dedicated shaping station with these essentials:
- A clean, slightly moistened work surface
- A bench scraper for dough handling
- Pre-floured proofing baskets
- Rice flour for dusting
The quickest way to shape dough properly is to build tension without disrupting its internal structure. Each piece needs individual attention. A steady rhythm helps when you use the letter-fold technique. This technique stretches and folds the dough’s edges toward the center, creating a tight outer skin supporting the loaf’s final shape.
Your loaves need two rounds of shaping with a 15-minute break between them. The gluten relaxes during this break, which helps the final shaping work better. The dough’s surface should feel taught but not too tight, suggesting you’ve developed the correct tension.
Proofing multiple loaves simultaneously
Multiple proofing vessels need careful organization and proper space usage. Professional bakers use banneton baskets and proofing bowls together. They arrange them to maximize airflow and keep temperatures consistent. The best setup has:
| Proofing Method | Temperature Range | Duration |
|---|---|---|
| Room Temperature | 75-78°F (24-26°C) | 2-4 hours |
| Cold Retard | 38-42°F (3-6°C) | 8-16 hours |
Bakers should space their vessels adequately to distribute temperature evenly while proofing several loaves. A staggered arrangement makes it easy to access and monitor each loaf. The baker’s vessels need proper lining with well-floured cloth or rice flour to prevent dough from sticking.
Managing proofing times for consistent results
Temperature control plays a significant role when you’re handling multiple loaves. Professional bakers employ the cold retard method to keep production on schedule and create complex flavors. This technique involves:
- A first proof at room temperature (30-60 minutes)
- Transfer to refrigeration
- Extended cold proof (8-16 hours)
- Staged baking sequence
Bakers working with larger batches should space out their proofing times. This creates a steady flow of loaves ready to bake. The poke test remains the quickest way to check if your dough is prepared. Press the dough gently – it should bounce slowly and leave a small dent.
Monitor temperatures during proofing to avoid overproofing dough, especially with multiple batches. Keeping detailed records of times and temperatures will help you establish patterns that work in your kitchen.
While the first bakes, your refrigerator can act as a proofing brake to keep the second loaf from over-proofing. Take loaves out of cold storage about 30 minutes before they go in the oven. This gives you the perfect oven spring and matching results across batches.
Room conditions will affect your proofing times. Warmer rooms speed up fermentation, while more relaxed spaces slow it down. Good ventilation and temperature control in your workspace will yield matching results batch after batch.
Baking in Batches
The quickest way to batch bake depends on mastering timing, temperature, and technique. Bakers need these skills to produce consistent sourdough bread loaves. Professional bakers must consider multiple factors that help them maximize their oven’s capacity and deliver excellent products.
Hosting baking schedules
The success of batch baking relies on precise timing and temperature management. A baker’s schedule should account for oven capacity and optimal baking conditions. The most effective baking schedule follows this pattern:
| Time Block | Activity | Temperature |
|---|---|---|
| Pre-heat | 45-60 min | 500°F (260°C) |
| First batch | 20-25 min | 450°F (232°C) |
| Steam phase | First 15 min | 450°F (232°C) |
| Crust development | Final 10 min | 425°F (218°C) |
| Oven recovery | 10-15 min | Return to 500°F |
Professional bakers must keep consistent intervals between batches and allow enough time for the oven’s temperature recovery. The cold retard method works best for batch scheduling, especially when you have to develop complex flavors through extended fermentation.
Maintaining oven spring for multiple loaves
Getting the same oven spring for several batches of bread requires watching a few significant factors. The right temperature becomes even more critical when you’re baking multiple loaves. Bakers should:
- Make sure there’s enough steam in the first 15 minutes
- Keep the correct oven temperature during baking
- Leave enough room between loaves so heat can move around
- Score the loaves right before they go into the oven
Temperature stability is essential to get a great oven spring. Bakers must check their oven temperature between batches and give it time to bounce back for consistent results. Steam generation is vital to developing proper crust and oven springs, especially during the first baking phase.
Bakers need a clear plan to load and unload their ovens for the best results. This means:
- Getting Dutch ovens or baking stones hot
- Moving loaves into the oven quickly to keep heat in
- Adding steam as soon as bread goes in
- Keeping oven temperature steady while baking
- Watching how the crust develops and colors
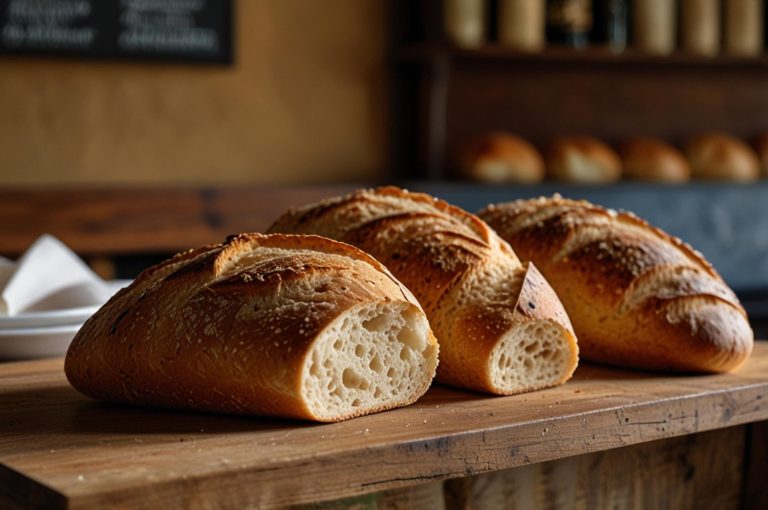
Cooling and storing larger quantities
Proper cooling and storage procedures are vital when you handle multiple loaves. Professional bakers need dedicated cooling areas with good airflow to stop moisture buildup. The cooling process works best with these guidelines:
- Let loaves cool fully on wire racks (minimum 2-3 hours)
- Keep enough space between loaves as they cool
- Room temperature should stay between 68-72°F (20-22°C)
- Keep track of the humidity in the cooling area
- Don’t stack loaves until they reach room temperature
Professional bakers need a systematic approach to store bread based on how much they make and sell. Cold storage helps extend shelf life and keeps the product fresh. Here’s what you need to know about storing more significant amounts:
- Make sure loaves are at room temperature before packaging
- Pack same-day sales in food-grade paper bags
- Use proper rotation systems (FIFO – First In, First Out)
- Check storage area temperature and humidity regularly
- Freeze extra production to use later
Temperature tracking plays a significant role during storage. The best storage temperature sits between 39-42°F (4-6°C) for refrigerated products and 0°F (-18°C) for frozen inventory. Professional bakers should keep detailed records of storage conditions and shelf life. These records help optimize production schedules and reduce waste.
Sourdough bread’s natural acidification process gives it a longer shelf life than commercial yeast bread. This quality becomes especially valuable with larger production volumes. It offers more flexibility with storage and distribution timing while the product stays fresh.
Conclusion
Scaling bakery sourdough bread production requires mastering several connected elements. Professional bakers balance precise temperature control, workspace organization, and systematic production methods. They must also keep their starter healthy. The path to success runs through proper mixing ratios, fermentation management, and consistent shaping techniques. Bakers need the right equipment upgrades and well-planned production schedules.
Quality stands as the life-blood of successful scaling. Bakers achieve this through careful attention to production phases and proper ingredient selection. Home bakers and restaurant owners can lift their bread and pizza game with an authentic artisanal sourdough starter from The Yeast We Can Do. Our premium starter culture is available – email john@theyeastwecando.com. These scaling principles and a commitment to artisanal standards help bakers meet higher production goals while keeping their sourdough products unique.
FAQs
1. How do bakeries produce large quantities of sourdough bread?
Mass sourdough production, often called ‘sourfaux,’ typically involves the Chorleywood bread process. This method, developed in 1961, incorporates carbon dioxide-infused water to quickly form bubbles in the bread’s crumb, naturally occurring during traditional sourdough proofing.
2. What is an adequate feeding ratio for maintaining a healthy sourdough starter?
A commonly effective ratio for feeding a sourdough starter is 1:5:5, which should be done twice daily at 12-hour intervals. This involves using a 20% ripe starter, 100% water, and 100% flour, including a mix of whole-grain rye and white flour.
3. How can I increase the amount of my sourdough starter?
You can use a 1:1:1 ratio for smaller increases to scale up your sourdough starter. For larger quantities, such as turning 10g of starter into 200g, a 1:10:10 ratio can be used, adding 100g of flour and 100g of water to the initial 10g of starter.
4. What ingredients are commonly used in commercial sourdough bread?
Commercial sourdough bread typically includes unbleached enriched flour, water, sour culture, salt, wheat germ, and semolina. For example, the La Brea Bakery Country White Sourdough loaf features these components and is known for its subtle sour flavor and golden crust.
5. What equipment is essential for starting a small-scale bakery?
Starting a small-scale bakery requires essential equipment such as an oven and a mixer. Additionally, you’ll need containers for bulk fermentation and a proofing chamber that controls temperature and humidity efficiently without excessive electricity use.
6. What are some large-scale baking techniques for sourdough bread?
Traditional home baking techniques often need adjustment when scaling up sourdough bread production. Techniques to consider include mixing dough by hand for small batches, learning to knead and stretch-and-fold large amounts of dough, and mastering how to divide and pre-shape dough without deflating it too much. Implementing best practices in food safety specific to bakery operations is also crucial.
7. How can I ensure consistent sourdough bread quality throughout the year?
Careful planning of batch sizes and baking schedules can achieve consistency in sourdough bread quality. To ensure year-round quality, it’s important to maintain a stable proofing environment and adapt to seasonal changes in ingredients and ambient conditions.