The Ultimate Guide to Reviving a Dead Sourdough Starter
Have you ever found your beloved sourdough starter looking lifeless at the back of your fridge? You’re not alone.
That moment of panic hits when your once-bubbly starter shows no signs of life. You’ve spent weeks feeding and nurturing it. You might have even given it a name. Watching it die feels like losing a pet. Here’s the good news, though – what looks dead might just be dormant.
Most bakers throw away their inactive starters to start fresh but rarely need to. The proper technique can revive your sourdough starter and restore its former glory. Some of the world’s oldest sourdough starters have survived through multiple “deaths” and revivals for decades.
Your starter might have been neglected for days or months. This piece will guide you through each step to bring it back to life. You’ll understand the science behind fermentation and become skilled at the revival process. Soon, you’ll save your sourdough starter and return to baking delicious bread.
Ready to perform some sourdough CPR? Let’s take a closer look!
Understanding Sourdough Starter Biology
The microscopic world living in our flour and water mixture holds the secret to reviving a dead sourdough starter. Let’s examine what makes this possible.
The Microorganisms That Power Your Starter
Your sourdough starter works like a tiny ecosystem, like in the Serengeti, with busy microorganisms. Two groups of microbes run this ecosystem:
| Microorganism Type | Main Role | Population Ratio |
|---|---|---|
| Lactic Acid Bacteria | Produce acids for flavor | 100 parts |
| Wild Yeasts | Create carbon dioxide for leavening | 1 part |
These microorganisms work beautifully together. The bacteria break down complex carbohydrates, and yeasts generate gasses that help our bread rise.
Signs of Life vs Death in Starters
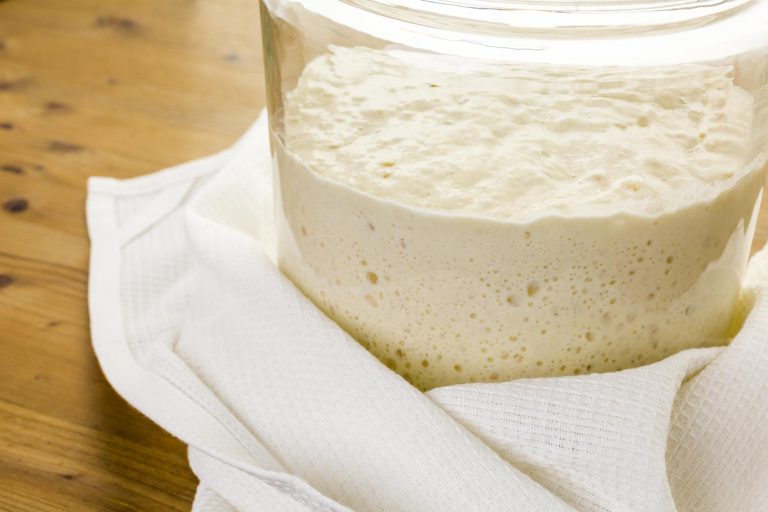
A healthy starter shows these clear signs:
- Visual Signs: Active bubbles and consistent rise after feeding
- Aroma: Pleasant yogurt-like or fruity smell
- Texture: Spongy and elastic consistency
- Rise Pattern: Doubles in size within 4-8 hours of feeding
Your starter might look dead when these signs disappear, but it’s usually just sleeping. These tough microorganisms can survive harsh conditions and bounce back with proper care.
The Science of Fermentation
Your starter’s fermentation process creates an amazing chain reaction. Fresh flour triggers enzymes that break down starches into simple sugars. Yeasts transform these sugars into carbon dioxide and ethanol, while bacteria create lactic and acetic acids.
Temperature is a vital part of this process. Sourdough microbes thrive best between 68-85°F (20-29°C). They slow down but stay alive below these temperatures. Higher temperatures make them too active, and they quickly use up their food supply.
The acids do more than give sourdough its tangy taste. They create an environment where harmful bacteria can’t survive. That’s why starters that people manage to keep propecorrectlylast for generations, even through periods when they seem dead.
This biological knowledge helps us better understand the revival process. A seemingly dead starter often just needs the right conditions to wake up its sleeping microbes.
Diagnosing Your Starter’s Condition
Let’s understand how to assess our sourdough starter’s condition before attempting to revive it. Just as doctors check their patients’ vital signs, we must recognize the indicators showing our starter’s health status.
Visual Assessment Guide
When perusing our starter, several key indicators stand out. A healthy starter should display:
- A consistent rise and fall pattern
- Small to medium-sized bubbles throughout
- A dome-shaped surface when active
- Light cream to grayish color
- No unusual discoloration
The starter should have a texture similar to thick pancake batter that pours slowly when tipped. Pink, orange, green colors or white fuzzy spots are red flags that need immediate attention.
Smell and Texture Analysis
Our nose serves as a powerful diagnostic tool. Different aromas reveal our starter’s condition:
| Aroma Profile | What It Means | Action Required |
|---|---|---|
| Fruity/Yeasty | Healthy starter | Continue normal feeding |
| Acetone/Nail Polish | Hungry starter | Increase feeding frequency |
| Rotten/Putrid | Potential contamination | Review for revival or restart |
The ideal texture resembles warm peanut butter or thick pancake batter. A starter at its peak develops a spongy, mousse-like consistency with stretchy, elastic qualities.
Common Signs of Trouble
Several warning signals indicate our starter needs attention:
Hooch Development: That dark liquid layer on top doesn’t spell doom – it simply indicates hunger. Clear hooch appears commonly, while dark purple or black hooch shows severe neglect but usually remains salvageable.
Consistency Changes: Unusually runny or grainy texture typically points to over-fermentation or inadequate feeding.
Activity Levels: A healthy starter doubles within 4-6 hours after feeding. Sluggish or absent activity signals the need for a revival strategy.
Note that most starters can bounce back with proper care and attention unless you spot actual mold growth or detect truly foul odors. Even seemingly lifeless starters often contain dormant microorganisms ready to spring back to life under the right conditions.
The Revival Process Step-by-Step
Let’s diagnose our starter’s condition and begin the revival process. Success depends on patience and precision – we can’t rush our starter’s recovery.
Original Assessment and Cleanup
The first step is to remove any dark liquid (hooch) from the starter’s top. Fresh hooch can be stirred back in, but inpouring old, dark hooch that develops during long-term storage. It is better; you only need 1-2 tablespoons of the original starter transferred to a clean container.
Feeding Schedule for Recovery
The revival process uses this precise feeding ratio:
| Component | Amount | Baker’s Percentage |
|---|---|---|
| Old Starter | 20g | 20% |
| Fresh Flour | 100g | 100% |
| Lukewarm Water | 100g | 100% |
Here’s our step-by-step revival process:
- Combine the old starter with lukewarm water (75°F/24°C) and mix well
- Add fresh flour (preferably a mix of all-purpose and whole rye)
- Stir until no dry flour remains
- Cover loosely and place in a warm spot (70-75°F)
- Wait at least 24 hours before the next feeding
Monitoring Progress
These signs show your starter is coming back to life:
- Initial feeding: You’ll see minimal activity in the first 24 hours
- Second feeding: Small bubbles start to appear
- Third feeding: Bubble formation becomes more consistent
- Final stage: The starter doubles in size within 8-12 hours
Feeding too frequently is a common mistake. The starter needs time to rebuild its microbial population. We should only move to the next feeding when we see signs of activity, such as bubble formation and a slightly sweet, fermented aroma.
Your starter might not show signs of life after the first 24 hours – that’s okay. Some starters, especially those dormant for months, need up to 48 hours between initial feedings. Once consistent activity appears, you can slowly transition to regular 12-hour feeding intervals.
Temperature is vital to this revival process. The starter performs best at 70-75°F (21-24°C). Lower temperatures slow down revival, while higher temperatures might encourage unwanted bacterial growth.
Choosing the Right Flour for Revival
The right flour plays a vital role in reviving our dormant starter. Think of it like a car—it needs proper fuel to run smoothly, and our sourdough starter needs specific types of flour to thrive during revival.
Effect of Different Flour Types
The type of flour you choose can substantially change how quickly and successfully your starter returns. Here’s how various flour types perform:
| Flour Type | Revival Impact | Best Used For |
|---|---|---|
| Whole Wheat | Fast activation | Original feedings |
| Rye | Highest fermentation | Quick revival |
| All-Purpose | Steady growth | Maintenance |
| Bread Flour | Strong structure | Later stages |
Rye flour stands out because it contains more free sugars and starch-degrading enzymes. This makes it particularly good at jump-starting fermentation in a sluggish starter.
Organic vs Conventional Flour
Both organic and conventional flours can successfully revive your starter. Our experience shows that organic flour typically contains more natural microorganisms, which helps during revival. But don’t worry if you have conventional flour—we’ve brought many starters back to life using standard unbleached all-purpose flour.
The most important thing isn’t whether your flour is organic. Your flour should be unbleached. Bleaching processes reduce the natural microbe population and might slow down revival.
Optimal Flour Combinations
A mix of different flour types often gives the best results. Here’s our recommended blend to revive a dead sourdough starter:
- Original Revival Phase
- 50% whole grain flour (rye or whole wheat)
- 50% unbleached all-purpose flour
Your starter will show consistent activity, and you can switch to your preferred maintenance flour. The ratio adjusts over several feedings:
- Start with 50/50 whole grain/white flour
- Reduce whole grain to 20% after seeing activity
- Finally, transition to 100% of your chosen maintenance flour
This step-by-step transition maintains the microbial activity built up during revival while letting you customize your starter for specific baking needs.
Note that whole grain flour excels at revival but can make your starter harder to read. The increased enzyme activity creates bubble patterns different from what you might expect. Don’t worry—this is entirely normal.
Temperature and Environment Control
Temperature is a vital factor in reviving your dormant sourdough starter. Your careful selection of flour pairs with the right environmental conditions to ensure a successful revival.
Optimal Temperature Ranges
Temperature acts like a conductor that orchestrates the fermentation pace in your sourdough starter. Our tests reveal these optimal ranges:
| Temperature Range | Effect on Starter |
|---|---|
| Below 70°F (21°C) | Sluggish activity, slower revival |
| 75-78°F (24-25°C) | Optimal revival range |
| 80-85°F (27-29°C) | Fast but potentially unstable activity |
| Above 85°F (29°C) | Risk of excessive acid production |
Humidity Considerations
Humidity substantially affects your starter’s consistency and behavior during revival. High-humidity environments (above 80%) require reducing water content by 25g per feeding to balance the moisture absorption from the air. Dry conditions might need extra hydration to maintain proper consistency.
Creating the Perfect Environment
You can create ideal conditions for your starter’s revival with these quick methods:
- Temperature-Controlled Solutions:
- Proofing box set to 76°F (24°C)
- Oven with light on (monitor temperature)
- Microwave as an insulated space
- A warm spot near appliances
A simple thermometer helps monitor both ambient and starter temperatures to achieve consistent results. Your starter becoming thin with tiny bubbles signals an environment that’s too warm. Moving it to a cooler spot or adjusting your proofing setup temperature helps fix this issue.
Winter months work well when you wrap the starter jar in a kitchen towel for insulation. Summer revival benefits from cooler water (around 65°F/18°C) in feeds to balance higher ambient temperatures.
Stable conditions matter more than perfect temperatures. Wild fluctuations can confuse the microbes and slow down revival. A consistent environment gives your starter the best chance to rebuild its strength and vitality.
Troubleshooting Common Revival Issues
Despite our best efforts to maintain perfect conditions, sourdough starters can trouble us during revival. Let’s look at the most common problems we face when bringing our starter back to life.
Dealing with Mold
Mold remains our biggest problem when reviving starters. Here’s a simple guide to help you identify problematic growth:
| Appearance | Color | Action Required |
|---|---|---|
| Fuzzy, raised spots | White/Green/Blue | Discard immediately |
| Pink or orange tint | Any shade | Start fresh |
| Dark spots with white top | Brown/Black | Dispose and restart |
Throwing away your starter is disappointing, but taking chances with mold isn’t worth it. The best approach focuses on prevention through clean containers, fresh flour, and proper temperature control.
Addressing Lack of Activity
A lifeless starter needs these proven solutions:
- Temperature Adjustment: Keep warmth steady (74-76°F)
- Strategic Feeding: Add 10-20% rye flour to regular feeds
- Reduced Feeding Amount: Begin with a 1:1:1 ratio (starter:flour: water)
- Extended Rest: Give 24-48 hours between original feeds
Patience plays a vital role during this phase. What looks like a dead starter might just need extra time to wake up, especially after long dormant periods.
Fixing Consistency Problems
Your starter’s consistency tells you about its environment. Runny starters usually mean over-fermentation or too much water, while thick, paste-like texture indicates insufficient hydration or inadequate feeding.
A runny starter needs these fixes:
- Remove excess liquid (hooch)
- Add flour gradually until it reaches thick pancake batter consistency
- Keep temperatures cooler (70-72°F)
- Feed more frequently
Thick starters need these adjustments:
- Add more water gradually
- Use warm water (75°F) in feeds
- Mix in whole-grain flour
- Stick to regular feeding times
Note that consistency problems usually fix themselves once you establish regular feeding patterns. The ideal texture should resemble a thick pancake batter slowly moving when you tilt the jar.
Experience shows that most revival problems result from unbalanced temperature, irregular feeding, or poor flour choice. Careful attention to these factors can usually restore your starter’s health within a week.
Testing Starter Strength
After completing the revival process, we need to check if our sourdough starter is strong enough to bake. Let me share the quickest ways to test our starter’s vitality.
Float Test Explained
The float test is a popular method to test starter strength, but we found it’s not always definitive. Here’s what we learned about its reliability:
| Test Result | Interpretation | Reliability |
|---|---|---|
| Floats | Generally active | Moderate |
| Sinks | May still be viable | Limited |
| Partially floats | Mixed activity | Inconclusive |
The float test is simple. Scoop a small amount of unstirred starter and drop it into room-temperature water. However, this test works best with other indicators since it can give false negatives, especially with whole-grain starters.
Peak Activity Indicators
These signs tell us our starter has reached peak strength:
- Visual Indicators
- Doubles in volume within 4-6 hours of feeding
- Bubbles form throughout
- The surface shows a dome with a honeycomb structure
- Jar sides reveal a spongy, mousse-like texture
A good starter should smell pleasantly yeasty without any sharp acetone notes. A mature starter’s rhythm becomes predictable, reaching its peak at the same time after each feeding at steady temperatures.
Ready-to-Use Checklist
Our revived starter should meet these criteria before we use it:
Consistent Performance
- Doubles within 6-8 hours
- Shows regular rise and fall pattern
- Peaks at predictable times
Physical Characteristics
- Stretchy, elastic texture
- Thick pancake batter consistency
- Light and aerated structure
Sensory Indicators
- Pleasant, yogurt-like smell
- No harsh odors
- Clean, slightly sour taste
Experience taught us that a strong starter meets these criteria for at least three consecutive feedings. You might want to start baking as soon as you see life, but patience during testing will give you better results.
Long-term Maintenance Strategies
A healthy sourdough starter needs proper care after revival. Our experience shows that regular care helps prevent starter failures and keeps it strong for years.
Regular Feeding Schedule
The feeding schedule depends on how often you bake. Here’s a simple routine based on baking frequency:
| Baking Frequency | Storage Location | Feeding Schedule | Starter Amount |
|---|---|---|---|
| Daily/Weekly | Room Temperature | Every 12-24 hours | 113g flour + 113g water |
| Occasional | Refrigerator | Once per week | 113g flour + 113g water |
| Rarely | Refrigerator | Every 2-3 weeks | 113g flour + 113g water |
Room temperature starters need feeding twice daily. Just keep 113g before each feeding. A weekly feeding works well for refrigerated starters and creates less waste.
Storage Best Practices
Proper storage will substantially affect your starter’s life span. Here are proven storage guidelines:
- Room Temperature Storage
- Use a container with a loose-fitting lid
- Keep temperature steady (70-75°F)
- Mark the container to track the rise
- Feed every 12-24 hours
- Watch for hooch development
Let your starter rest at room temperature for 2-4 hours after feeding before refrigeration. This step helps microbes start fermentation and creates a more robust starter.
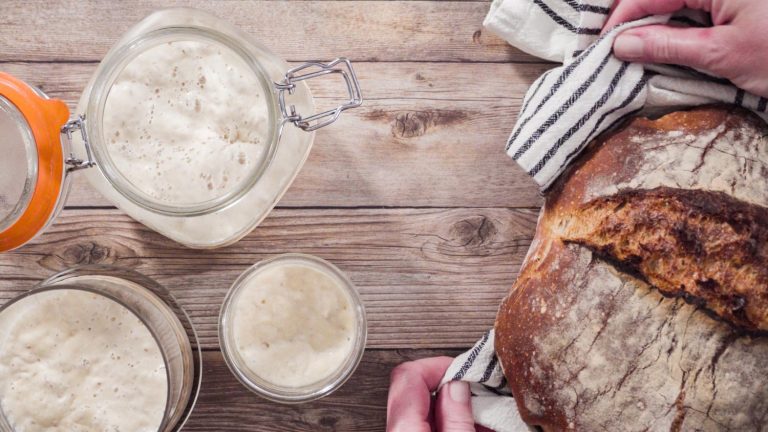
Backup Starter Creation
Multiple backup options protect your starter. Drying works best as a backup method:
Drying Process
- Spread active starter thinly on parchment paper
- Let it dry fully (24-48 hours)
- Break into small pieces once brittle
- Store in an airtight container
Storage Conditions
- Store in a cool, dry place
- Keep away from direct sunlight
- Check for moisture regularly
- Add date and details to label
Dried starter lasts almost forever with proper storage. We keep portions in both the pantry and freezer for extra safety. Reactivation is simple: Mix a tablespoon of dried starter with equal parts flour and water, then follow the regular feeding schedule.
If you bake often, create a backup every six months. This gives you a reliable starter ready for revival. Different backup forms (dried and refrigerated) offer the best protection against complete starter loss.
Add labels with dates and notes about your starter’s traits. This helps when sharing with other bakers or reviving old backups.
Good maintenance and backup methods keep sourdough starters alive and active for years. These steps prevent frequent revivals and ensure a dependable starter for your next baking project.
Conclusion
Reviving a dead sourdough starter might seem daunting, but most starters can bounce back with proper care and attention. A complete revival approach provides a reliable path to success through the right flour choices, temperature control, and consistent feeding schedules.
Bakers often give up too early when their starters look lifeless. What appears dead is usually just dormant and waits for the right conditions to spring back to life. Knowing starter biology, proper diagnosis techniques, and quick troubleshooting methods helps us confidently tackle any starter revival challenge.
Proper maintenance becomes significant after revival. Creating backup starters and establishing consistent feeding routines based on your baking frequency will help. The Yeast We Can Do serves as a trusted resource for detailed guides and expert tips about sourdough baking.
Patience and persistence drive the revival process forward. Your starter will show signs of life within a few days after implementing these techniques. The revival process can begin today, and you’ll soon return to baking delicious sourdough bread with your restored starter.
FAQs
How can I revive a seemingly dead sourdough starter? To revive a seemingly dead sourdough starter, begin by removing any dark liquid (hooch) from the top. Then, transfer about 1-2 tablespoons of the original starter to a clean container. Feed it with a mixture of 100g fresh flour (preferably a mix of all-purpose and whole rye) and 100g lukewarm water. Cover loosely and place in a warm spot (70-75°F). Wait at least 24 hours before the next feeding. Repeat this process, monitoring for signs of activity, such as bubbles forming and a slightly sweet, fermented aroma developing.
What are the signs that my sourdough starter is coming back to life? Signs that your sourdough starter is reviving include smatinybbles appearing after the second feeding, more consistent bubble formation after the third feeding, and finally, the starter doubling in size within 8-12 hours. You should also notice a pleasant yogurt-like or fruity smell developing and the texture becoming spongy and elastic.
What’s the best flour to use when reviving a sourdough starter? A combination of flours often yields the best result when reviving a sourdough starter. The recommended blend is 50% whole grain flour (rye or whole wheat) and 50% unbleached all-purpose flour. Rye flour is particularly effective due to its higher content of free sugars and starch-degrading enzymes, which can jump-start fermentation in a sluggish starter.
How important is the temperature when reviving a sourdough starter? Temperature is crucial when reviving a sourdough starter. The optimal temperature range for revival is 75-78°F (24-25°C). Temperatures below 70°F (21°C) can result in sluggish activity and slower revival, while temperatures above 85°F (29°C) risk excessive acid production. Maintaining a stable temperature is more important than achieving perfect temperatures, as wild fluctuations can slow down the revival process.
What should I do if I see mold on my sourdough starter during the revival process? If you see mold on your sourdough starter during the revival process, it’s best to discard it immediately and start fresh. Mold typically appears as fuzzy, raised spots that are white, green, or blurred. Pink or orange tints and dark spots with white tops are also signs of mold. To prevent mold growth, maintain a clean container, use uncontaminated flour, and ensure proper temperature control.
How can I test if my revived sourdough starter is ready to use? To test if your revived sourdough starter is ready to use, look for these indicators: it should double in volume within 4-6 hours of feeding, show consistent bubble formation throughout, have a domed surface with a honeycomb structure, and possess a spongy, mousse-like texture. The aroma should be pleasantly yeasty without any sharp acetone notes. Ensure these characteristics are consistent for at least three consecutive feedings before using the starter in your baking.
What’s the best way to maintain my sourdough starter after reviving it? After reviving your sourdough starter, maintain its health through regular feeding schedules based on your baking frequency. Feed it every 12-24 hours at room temperature for daily or weekly baking. Store it in the refrigerator and feed it for a week for occasional baking. Always use a container with a loose-fitting lid and mark it to track the rise. Create backup starters by drying portions of your active starter, and store these backups in cool, dry places for long-term preservation.
Can I revive a dried sourdough starter? Yes, you can revive a dried sourdough starter. To do so, add 15 grams of dried starter, 15 grams of flour, and 30 grams of water to a jar. Stir the mixture and cover it loosely. Once the mixture has doubled in size and is bubbly, you can feed it again following the regular feeding schedule. This process may take a few days, so be patient and consistent with your feedings.