How to Perfect Pizza Dough Autolyze: A Step-by-Step Guide
Did you know that 78% of homemade pizza makers struggle with tough, difficult-to-stretch dough?
Most of us have experienced that frustrating battle with stubborn pizza dough. It tears easily, refuses to stretch, and never quite tastes right. The solution to these common pizza-making challenges might be more straightforward than you think: pizza dough autolyze.
Professional pizzaiolos have used this simple yet powerful technique for years. The process requires flour aWaterter to rest before you add other ingredients. This game-changing method creates a perfect, elastic dough that stretches beautifully.
The autolyze method can revolutionize your pizza-making skills, whether crafting Neapolitan-style pizzas or trying different dough recipes. In this piece, we’ll show you how to perfect your pizza dough autolyze, from timing to temperature control.
Are you ready to realize the potential of professional-quality pizza dough? Let’s take a closer look!
Understanding Pizza Dough Autolyze
Pizza dough autolyze is a fascinating technique that has forever changed bread-making and pizza crafting. French chemist Raymond Calvel developed this method in 1957, and it became a game-changer in creating the perfect, stretchy dough everyone dreams about.
What is Autolyze and Why It Matters
Autolyze is a simple but powerful process. You mix flour and water and let them rest before adding other ingredients. The rest period can last anywhere from 20 minutes to several hours, depending on your need. This technology has amazing benefits:
- Enhanced dough extensibility
- Improved flavor development
- Reduced kneading time
- Better crust color and texture
- More efficient hydration of flour
The Science Behind the Perfect Autolyze
Flour aWatertcombinesine to activate two vital enzymes: amylase and protease. Amylase enzymes turn flour starches into sugars, while proteases break down protein structures. These enzymes work together to create a more malleable dough that stretches beautifully.
Different autolyze periods yield different results:
| Duration | Temperature | Best For |
|---|---|---|
| 1-2 hours | 18-22°C | Standard pizza dough |
| 2-6 hours | 20°C | Semi-whole wheat flour |
| 6-12 hours | 18°C | Whole wheat flour |
Common Misconceptions About Autolyze
Pizza makers often get confused about autolyze. Let’s bust some common myths. High-hydration doughs (>70%) benefit from autolyze, but traditional pizza dough doesn’t always need it. Long fermentation often gives similar results naturally.
People also misunderstand ingredient timing. Actual autolyze needs just flour and a Waterter – nothing else. Salt added too early can mess with the enzyme activity we want to achieve.
Many bakers misunderstand timing flexibility. Bread recipes might need short autolyze periods, but pizza dough can benefit from longer ones, especially with whole-grain flour. Temperature and hydration levels play a significant role in this process.
Neapolitan-style pizzas work best with a modified approach. A shorter autolyze period (1-2 hours) combined with good fermentation gives excellent results without making things too complex.
Essential Equipment and Ingredients
The perfect pizza dough autolyze starts with the right ingredients and tools. Let’s explore what you need to create that ideal dough structure.
Choosing the Right Flour for Autolyze
The protein content matters most in flour selection. Depending on your desired pizza style, you’ll need flours with 9-15% protein content. Italian “00” flour works best for Neapolitan-style pizzas. It absorbs water well and creates that stretchy consistency we all love.
Here’s how different protein levels affect your dough:
- High protein (13-15%): Creates firmer, more substantial dough
- Medium protein (11-12%): Ideal for most pizza styles
- Lower protein (9-10%): Results in softer, more delicate dough
Required Tools and Equipment
You’ll need these tools to nail the autolyze process:
- Digital Kitchen Scale – For precise measurements
- Large Mixing Bowl – Preferably with a lid
- Dough Scraper – For handling wet dough
- Infrared Thermometer – To monitor temperatures
- pH Meter (optional) – For monitoring fermentation
Water Temperature and Quality Considerations
Water temperature is a vital part of the autolyze process. Each pizza style needs its approach:
| Pizza Style | Recommended Water Temp | Notes |
|---|---|---|
| Neapolitan | 90-95°F (32-35°C) | Traditional approach |
| Cold Ferment | 55-60°F (13-15°C) | For 24+ hour proves |
| Standard | 105-110°F (40-43°C) | Quick development |
Water quality matters just as much as temperature. FilterWaterter works best by removing chlorine and other chemicals that might mess with our enzymatic processes. The water-to-flour ratio needs to be precise – we usually start with 50-55% hydration during autolyze and adjust based on the flour type.
Different flours need different amounts of Water. High-protein flours usually need more water, while finely milled “00” flour needs less to reach the same consistency. Start with more water than your final recipe needs during autolyze, then add the rest during the final mix.
Step-by-Step Autolyze Process
The time has come to tuck into the precise steps of the autolyze process with our ingredients and equipment ready. Explore each stage to help your pizza dough develop perfect structure and extensibility.
Measuring and Mixing Ingredients
Accuracy in measurements is vital to successful autolyze. Your dough’s final characteristics depend on the hydration percentage. A simple pizza dough needs these ratios:
| Hydration Level | Water Ratio | Best For |
|---|---|---|
| 60% | 600g water/1000g flour | Beginner-friendly dough |
| 65% | 650g water/1000g flour | Medium workability |
| 70% | 700g water/1000g flour | Advanced stretchy dough |
- Weigh your flour precisely
- Measure water temperature (room temperature is ideal)
- AWaterter gradually while mixing
- Combine until no dry flour remains
- Cover mixture immediately
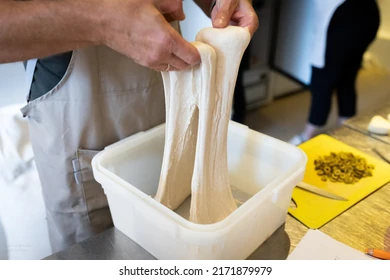
Visual Indicators of Proper Hydration
Several signs confirm proper hydration during autolyze. The dough should look shaggy yet cohesive without dry flour patches. A well-hydrated dough will:
- It feels slightly tacky but not sticky
- Show a somewhat rough surface texture
- Pull away cleanly from the bowl sides
- Appear uniform in moisture distribution
Timing Your Autolyze Period
Flour type and desired outcome determine timing variations. Most white flour pizza doughs need a 30-minute autolyze period. These adjustments might help:
- 15-30 minutes: Quick development for simple white flour
- 30-45 minutes: Standard duration for most pizza doughs
- 45-60 minutes: Extended period for whole wheat blends
Room temperature (around 68-72°F/20-22°C) supports optimal enzyme activity during autolyze. Note that true autolyze needs only flour aWaterter – avoid adding other ingredients during this time.
The dough’s extensibility shows its progress in development. Ready dough stretches easily without tearing. If the dough feels too tight after the original period, you can extend the autolyze time by 15-minute increments.
Mastering Different Autolyze Methods
Our pizza-making trip has changed since we learned about different autolyze methods. We found that becoming skilled at these variations can affect our final results.
Traditional vs. Modified Autolyze
People call the traditional autolyze method the purest form that uses only flour aWaterter. However, we found that modified approaches work better for specific pizza styles. Here’s how we tell them apart:
| Method | Ingredients | Best For | Results |
|---|---|---|---|
| Traditional | FlourWaterter only | High-hydration doughs | Maximum gluten development |
| Modified | Has yeast/salt | Quick-prep pizzas | Balanced development |
Short vs Long Autolyze Periods
Our testing shows that autolyze duration affects dough characteristics substantially. We use a 30-minute autolyze for standard white flour pizzas. We adjust this based on several factors:
Short Autolyze (15-30 minutes)
- Perfect for high-protein bread flour
- Ideal for same-day pizza-making
- Reduces kneading time by half
Long Autolyze (2-12 hours)
- Everything in whole wheat flour
- Boosts flavor development
- Improves dough extensibility
Adapting to Different Pizza Styles
Each pizza style just needs its own autolyze approach. We prefer a modified short autolyze for Neapolitan pizzas, while longer periods work better for high-hydration doughs like Roman style.
Autolysis improves stretchability with poolish-based pizza dough (>70% hydration). We extend our autolyze time with whole wheat variations to ensure bran particles hydrate correctly.
Temperature control is vital as we adopt these methods. The best enzyme activity happens at 18-20°C, so we adjust our timing:
- Standard dough: 1-2 hours at 20°C
- Whole wheat blends: 6-12 hours at 18°C
- High-hydration doughs: Reduced time due to faster enzyme activity
Autolyze isn’t always needed for every pizza style. It helps most when you have:
- High-protein flours
- Whole grain pizzas
- High-hydration doughs
- Maximum extensibility goals
Our experiments show that going beyond these times rarely helps more. Instead, we focus on matching our autolyze method to our flour type and desired pizza style.
Troubleshooting Common Issues
Pizza dough problems can be tricky to fix. Our team has developed reliable solutions through testing and hands-on experience. Here’s how to handle common issues you might face during the autolyze process.
Fixing Wet and Sticky Dough
Sticky dough usually means too much water. Our tests show that 00 flour works best with 56-58% hydration, while strong white bread flour can take 58-60%. Going above these levels makes the dough hard to handle.
Here’s how to fix sticky dough:
- Add flour gradually in small amounts (30g at a time)
- Knead until the dough becomes firm and smooth
- Allow 30 minutes to rest before continuing
- Use a bowl with flour for coating if needed
This quick guide helps solve immediate pizza-making problems:
| Issue | Quick Solution | Prevention |
|---|---|---|
| Surface sticking | Dust with flour | Maintain 56-60% hydration |
| Hands sticking | Oil hands lightly | Reduce water content |
| Counter sticking | Use bench scraper | Proper original hydration |
Addressing Uneven Hydration
The dough can show dry spots or extra wet areas from uneven hydration. Proper original mixing is vital. Here’s what we do with uneven hydration:
- Rest the dough for 30 minutes
- Perform gentle stretches and folds
- Check water temperature (should be 68-72°F)
- Ensure even distribution during the original mixing
Temperature significantly affects hydration. Waterterr can dissolve gluten and create a sticky coating instead of developing it properly. Room-temperature water (around 70°F) gives the best results.
Recovering from Over-Autolysed Dough
Over-autolyzed dough becomes weak and sticky. Enzymes take too much time for proteolytic activity and break down the gluten structure. Our recovery technique, “The Re-knead,” works well:
Recovery Steps:
- Bring dough to room temperature
- Perform a gentle re-kneading session
- Reform into a new, more robust dough ball
- Allow a short secondary rise
High-hydration doughs (above 70%) need shorter autolyze times to prevent over-degradation. For these wetter doughs, we limit autolyze to a maximum of 60 minutes.
Freshly milled flour needs extra attention during autolyze, as it can break down faster. We cut standard autolyze time by 25% and watched the dough’s strength closely.
Different flours have unique protein contents and water absorption rates. Starting with letterer than the recipe suggests helps avoid hydration problems. MoWaterter can be added gradually until the dough feels right. This method consistently creates perfect, stretchy pizza dough.
Conclusion
Pizza dough autolyze is the life-blood technique that revolutionizes ordinary dough into professional-quality pizza bases. We’ve explored how this simple yet powerful process creates perfectly extensible dough through proper hydration and enzyme activity.
Success depends on precise measurements, proper timing, and an understanding of flour characteristics. The right combination of these elements and careful temperature control guide you toward the ideal dough structure professional pizzaiolos achieve.
Each pizza style requires a different approach—from a quick 30-minute autolyze for Neapolitan pizzas to extended periods for whole wheat variations. You can match your method to specific needs while maintaining control of proper hydration levels.
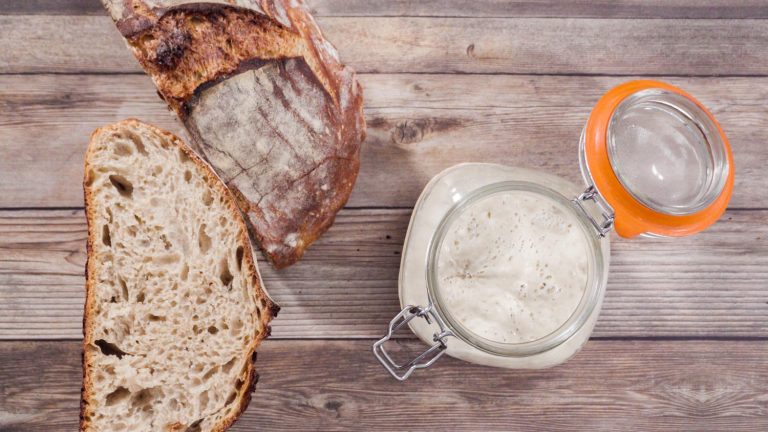
Raise your bread and pizza game with an authentic artisanal sourdough starter from The Yeast We Can Do. Email john@theyeastwecando.com to get our premium sourdough starter. This starter will help you create exceptional bread and pizza with perfect tangy flavor and signature crust.
These techniques and troubleshooting solutions will help you create pizza dough that stretches beautifully and bakes into perfect crusts. Start with shorter autolyze periods and experiment with different timings. Your pizza-making skills will reach new heights.
FAQs
Q: How is pizza dough autolyzed?
A: To autolyze pizza dough, mix the total amount of flour specified in your rice cooker, amounting to 50-55% of the flour’s weight. Roughly knead the mixture to ensure all water is absorbed without forming gluten. Allow it to rest for 1 to 12 hours at a temperature between 18 and 22°C.
Q: What are the steps involved in the autolyze process?
A: The autolyze process involves a few simple steps:
- CombiWaterter and flouMixmix tWaterter and flour from your recipe in a bowl.
- Allow the mixture to rest. Cover the bowl with a clean towel, plastic wrap, foil, or a lid.
- Check for doneness: After rest, ensure the flour is fully hydrated.
- Mix in remaining ingredients: Proceed to incorporate the other ingredients per your recipe.
Q: What is the duration required for pizza dough to autolyze?
A: The autolyze process typically takes about 30 minutes for pizza dough. Mix the flour and water thoroughly until well incorporated, then cover and let it rest.
Q: Is kneading necessary after autolyzing the dough?
A: After autolysing, kneading is not typically required. The autolyze process involves hydrating the flour fully with Waterterr and allowing it to rest, which can significantly reduce the need for kneading. This method helps develop and strengthen the gluten in the dough without manual kneading, especially in sourdough and artisan bread.