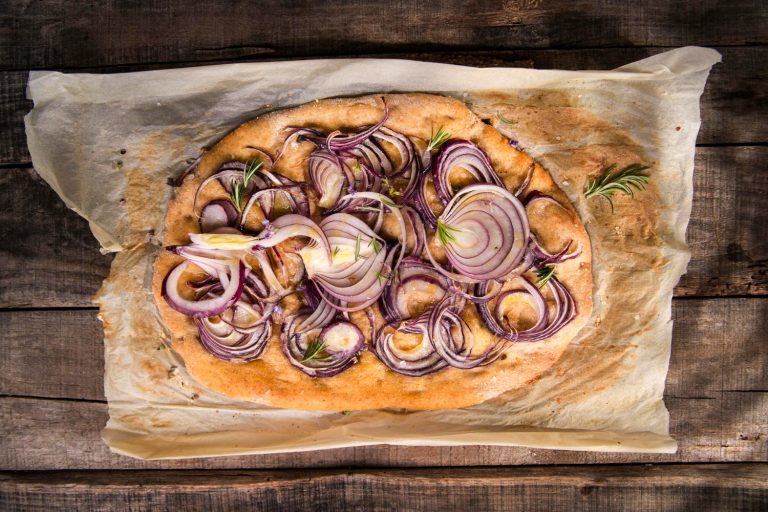
How to Master the Open Crumb Sourdough Technique: A Beginner’s Guide
The open-crumb sourdough technique is one of the most critical steps in every baker’s experience. Bakers use this advanced method to create bread with distinctive large, irregular holes throughout the crumb structure that separate good bread from exceptional artisanal sourdough. You need to understand specific principles and methods professional bakers use to achieve these impressive results.
This detailed piece explains everything involved in creating perfect open-crumb sourdough bread. You will learn about proper dough hydration, fermentation timing, and shaping techniques. The right flour selection and optimal dough consistency will help you develop the skills to create professional-quality sourdough with a beautiful, open-crumb structure.
Understanding Open Crumb Sourdough
Bakers must understand what creates an exceptional loaf to become skilled at making sourdough. The concept of open crumb defines professional-quality loaves and distinguishes them from ordinary bread.
What is an open crumb?
Open crumb describes bread’s internal structure, which features a light and airy texture with distinct holes spread throughout the loaf. The structure emerges from proper fermentation and strong dough development, which work together with careful handling techniques. These irregular holes appear purposefully and show how well bakers can control various elements in their bread-making process.
Why is it desirable?
Creating an open crumb goes beyond just looks. A well-developed open crumb structure shows optimal fermentation that adds to the bread’s flavor profile. Professional bakers value open crumbs, and with good reason, too:
It shows expertise in the fermentation process.
The light texture improves the overall eating experience.
It reveals the proper development of gluten structure.
The bread’s moisture retention becomes better.
Bakers seek open crumb structure because it perfectly balances dough strength and extensibility. This balance comes from careful attention to fermentation timing, proper hydration levels, and skilled dough handling techniques.
Characteristics of open crumb bread
A well-developed open-crumb sourdough bread stands apart from regular bread with unique characteristics. The bread’s interior structure reveals:
Even Distribution: The holes spread evenly across the crumb instead of clustering in specific areas
Variable Sizes: The texture becomes interesting with a blend of medium and large holes
Strong Cell Walls: The bread’s hole walls should appear glossy and show good development
Light Weight: The bread feels lighter than expected when picked up
Structural Integrity: The bread holds its shape perfectly despite its open structure
The crumb structure reveals the bread’s story from the original mix to the final bake. Bakers achieve the perfect open crumb by carefully balancing several elements. These include dough hydration, fermentation management, and handling techniques. Every hole represents the baker’s success in the interest of perfection and shows its mastery over ingredients and processes.
Essential Ingredients and Equipment
To make exceptional open-crumb sourdough, you need more than skill. The right ingredients and equipment play an equally important role. The final result depends on how well you understand each component’s role.
High-protein flour
The perfect open-crumb sourdough starts with choosing the suitable flour. High-protein flour creates the ideal foundation, with its protein content ranging from 11% to 13%. This protein level gives dough the strength it needs to develop gluten properly. Artisanal bread flour works best to achieve these results. Though whole wheat flour enhances nutrition and flavor, bakers should use it sparingly because its bran particles can disrupt the open crumb structure.
Active sourdough starter
A vigorous sourdough starter is the lifeblood of successful fermentation. The starter must be kept at 74°F to 78°F and fed regularly—ideally every 12 hours to achieve optimal activity. A healthy starter displays these characteristics:
Visible rise and fall patterns
Scattered bubbles throughout
Pleasant, mildly sour aroma
Loosened consistency at peak activity
Proper hydration
Hydration levels make a significant difference in creating an open crumb structure. Many bakers believe higher hydration automatically leads to better results, but great bread can be made with various hydration ranges:
Beginning bakers: 65-75% hydration
Intermediate level: 75-80% hydration
Advanced techniques: 80%+ hydration
The ideal hydration percentage is determined by a baker’s skill level and flour’s protein content. Mastering techniques becomes easier when working with lower-hydration doughs.
Baking tools
Quality baking results need specific tools to boost precision and control:
Digital Scale: Accurate to 1-gram increments for precise measurements
Bench Knife: You need this to handle and shape dough
Bannetons: Accessible in round (boules) or oblong (bâtards) shapes
Instant-Read Thermometer: Helps you check dough temperature
Danish Dough Whisk: The quickest way to mix high-hydration dough
Lame: Scores the dough before baking.
Dutch Oven or Bread Vessel: Creates steam and distributes heat evenly
Temperature control matters a lot, especially when you have dough fermentation. Your home kitchen should stay between 75°F and 85°F to ferment dough properly. Professional bakers use dedicated proofers, but home bakers can create the right environment with basic temperature control methods.
Parchment paper or a bread sling are great ways to transport your high-hydration dough from the counter to the oven. Brown rice flour works best to dust bannetons and prevents the dough from sticking without adding extra flour. Heat-resistant gloves keep your hands safe while handling hot baking vessels.
Mastering the Technique
Open crumbs in sourdough bread require several significant techniques that work together. The process builds and creates a foundation for exceptional bread structure.
Developing gluten structure
Natural fermentation creates optimal gluten development. Bakers should let fermentation do the work instead of excessive kneading. This gentle technique, called micro-kneading, builds structure naturally. Yeast activity creates small stretches in the dough matrix that work better than traditional kneading methods.
The original mixing phase requires bakers to:
Mix ingredients just enough without overdoing it.
Rest the dough for 30-60 minutes after mixing.
Use gentle stretch and folds at set times.
Check gluten formation with the window pane test
Proper fermentation
The bulk fermentation process needs precise temperature control to develop optimal crumb structure. Your dough’s internal temperature should stay between 78-82°F (25.5-27.8°C). This specific range helps achieve consistent fermentation and proper gluten development.
The bulk fermentation process includes these vital steps:
Mix and let the dough rest.
Complete the first set of stretches and folds.
Rest for 30 minutes
Perform the second set of stretches and folds.
Allow final rest period.
Check volume increase (look for 75% growth)
Gentle dough handling
A baker’s dough handling technique substantially affects the final crumb structure. Excessive manipulation can destroy the delicate network of air bubbles that develop during fermentation. The ideal approach needs a confident yet gentle touch. Professional bakers often describe this as “a lover’s touch” – firm but gentle, confident but never rough.
As fermentation continues, the dough requires progressively gentler handling, which preserves the gas structures within. Any deflation during this stage will lead to a tighter, denser crumb in the final product.
Shaping for tension
Proper shaping creates tension and is a crucial step in developing an open crumb structure. Pre-shaping organizes the dough’s structure before its final form takes shape.
Bakers must build height through strategic folding and create surface tension at the shaping stage. This approach builds layers within the dough and develops a taught outer skin that supports the loaf during proofing and baking.
The dough’s texture should feel pillowy and puffy in the final proof stage. A robust outer skin supports its structure well. The dough shouldn’t feel drum-tight as this shows over-tensioning. Bakers aim to balance strength and extensibility to allow maximum oven spring and optimal crumb development.
Most professional bakers shape loaves into oval (batard) forms instead of rounds (boules). The oval shape tends to create a more open crumb structure. Success comes from maintaining enough tension to support the dough’s structure without excessive handling that could damage the delicate air pockets.
Perfecting the Bake
Perfect open crumb sourdough requires you to become skilled at the baking process. Your success depends on precise temperature control, proper steam generation, and patience when the bread cools. These elements contribute substantially to the coveted open crumb structure.
Optimal oven temperature
The path to perfect open crumbs starts with proper preheating. Bakers should preheat their ovens to 500°F/260°C for at least one hour before baking. The original high temperature will give maximum oven spring and optimal crust development. The baking process follows distinct temperature phases:
| Baking Phase | Temperature | Duration | Purpose | |————–|————-|———-|———-| | Initial Spring | 500°F/260°C | 20 minutes | Maximum oven spring | | Development | 450°F/230°C | 30 minutes | Crust formation | | Final Bake | 400°F/200°C | 15-25 minutes | Color development |
Properly fermented dough is the most critical element that affects oven spring. The proper temperatures throughout the bake will produce optimal results. The bread’s internal temperature will plateau at 212°F/100°C as it continues to brown and develop.
Steam for oven spring
Steam is vital to achieve maximum oven spring and develop that sought-after open crumb structure. Bakers can choose from several ways to generate steam:
Dutch Oven Method
Makes a natural steam chamber
Keeps moisture locked in for first 20 minutes
It needs perfect timing to remove the lid.
Open Baking with Steam Generation
Lava rocks placed in a cast iron pan
Wet towels in the baking pan
Ice cubes add more moisture.
Steam helps the bread reach its maximum expansion during the first 20 minutes. Steam retention keeps the dough’s surface flexible while the internal structure develops, preventing the crust from forming too early.
Cooling and slicing
The perfect open crumb develops in its final stage after the bread comes from the oven. Your bread needs proper cooling time to set its internal structure. This improves the texture and makes slicing easier. The bread keeps baking inside even after you take it out.
You need a lot of patience to cool your bread right:
Minimum cooling time: 60 minutes
Optimal cooling time: 90-120 minutes
Internal temperature goal: Room temperature
The bread’s internal temperature should drop below 130°F/54°C before you slice it. This waiting period helps the crumb set right and keeps the open structure from collapsing. Premature cutting will squeeze the crumb and ruin the airy texture you worked so hard to create through fermentation and baking.
Professional bakers know that cooling is a vital part of the process. You must fight the urge to cut into a fresh loaf because proper cooling completes your bread’s open crumb structure. A loaf that cools appropriately will give you the following:
Even moisture throughout
Firm crumb structure
Best crust texture
Better flavor
Clean cuts every time
The proper temperature control, enough steam, and patient cooling create bread with an impressive oven spring and open crumb structure. Everything in baking combines fermentation and shaping to make exceptional sourdough bread.
Conclusion
Creating perfect open crumb sourdough requires focusing on several technical elements that work together. Each step builds on the last one. You’ll start by choosing high-protein flour, keeping precise fermentation temperatures, using gentle handling techniques, and controlling proper steam levels during baking. Your success comes from knowing how these elements connect and having the patience to execute them right, especially when you have critical cooling periods that set the final crumb structure.
Making perfect open-crumb sourdough shows you’ve moved beyond simple bread making to true artisanal craftsmanship. Bakers get professional results through dedicated practice and attention to detail at every step. Want to lift your bread and pizza skills? Try an authentic artisanal sourdough starter from The Yeast We Can Do. Our small-batch starter helps passionate home bakers, and restaurant owners create exceptional bread with perfect tangy flavor and signature crust. You can consistently achieve that sought-after open crumb structure in your sourdough bread with proper technique and quality ingredients. ## FAQs
What are the critical factors for achieving an open crumb in sourdough bread?
To achieve an open crumb in sourdough, focus on four main aspects:
Fermentation: Perfecting fermentation is crucial for developing an open crumb.
Flour: The type of flour used significantly impacts the crumb structure.
Hydration: It’s not about using more water but finding the proper hydration level for your specific flour.
Shaping: Proper shaping techniques are essential to maintain the structure and support the open crumb.
How can I enhance the open crumb structure of my sourdough bread?
To improve the open crumb structure, consider increasing the water content in your dough. This makes the dough stretchier, which helps the gas bubbles expand and creates a more open crumb. This is particularly effective when using stronger flours.
Why is my sourdough bread not achieving an open crumb?
Several factors could be preventing your sourdough from developing an open crumb:
Use a lower protein flour, such as all-purpose flour.
We are extending the bulk fermentation or rise time.
We are incorporating a higher percentage of whole wheat flour.
I am avoiding degassing the loaf excessively during shaping.
Note that under-proofing your loaf typically results in a denser, undesirable crumb.
What is the optimal condition for a sourdough starter?
The ideal temperature for a sourdough starter is between 75-80ºF (24-27ºC). At this temperature range, the starter will ferment more rapidly. In warmer conditions, feeding the starter more frequently is necessary, and the resulting sourdough might have a more pronounced acidic flavor.
How can I achieve a more open crumb in my sourdough loaves?
For a more open crumb, consider adjusting the hydration level of your dough to make it more extensible. This will allow better gas retention and bubble formation, particularly when using solid flours.