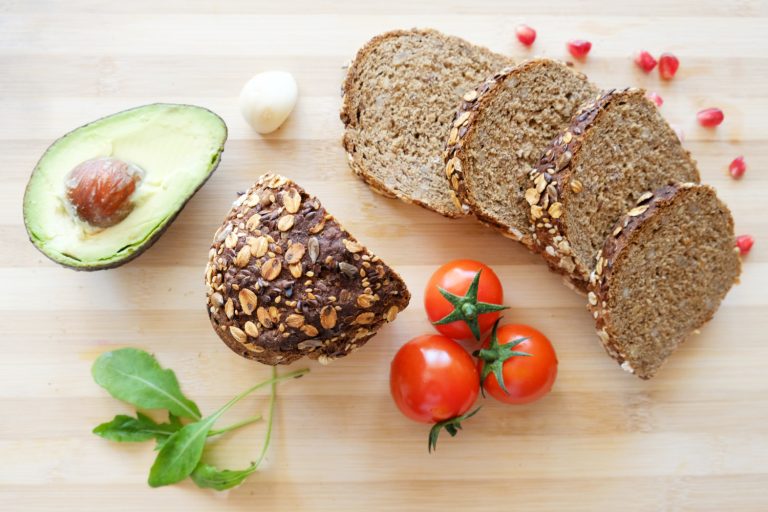
How to Know When to Bake Sourdough: A Step-by-Step Guide
The perfect moment to bake sourdough bread determines whether you’ll create an amazing loaf or face disappointment. The timing of baking significantly changes your bread’s final texture, flavor, and rise. Home bakers often find this a challenging decision point. Your bread’s success depends on several factors that you must master.
The art of sourdough baking demands a deep grasp of proper proofing techniques and dough’s readiness signals. This piece shows you everything about visual indicators and teaches you the poke test method. Temperature’s effect on fermentation plays a vital role in the process. You will master the ideal moment for baking through hands-on tests and careful attention to your dough’s progress.
Understanding Sourdough Fermentation
Sourdough fermentation represents a complex dance of microorganisms that turns simple flour and water into a living, breathing ecosystem. This natural process determines when to bake sourdough and helps bakers achieve perfectly proofed dough.
The Science Behind Sourdough
A sourdough starter hosts a thriving community of microorganisms that includes wild yeasts and lactic acid bacteria. Regular breads use just one type of commercial yeast, but sourdough creates what scientists call a “Serengeti” of microbial life. The yeasts and bacteria form a perfect partnership – yeasts generate carbon dioxide to help the bread rise while bacteria create that distinctive tangy flavor through acid production.
The magic starts when the flour’s enzymes break down starches into simple sugars. These sugars become food for the microorganisms, which then create compounds that help develop the dough. Lactic acid bacteria produce both lactic and acetic acids, and yeasts release carbon dioxide and ethanol. Together, these elements shape the bread’s texture and flavor profile.
Factors Affecting Fermentation
Sourdough fermentation speed and effectiveness depend on several elements that determine when your dough will be ready to bake:
- Temperature: The dough ferments faster in warm conditions (72-78°F) and slows down in cooler temperatures
- Flour Type: Each grain offers different nutrients and enzyme levels
- Hydration Level: The amount of water changes enzyme activity and fermentation speed
- Starter Health: A strong starter leads to steady fermentation
- Feeding Schedule: Your starter needs regular feeds to keep the microbes balanced
Every batch of sourdough creates its own unique environment through these elements working together. Bakers who understand how these elements affect their dough can spot the perfect moment to bake. This knowledge helps achieve the right rise and prevents dough from being under or overproofed. Success in sourdough baking comes from watching these variables and making smart adjustments to get the results you want.
Visual Cues for Sourdough Readiness
Reading visual cues helps bakers become skilled at finding the right moment to bake sourdough bread. Bakers with experience watch for specific visual indicators that show when their dough is ready for the oven.
Observing Dough Rise
A dough’s volume increase is the main indicator that shows how fermentation progresses. Bakers should expect a 50-75% volume increase during bulk fermentation. But numbers don’t tell the complete story – the quality of the rise matters most. The dough should look alive and active fermentation becomes visible when gentle movement appears as the container gets slightly disturbed.
Checking for Surface Bubbles
Surface bubbles help us learn about how active the fermentation is. A properly fermented dough shows these distinct features:
- Large, clearly visible bubbles break through the surface
- The container’s side view reveals a honeycomb-like pattern
- Bubbles spread evenly across the entire dough
- Tiny pinpoint bubbles emerge between the larger ones
Assessing Dough Texture
A properly fermented dough’s texture provides significant clues about its readiness to bake. Well-developed dough should have these characteristics:
- A soft, stretchy feel when touched
- A light, airy sensation during gentle handling
- A lively response to movement
- A balanced consistency that’s neither too tight nor too loose
The dough’s texture changes naturally throughout fermentation. It transforms from a dense, resistant mass into something soft and pliable. This happens because gluten structures develop and break down until they reach the sweet spot. The dough shouldn’t feel too sticky or loose, as these traits suggest overfermentation.
A well-fermented dough has a smooth surface with a subtle shine that shows proper gluten development and the right amount of water. The dough mass should wobble like jelly at the time you move its container. Bakers use these visual and touch-based signs with other testing methods to find the perfect moment to bake their sourdough.
Performing the Poke Test
The poke test remains one of the most reliable ways to know at the time your sourdough is ready to bake. This straightforward method lets bakers check their dough’s fermentation progress through hands-on testing.
How to Do the Poke Test
A well-executed poke test gave an explanation about the dough’s fermentation status. You can perform this test with these simple steps:
- Lightly flour or wet your finger to prevent sticking
- Gently press your finger about half an inch into the dough surface
- Withdraw your finger quickly but smoothly
- Observe how the dough responds
- Test multiple spots for consistent results
Interpreting Poke Test Results
Your dough’s reaction to a finger press shows how far along the fermentation has progressed. Bakers need to watch for these telling signs:
- Quick Spring Back: The dough needs more proofing time if the indentation vanishes right away
- Slow Recovery: You’ve achieved perfect proofing when the dough bounces back slowly and leaves a tiny mark
- No Recovery: The dough has overproofed if your fingerprint stays without changing
The poke test gives you good insights, but some things can throw off your readings. Cold dough fresh from the fridge tends to spring back faster, which might give you the wrong idea about its fermentation. The same goes for doughs with lots of water or whole grains – they show different bounce-back patterns.
Bakers get better at this test as they work with their recipes more. They develop a feel for their dough’s behavior at each stage. This hands-on knowledge works together with what they see and how long they’ve been proofing to pick the perfect baking moment.
You’ll get the best results by doing the poke test as your dough approaches its expected proofing time. The dough should feel puffy when you touch it, and you should get matching responses from testing different spots. Even responses across your dough’s surface tell you the fermentation is uniform and it’s ready for the oven.
Timing and Temperature Considerations
Temperature is crucial to decide when to bake sourdough bread. Bakers who grasp the connection between time and temperature can achieve consistent, high-quality results.
Optimal Proofing Duration
Sourdough proofing duration changes substantially based on environmental conditions and dough temperature. Most sourdough needs 2-4 hours to proof properly at room temperature (74-76°F). The process takes 10-16 hours when cold proofing happens in a refrigerator (38-40°F), which makes it perfect for overnight fermentation.
Key timing considerations for different proofing methods:
- Warm proofing (80°F): 1-2 hours
- Room temperature proofing (74-76°F): 2-4 hours
- Cold proofing (39°F): 10-16 hours
- Retarded proofing (46°F): 6-8 hours
Impact of Room Temperature
Room temperature affects fermentation activity and timing by a lot. Wild yeast and bacteria work best between 76-78°F. This range helps them keep a perfect balance for flavor development and rise. Fermentation slows down quite a bit below 70°F. Temperatures above 80°F can make fermentation happen too fast.
Temperature changes your dough’s behavior in several ways:
| Temperature Range | Effect on Dough | Timing Adjustment |
|---|---|---|
| Below 70°F | Slow fermentation | Double proofing time |
| 74-78°F | Optimal activity | Standard timing |
| Above 80°F | Rapid fermentation | Reduce time by half |
Your dough temperature needs careful monitoring because it shapes fermentation speed and bread quality. The best results come from keeping a steady temperature between 74-78°F. This sweet spot lets you control fermentation while keeping the activity level just right. Bakers might need shorter proofing times or cooler water in warmer weather.
Different temperatures need different approaches. You can adjust proofing time instead of fighting the room temperature. Steady temperature consistency during fermentation gives you predictable results and better bread quality.
Conclusion
Great sourdough baking just needs you to watch several indicators that work together. Surface bubbles and volume increase are visual signs that, along with well-done poke tests, show you the optimal baking timing. Scientific knowledge about fermentation and temperature effects helps bakers understand when their dough is ready. These techniques become second nature with practice.
The right timing can change ordinary bread into something special. Your loaves will have the perfect crumb, crust, and flavor profile. Anyone starting their sourdough experience or looking to improve their results should try The Yeast We Can Do’s authentic artisanal starter. You can email john@theyeastwecando.com to get premium starter that creates exceptional bread and pizza with that perfect tangy flavor and signature crust. Watching patiently, timing things right, and using quality ingredients will reward you with outstanding results that show what sourdough bread making is all about.
FAQs
How can I tell if my sourdough is ready to be baked?
- To determine if your sourdough is ready for baking, observe the dough’s volume, surface bubbles, and texture. A well-proofed dough should have doubled in size, show visible bubbles on the surface, and have a slightly sticky and elastic texture. Additionally, you can perform the “poke test” by gently pressing the dough with a floured finger. If the indentation remains, the dough is ready to bake.
What are the signs that my sourdough starter is ready for use in baking?
- A sourdough starter is ready for baking when it has doubled in size within 4 to 6 hours after feeding, shows bubbles on the surface, and emits a pleasant, slightly tangy aroma. You can also perform a float test by dropping a spoonful of the starter into a glass of water; if it floats, it’s ready to use.
How long should I let my sourdough ferment before baking?
- The fermentation time for sourdough can vary based on several factors including the starter’s activity, room temperature, and the specific recipe. Generally, sourdough should be allowed to ferment until it has visibly increased in size, shows a network of bubbles, and passes the poke test.
What is the poke test and how do I perform it on dough?
- The poke test is a simple technique to check dough readiness before baking. Lightly flour your finger and gently press about 1 inch into the dough. If the indentation remains, the dough is ready to bake. If it springs back quickly, it needs more time to ferment.
How do I know when my sourdough starter is at its peak and ready to bake with?
- Your sourdough starter is at its peak and ready for baking when it has doubled in size shortly after feeding, is bubbly, and has a pleasant yeasty and tangy smell. The texture should be thick and slightly sticky. Performing a float test can also help determine if it’s at its peak.
What should I look for in a sourdough starter to know it’s active and lively?
- An active and lively sourdough starter will have a frothy appearance with bubbles, and it may increase in volume after being fed. It should smell yeasty and slightly tangy, indicating healthy fermentation.
Can I bake with my sourdough starter immediately after receiving it from someone?
- If the sourdough starter you receive is active, you can bake with it immediately. However, if it’s dormant, it might take 24-48 hours to reactivate. The starter should show signs of activity such as frothing and bubbling before use.
What are the visual cues to look for in sourdough dough to assess its readiness for baking?
- Visual cues for sourdough readiness include a noticeable increase in volume, a network of bubbles on the surface, and a texture that holds an indentation when poked. These signs indicate that the dough has fermented properly and is ready for baking.