How to Shape Perfect Sourdough Rolls: A Step-by-Step Guide
Sourdough rolls captivate with their distinctive appearance, texture, and taste. The proper shaping technique transforms dense, misshapen bread into professional-quality results. A baker’s shaping process influences the roll’s appearance, texture, crumb structure, and overall quality.
This detailed guide explains each step to creating exceptional sourdough dinner rolls. Readers will master the techniques for handling dough, creating proper surface tension, and shaping consistent dough balls. The content walks through everything from the original preparation to final proofing and baking, helping bakers achieve success with every batch.
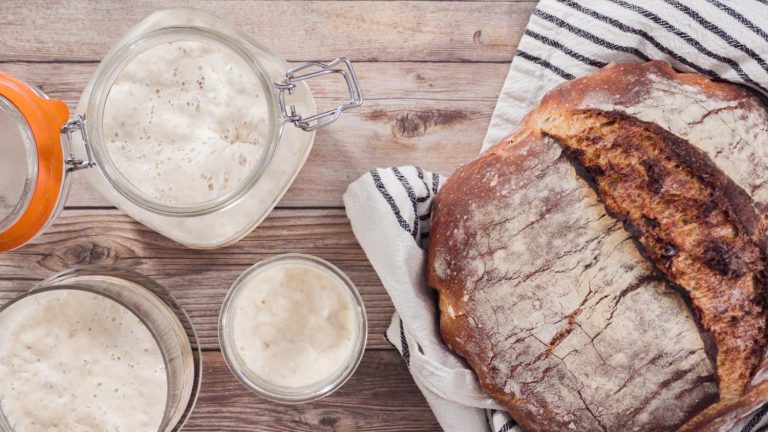
Preparing Your Sourdough for Shaping
The art of shaping sourdough rolls starts well before handling the dough. The preparation phase, which focuses on proper dough consistency and fermentation, is crucial for producing professional-quality results.
Achieving the Right Consistency
The ideal sourdough for shaping should feel firm yet tacky when touched. Your dough’s texture needs to be smooth and elastic with enough strength to maintain its shape. Bakers want to create a dough that strikes the perfect balance – not too wet to handle and dry to form dense rolls. Excessive stickiness points to high hydration or poor development during mixing.
The Importance of Proper Fermentation
Bulk fermentation is the lifeblood of developing well-structured sourdough. This process takes about 3½ hours at 74-76°F (24°C). The dough goes through the most significant changes that make it ready to shape. Bakers should watch for these signs that show proper fermentation:
- The dough volume visibly increases
- A smooth surface emerges with tiny bubbles
- The dough feels soft and billowy to touch
- Domed edges form where the dough meets the container
Your dough needs three stretches and folds spaced 30 minutes apart during bulk fermentation. After the final fold, let the dough rest covered until fermentation completes. The dough might feel too soft to handle. Chill it for up to an hour before shaping it to make it more manageable.
Under-fermentation gives you more room for correction than over-fermentation. An over-proofed dough becomes flat and very airy, which makes shaping impossible. Your dough is ready to shape when it grows in size, develops a smoother texture, and feels airy while keeping its structure.
Essential Tools for Shaping Sourdough Rolls
The right tools are essential for perfectly shaped sourdough rolls. Good equipment makes the shaping process more accessible and ensures consistent results.
Bench Scraper
A bench scraper makes shaping sourdough rolls easier and more efficient. This simple tool helps bakers work with sticky dough while keeping their hands clean and creates perfectly shaped rolls. The best bench scrapers come with these essential features:
- A durable stainless steel blade
- A handle that fits comfortably in your hand
- A blade with just enough flex to hug the surface
- A clean-cutting edge that divides dough smoothly
Proofing Baskets
They are proofing baskets or bannetons that support dough during its final rise. These baskets shape the dough and let air flow through it naturally. Bakers prefer either classic rattan baskets or modern versions with linen linings. A cotton towel-lined bowl works well for beginners who want to start baking.
Baking Stone or Dutch Oven
Your choice between a baking stone and a Dutch oven affects how your sourdough rolls turn out. Baking stones made from cordierite are excellent at spreading heat evenly and creating crispy bottoms. You can bake multiple rolls at once on these stones. The stone’s porous surface absorbs moisture and helps develop a better crust.
A Dutch oven creates the perfect environment by trapping steam as your bread starts to bake. To get the best results, you’ll need a Dutch oven that’s at least 4.2 liters. The moisture stays trapped inside and helps your bread achieve that classic oven spring with a beautiful, crispy crust. Both tools work well, but new bakers often get more consistent results with a Dutch oven because it provides a controlled environment.
Step-by-Step Shaping Technique
Bulk-fermented dough requires precision and technique to create perfectly shaped rolls. Bakers who become skilled in shaping will achieve consistent and professional results.
Dividing the Dough
Once bulk fermentation is complete, bakers divide their dough into individual portions. The fermented dough needs a gentle transfer onto a clean work surface. A bench scraper helps cut the dough into equal-sized pieces that match the desired roll size. Quick and decisive cuts will protect the dough’s structure.
Pre-shaping
Pre-shaping changes the divided pieces into smooth, rounded forms, making final shaping easier. During this step, the baker needs no additional flour on the work surface. A bench scraper held at a shallow angle and a slightly wet hand work together to tuck the dough under itself. This technique creates surface tension and builds the foundations for the final shape.
Final Shaping
Your dough needs about 30 minutes of rest before the final shaping begins. A well-rested dough spreads outward roughly 30% while it still keeps its circular shape. Bakers should follow these essential steps:
- Turn the dough piece upside down
- Gently stretch to create a surface area
- Fold the edges toward the center
- Roll and tuck to create the final form
- Seal any open seams
Creating Surface Tension
Surface tension plays a significant role in achieving proper oven spring and final appearance. A well-tensioned role shows these characteristics:
- A smooth and taut exterior without tears
- Knowing how to maintain shape on the work surface
- Slight resistance under gentle pressure
- An even, rounded look
The tucking motion during shaping creates proper tension. Bakers should visualize this process as “gluing the dough together” with each movement. This creates a tight outer skin that supports the dough through its final rise and into the oven. The dough becomes more manageable with a quick 15-minute rest in the refrigerator if it feels too sticky.
Proofing and Baking Your Shaped Rolls
Perfect sourdough rolls need precise attention during their final proofing, scoring, and baking preparation stages. These steps help create golden, crusty rolls that deliver the ideal texture from your well-shaped dough.
Proper Proofing Techniques
Bakers select between two proofing methods that depend on their schedule and desired flavor profile. Same-day proofing requires warm temperatures (74-76°F) and takes 2-3 hours. Cold proofing in the refrigerator takes 8-16 hours. The baker’s experience shows several vital signs of proper proofing:
- The dough’s texture becomes light and airy to touch
- A gentle finger indent rebounds gradually
- The surface shows a soft, smooth appearance
- Pressing reveals no dense areas
Scoring the Rolls
A sharp blade’s precise cuts across your rolls create more than an attractive pattern. These scores are crucial in your bread’s rise and steam release. You need a sharp blade or bread lame to make clean cuts about ¼ to ½-inch deep. Make these cuts with quick, confident strokes to keep the dough from deflating. Good scoring techniques help your bread in several ways:
- The dough releases steam through these controlled weak points
- Your rolls stay shapely without random bulges or blowouts
- The cuts guide your dough’s expansion path
- The bread achieves maximum oven spring
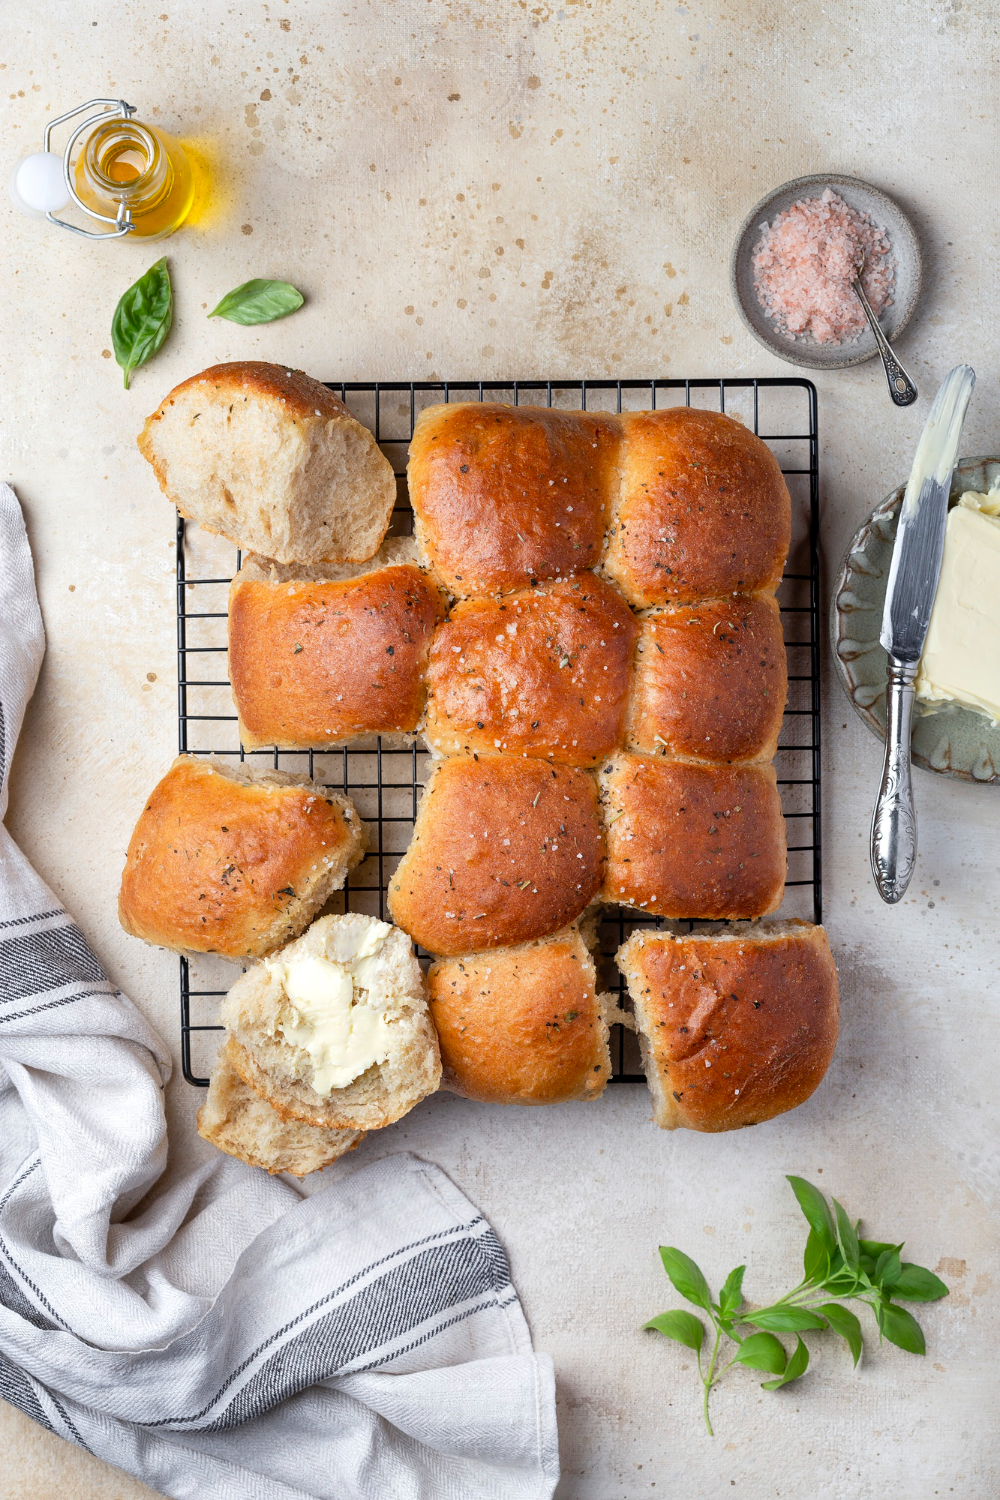
Baking for the Perfect Crust
Temperature control and steam hold the secret to a professional-quality crust. The oven should reach 425°F (220°C) to achieve optimal results. Steam plays a significant role during the original baking phase that prevents early crust formation and allows maximum rise.
A metal-rimmed baking sheet placed on the lower rack during preheating creates the perfect bake. Pour one cup of water onto the hot baking sheet before loading the rolls to generate steam. Important: Glass baking sheets might shatter during steam generation, so avoid using them.
The rolls need 25-28 minutes to achieve a light golden-brown color. When you tap properly baked rolls with a nicely developed crust, a hollow sound emerges. You can bake cold-proofed dough straight from the refrigerator without bringing it to room temperature.
Conclusion
Sourdough roll shaping requires multiple technical elements to work together perfectly. Careful fermentation during dough preparation builds the base for successful shaping. Precise handling techniques create the right surface tension for professional results. The right tools and a controlled baking environment help transform simple ingredients into artisanal bread with perfect crust development and internal structure.
Consistent practice and proper technique at each stage lead to great sourdough rolls. Bakers who become skilled at these techniques will make bakery-quality rolls with unique taste and appearance. Anyone ready to begin their bread-making experience can raise their bread and pizza game with an authentic artisanal sourdough starter from The Yeast We Can Do. Premium starter culture for exceptional bread and pizza with perfect tangy flavor and signature crust is available – email john@theyeasywecando.com. Home bakers can achieve professional results that match traditional artisan bakeries with proper techniques and quality ingredients.
FAQs
Can sourdough be formed into rolls?
Yes, sourdough can be shaped into rolls. The dough tends to be soft, so using a bench knife can be very helpful in achieving a tight shape. For easier handling, especially with sticky and soft doughs, chilling the dough in the refrigerator for about 15 minutes before shaping can make the process smoother.
How do you shape dough into rolls?
To shape dough into rolls, you typically divide the dough into equal portions, pre-shape each piece into a round, and then perform the final shaping to create surface tension. This helps the rolls maintain their form during proofing and baking.
What techniques are used to shape a sourdough loaf?
Shaping a sourdough loaf involves several steps, including dividing the dough, pre-shaping, and final shaping to create surface tension. This helps achieve the desired loaf form and contributes to the bread’s final texture and appearance.
Why does my sourdough not maintain its shape?
If your sourdough doesn’t keep its shape, it might be due to high hydration levels, which make the dough too slack. To remedy this, add a bit more flour or reduce the amount of liquid in your dough recipe.