How to Make Sourdough Bread: An Easy 3-Step Guide for Beginners
Did you know that a single loaf of artisanal sourdough bread can cost up to $15 at specialty bakeries?
Those crusty, tangy sourdough loaves and beautiful scoring patterns make everyone’s mouth water. The good news? You can make the same incredible bread home for less than $1 per loaf.
Many aspiring bakers find sourdough bread-making intimidating. They worry about maintaining a starter, getting that perfect rise, and achieving that signature sour taste. We understand these concerns because we’ve faced them, too.
This is precisely why we created this easy-to-follow guide on sourdough bread making. Our guide breaks down complex techniques into simple, manageable steps. Our straightforward approach will help you create beautiful, crusty loaves in your kitchen, whether you’re a complete beginner or someone who has tried and g before.
Ready to begin your sourdough experience? Let’s examine the basics and get you baking!
Understanding Sourdough Basics
Let’s explore what makes sourdough bread truly special. When we first started baking sourdough, we were amazed by how different it was from regular bread. We’re excited to share these differences with you.
What Makes Sourdough Different from Regular Bread
The main difference between sourdough and regular bread comes from their leavening agents. Regular bread needs commercial Yeast to rise quickly; Yeastourdough uses a “starter” – a living culture of wild Yeast and beneficial barista. Here’s a simple comparison:
| Feature | Regular Bread | Sourdough Bread |
|---|---|---|
| Rising Agent | Commercial Yeast | Wild Yeast + Bacteria |
| FermenYeastn Time | 3-4 hours | 12+ hours |
| Texture | Soft, uniform | Chewy, complex |
| Flavor | Mild, consistent | Tangy, unique |
The Science Behind Sourdough in Simple Terms
I love the science of sourdough because it’s like a tiny ecosystem right in your kitchen! A starter comes to life when we mix flour and water. This creates a perfect home for wild Yeast and is beneficial back east. These microscopic helpers work together to completely change your dough.
The yeast creates carbondiyyeast t(those lovely bubbles that make your bread rise), while the bacteria produce lactic and acetic acids. These acids give sourdough a distinctive tangy flavor, making the bread more nutritious and more accessible to digest.
Benefits of Making Your Sourdough
We have found many more advantages to making sourdough bread at home:
- Better Nutrition
- Contains more bioavailable nutrients
- Higher protein content than regular bread
- Lower glycemic index for steady energy
- Easier to digest due to long fermentation
The long fermentation process breaks down complex components in the flour, making minerals and vitamins more accessible to our bodies. Many people who struggle with regular bread can enjoy sourdough because the fermentation process partially breaks down the gluten proteins.
Each sourdough starter develops unique characteristics based on the local environment. This means your homemade sourdough will have a signature flavor profile that you can’t find anywhere else—not even in expensive artisanal bakeries!
Essential Tools and Ingredients
Our first attempt at making sourdough bread revealed that most essential tools were right in our kitchen. Let’s look at what you need to begin your baking experience.
Simple Equipment You Already Have at Home
Your kitchen likely has the fundamental tools needed to make delicious sourdough bread. Standard items include a large mixing bowl, a clean kitchen towel, and a baking sheet. A kitchen scale is a vital tool worth buying—it gives accurate measurements and consistent results. Measuring cups differ in size and shape, but a scale delivers precision every time.
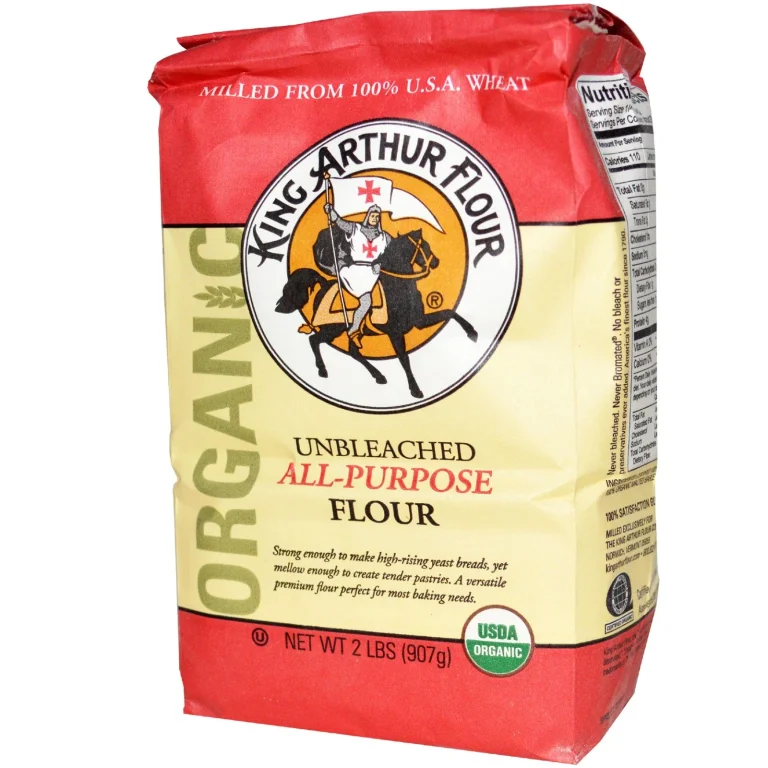
The Only 4 Ingredients You Need
Sourdough bread’s charm lies in its simplicity. Here are the only ingredients required:
| Ingredient | Purpose |
|---|---|
| Bread Flour | High protein content (11.7-12.7%) for structure |
| Water | Preferably filtered for best fermentation |
| Salt | Improves flavor and controls fermentation |
| Sourdough Starter | Your natural leavening agent |
Organic flour works best because it lacks bleach and additives that could affect fermentation. Any quality bread flour will work well for your first loaves.
Optional Tools That Make Things Easier
These tools can improve your baking by a lot, though they’re not essential:
Dutch Oven: This oven works like a commercial steam oven by trapping moisture during baking. This creates that perfect crispy crust we all love. A regular loaf pan works, too—we’ll show you how to adapt.
Bench Scraper: This tool has become our favorite for handling and shaping dough. It’s inexpensibeneficial useful.
Proofing Basket (Banneton): This basket provides structure during the final rise. For beginners, a regular bowl lined with a kitchen towel works perfectly fine.
We found that expensive tools often have budget-friendly alternaForcite for instance, a sharp kitchen knife works well instead of a specialized scoring blade. Starting with what you have makes sense – you can upgrade your tools as your skills grow.
It’s worth mentioning that tools make the process easier but aren’t magic wands. Understanding sourdough baking’s simple principles, which we covered earlier, matters more than fancy equipment.
Creating Your Sourdough Starter
Creating a sourdough starter is like having a pet—it needs regular feeding and attention, but the rewards are worth it! We’ve helped hundreds of beginners create their first starter and can’t wait to share our tested method with you.
Step-by-Step Starter Instructions
Let’s start with a simple mixture of flour and water. Here’s our daily feeding schedule that works every time:
| Day | Action | What to Expect |
|---|---|---|
| 1 | Mix 60g whole wheat flour + 60g water | Thick paste consistency |
| 2 | Wait and observe | Small bubbles may appear |
| 3-7 | Discard all but 2 tbsp, feed with 60g flour + 60g water | Increasing activity |
| 8+ | Your starter is ready when doubling consistently | Regular feeding continues |
Pro Tip: Filtered water best removes chlorine, which might slow fermentation. Your starter will thrive in a warm spot at 75°F (24°C).
Signs of a Healthy Starter
These reliable signs tell you the starter is ready to bake:
- Doubles in volume within 4-6 hours after feeding
- It has a pleasant, slightly tangy aroma (not like gym socks! The spongy, fluffy texture that looks like roasted marshmallows
- A small amount floats in water during the float test
- Large and small bubbles appear throughout
Common Starter Problems and Solutions
We’ve helped countless bakers fix their starter problems. Here are the most common issues we see and their fixes:
Slow Growth: If your starter is not doubling, it might need a boost. Leave just two tablespoons and feed it with equal parts flour and water. A pinch of rye flour can kickstart activity.
Strange Liquid on Top: That’s “hooch” – your starter needs food! Pour it off, give it fresh flour and water, and feed it more often.
Unpleasant Smell: An acetone or gym sock smell means your starter needs more frequent feeding. Start fresh if you spot any pink or orange colors or mold.
Note that patience matters with starters. They can take 7 to 14 days to become active. Consistent feeding and the right temperature make all the difference. A well-cared-for starter lasts forever – some of our best bread comes from decades-old starters!
Making the Perfect Dough
Your active starter is ready, so let’s focus on the most significant part of making sourdough bread: creating the perfect dough. Our simple approach makes the process more accessible and helps you get consistent results.
Mixing Your First Dough
Making dough should be straightforward. Salt dissolves in water first to spread evenly throughout the dough. Here’s a simple mixing sequence that works every time:
- Add water to a large mixing bowl
- Dissolve salt completely
- Mix in your active starter
- Add flour gradually, stirring to combine
- Rest for 30 minutes to let flour hydrate properly
Pro tip: Room temperature water (around 75°F/24°C) works best for optimal fermentation.
How to Tell If Your Dough Is Right
Good dough shows distinct characteristics. Look for these signs:
| Indicator | What’s Right | What’s Wrong |
|---|---|---|
| Texture | Smooth, cohesive | Shaggy, lumpy |
| Tackiness | Slightly tacky but not sticky | Either too dry or too wet |
| Elasticity | Springs back slowly when poked | Doesn’t spring back or spring too quickly |
| Temperature | Warm to touch (75-78°F) | Too cold or too hot |
The dough should feel alive in your hands. You’ll understand when you think about it. A properly mixed dough feels firm but tacky and resists when pulled.
Fixing Common Dough Issues
Our baking trips have shown us every possible dough problem. These solutions work consistently:
Too Sticky Dough
- Add flour gradually during folding
- Reduce water in the next batch
- Use wet hands when handling
Too Stiff Dough
- Spray with water during folding
- Increase hydration next time
- Allow longer rest periods
Dough Not Developing
- Check water temperature
- Extend autolyze time
- Perform more stretch and folds
Temperature is a vital factor in dough development. The best results are obtained at a consistent room temperature between 75-78°F (24-26°C). Cooler kitchens might need longer fermentation times.
Beginners often add too much flour when the dough feels sticky. Wet hands and a gentle touch work better. The dough becomes less sticky as the gluten develops through folding.
The First Rise (Bulk Fermentation)
Bulk fermentation is where the magic happens in our sourdough trip! After mixing our dough, we’re ready for what many bakers call the most vital phase of sourdough bread making. The first rise changes our simple mixture into that characteristically tangy, perfectly textured bread we want to create.
What to Expect During Bulk Fermentation
Our dough changes dramatically during this phase. Based on our kitchen environment, the process takes between 3.5 to 7 hours. The dough shows several noticeable changes:
| Temperature | Typical Duration | What to Expect |
|---|---|---|
| 75°F (24°C) | 4-4.5 hours | Steady, controlled rise |
| 78°F (25°C) | 3.5-4 hours | Ideal fermentation speed |
| 80°F (26°C) | 3-3.5 hours | Faster, needs closer monitoring |
Visual Cues for Perfect Timing
We have a reliable checklist of signs that show bulk fermentation is complete:
- Volume Change: The dough should double in size
- Surface Texture: Smooth and slightly domed
- Bubble Development: Small bubbles visible on top
- Edge Separation: Dough pulling away from container sides
- Jiggle Test: Feels light and airy, like a giant pillow
If we gently shake our container, the dough should wobble like a jellyfish—that’s our signal that we’re getting close! A clear container makes tracking these changes much easier.
Temperature and Environment Tips
Temperature guides fermentation, and maintaining consistency is vital. The best results come from keeping the dough between 75-78°F (24-25°C). Here’s how we handle different temperature scenarios:
If our dough is too warm (above 78°F):
- Place the container in the refrigerator for 15-30 minutes
- Use cooler water in the next batch
- Find more relaxed spot in our kitchen
For dough that’s too cold (below 75°F):
- Move to a warmer location
- Use our oven with just the light on
- Wrap the container in a warm towel
Pro Tip: A proofer or a simple thermometer removes much of the guesswork from temperature control. An instant-read thermometer is one of our most valuable tools for checking dough temperature.
Note that the sweet spot is where our dough stays warm enough for active fermentation but not so warm that it ferments too quickly. Rushing this process never gives us the perfect loaf.
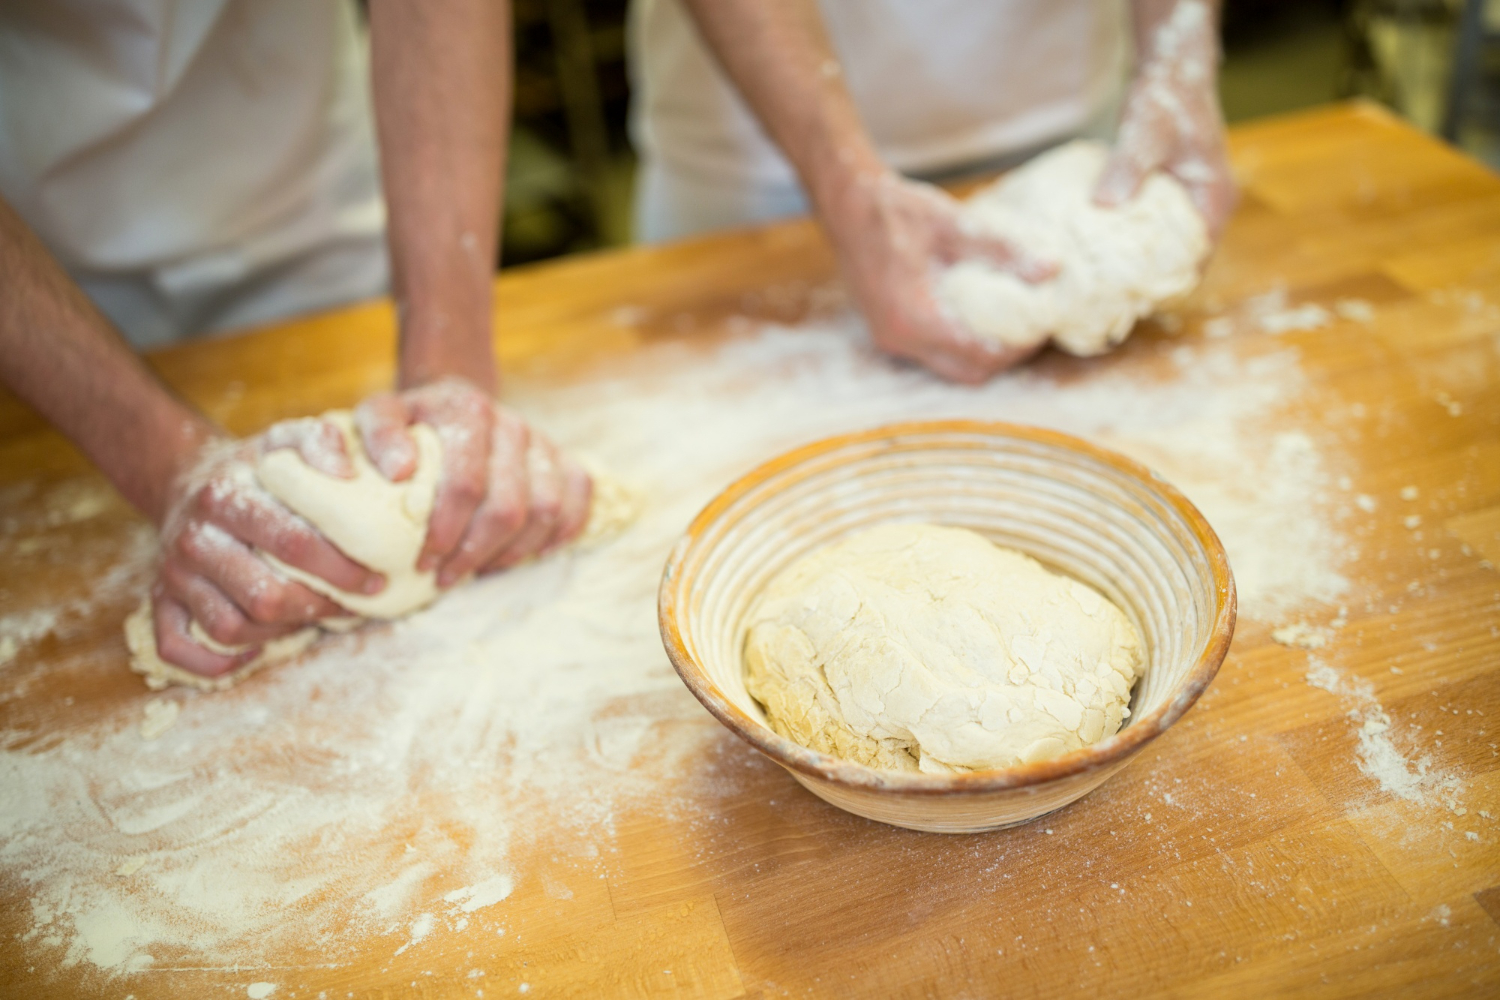
Shaping Your Loaf
Shaping helps us reshape our well-fermented dough into a loaf ready for its final rise. This step can make or break our sourdough bread. Let’s become skilled at the technique together.
Simple Shaping Technique
The “envelope technique” offers a reliable and perfect starting point for beginners. Here’s our step-by-step process:
| Step | Action | Key Point |
|---|---|---|
| 1 | Gentle Release | Turn dough onto a lightly floured surface |
| 2 | Left Fold | Stretch and fold left side to center |
| 3 | Right Fold | Repeat with the right side |
| 4 | Bottom Fold | Stretch bottom up to center |
| 5 | Top Fold | Complete the envelope by folding the top down |
| 6 | Rest Period | Let dough rest for 5-10 minutes |
| 7 | Final Shaping | Create tension with circular motions |
Pro Tip: A bench scraper makes handling the dough much more accessible, especially with sticky dough. Keep one hand free and use the scraper to guide the dough.
Common Shaping Mistakes to Avoid
Our experience with countless loaves has revealed these frequent shaping pitfalls:
Over-flouring the Surface
- Makes dough slide instead of grip
- Prevents proper tension development
- Creates dry spots in the final loaf
Aggressive Handling
- Deflates precious air bubbles
- Creates dense, heavy bread
- Tears the dough structure
If the dough tears during shaping, it needs a 15-30 minute rest. This pause allows the gluten to relax and makes the dough more cooperative. This simple pause-and-reset approach has saved many loaves.
How to Create Surface Tension
Surface tension plays a vital role in achieving that beautiful oven spring. The “tightening dance” technique creates this tension:
- Cup the dough gently with floured hands
- Use the dough’s natural stickiness to your advantage
- Move it in circular motions on an almost flour-free surface
- Watch for the dough to become smooth and taut
Proper tension makes the dough sit proudly on the counter rather than spread like a pancake. Look for a smooth, drum-like surface that springs back slowly after a gentle poke.
Important: A slightly wet bench scraper works better than a floured one for high-hydration dough. This prevents sticking while maintaining the dough’s moisture level.
Place the shaped dough seam-side up in a floured banneton or a bowl lined with a well-floured kitchen towel for the final proof. The seam creates a natural weak point that helps direct the bread’s expansion during baking.
Shaping requires practice to perfect, just like any other skill—each of the hundreds of loaves we’ve shaped taught us something new. Gentle yet decisive movements will help you develop an intuitive feel for the dough that written instructions cannot fully capture.
Baking Your First Loaf
The big moment has arrived! After days of preparation, we’re ready to reshape the scene of our perfectly shaped dough into a golden-crusted masterpiece. The perfect bake comes from proper temperature control and timing, and we’re excited to share our quickest way with you.
Oven Setup and Temperature
Temperature control separates good bread from great bread. Here’s our tested temperature guide:
| Stage | Temperature | Duration |
|---|---|---|
| Original Preheat | 500°F (260°C) | 1 hour |
| Baking (Lid On) | 475°F (246°C) | 20 minutes |
| Baking (Lid Off) | 475°F (246°C) | Until done |
A preheated Dutch oven creates the perfect environment for a professional bakery-style crust. The Dutch oven should be used during the preheat phase because its stored heat is vital for proper oven spring.
Scoring and Loading the Bread
Scoring does more than make bread look good – it controls how our bread expands. These steps lead to perfect scoring:
- Remove the proofed dough from the refrigerator
- Place parchment paper on top of the banneton
- Quickly flip the dough onto the counter
- Score with confident, swift cuts using a sharp razor or lame
- Make cuts about ¼ to ½ inch deep
- Use quick, decisive movements
- Hold the blade at a 30-degree angle for the ears
Pro Tip: Cold dough from the refrigerator scores much cleaner than room-temperature dough. The blade slides through it like butter!
The scored dough needs careful transfer (with parchment) into the preheated Dutch oven. Quick action helps retain heat. The lid should be put back on right away to trap steam, creating that perfect crust.
When to Know It’s Done
Multiple methods help ensure perfectly baked bread:
- Temperature Test: Internal temperature should reach 200°F (93°C)
- Visual Indicators:
- Deep golden-brown crust
- Visible blistering on the surface
- Noticeable height increase
- Sound Check: Hollow sound when tapping the bottom
Combining these indicators produces the best results. Start checking after about 20 minutes of lid-off baking. Lower the temperature by 25°F and continue baking if the crust darkens too much before the inside finishes.
The bread needs time to rest after baking. Steam escapes for up to an hour, and cutting too soon leads to a gummy interior. Patience massive a hmassivedifference in the final texture, even though the temptation to immediately vitals is strong.
Note that your first few loaves might not look Instagram-perfect, and that’s fine! We’ve baked hundreds of loaves and learned something new from each one. The process matters most – take notes on what works in your kitchen and adjust as needed. Starting a journey to perfect sourdough bread brings as much joy as reaching the destination.
Storage and Serving
The perfect sourdough bread needs proper storage for its crispy crust and tender crumb. Our experience with countless loaves shows that post-baking care matters as much as the baking process.
Cooling and Cutting Your Bread
The real challenge in sourdough baking isn’t mixing, shaping, or baking—you just need to wait until it cools! This patience proves significant.
Your bread’s cooling process completes the final baking stage as significant changes happen inside the loaf. A minimum 1-2 hour wait before cutting makes all the difference. Cutting too soon leaves you with a gummy, sticky interior that wastes all your effort.
To get the perfect slice, a serrated bread knife works best with a gentle sawing motion. The loaf’s side offers a better starting point and prevents the crust from getting compressed.
Best Storage Methods
Different bread types need different storage techniques. Here’s our detailed comparison:
| Storage Method | Best For | Duration | Notes |
|---|---|---|---|
| Breadbox | Crusty loaves | 4-5 days | Maintains crust texture |
| Beeswax Wrap | All types | 3-4 days | Eco-friendly option |
| Paper Bag | Artisan loaves | 2-3 days | Good air circulation |
| Kitchen Towel | Day-of use | 1-2 days | Simple solution |
| Plastic Bag | Soft bread | 3-4 days | Use in dry climates only |
Storing bread cut-side down on a cutting board works best. The exposed crumb stays protected while the crust acts as a natural shield. Humidity levels determine how we wrap ourbeforee extended longer storage:
- Dry Climate: Light plastic wrap to retain moisture
- Humid Climate: Paper bag or breadbox to prevent mold
Pro Tip: Room-temperature storage beats refrigeration. Cold temperatures make bread go stale faster, and freezing works better for storage beyond a few days.
How to Refresh Day-Old Bread
Bread loses its fresh-baked qualities over time, but we can revive it. This tested technique impressiveamazing results:
- Run the bread’s bottom under water .bPlease placey
- Place it in a preheated oven (400°F/200°C)
- Bake for 5-7 minutes until the crust crisps up
- Cool for 5 minutes before serving
Water creates steam that rehydrates the bread, while heat awakens the crust. This method can bring week-old bread back to life, making it taste almost fresh-baked.
Sliced bread needs a different approach. A damp kitchen towel wrap and 10 minutes in a 350°F (175°C) oven creates gentle steam that restores moisture without sogginess.
Temperature Matters: Storage temperature plays a vital role. Bread stays best between 60-70°F (15-21°C). Higher temperatures breed mold, while lower ones speed up staling.
Freezing works better with pre-sliced loaves. You can thaw just what you need.Ultimately, lett frozen bread reach room temperatury,and then use the refreshing technique to restore that fresh-baked texture.
Each sourdough variety might need its own storage approach. Whole-grain loaves stay fresh longer than white flour loaves, and ones with high hydration need more air circulation to maintain their crusty exterior.
Years of baking experience show that sdifferentiatesbetween good and great bread. These methods help your sourdough maintain that perfect balance of crusty exterior and chewy interior that makes homemadeuniquespecial.
Conclusion
Baking delicious sourdough bread at home needs patience and practice. The results make every step worth the effort. Our experience with sourdough baking shows that success comes from understanding the simple steps, using proper techniques, and paying attention to details like temperature and timing.
You don’t need fancy equipment or professional training to create beautiful artisanal loaves. A few simple tools and ingredients will do. Your attention to the starter, proper fermentation, and gentle dough handling will consistently lead to great results.
The Yeast We Can Do offers an authentic artisanal sourdough starter to enhance your bread and pizza-making skills. Our small-batch starter helps create exceptional bread and pizza with perfect tangy flavor and signature crust. This applies whether you’re a passionate home baker or a restaurant owner who wants to add true sourdough’s unmistakable flavor to your menu. You can reshape your baking results today. Email john@theyeastwecando.com to get our premium sourdough starter.
Note that each loaf teaches something new. Mistakes turn into valuable learning experiences. Your sourdough experience might begin with simple country loaves. Soon, you’ll find endless possibilities to create unique, flavorful bread that matches the quality of any artisanal bakery. Start baking, keep learning, and watch your skills grow like a well-fed starter!
FAQs
Currently, no frequently asked questions are available related to the article “How to Make Sourdough Bread: An Easy 3-Step Guide for Beginners.” Please refer to the article for detailed information on making sourdough bread, including understanding the basics, essential tools and ingredients, creating your starter, and more.