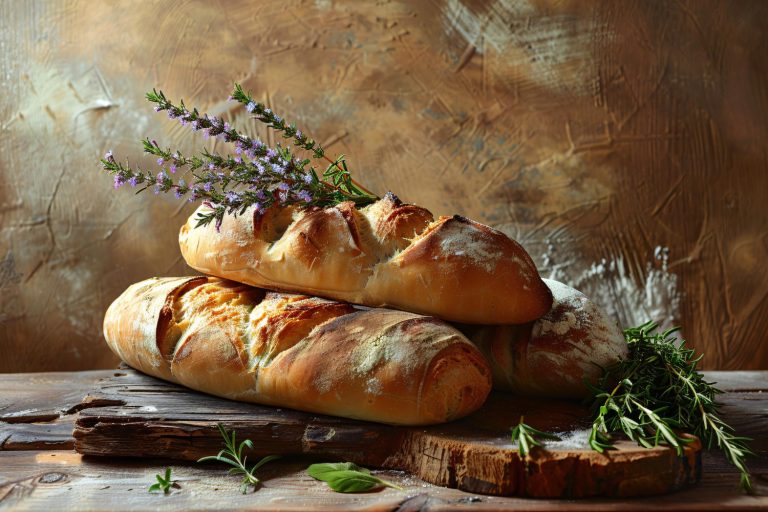
How to Make The Best Sourdough Shokupan Bread: A Step-by-Step Guide
The best sourdough shokupan bread blends traditional European fermentation with Japanese baking techniques. This creative mix reshapes the scene of classic Japanese milk bread into a naturally leavened creation that delivers deeper flavor complexity and better digestion. You’ll get a soft, pillowy loaf that stays fresh for days.
This detailed guide shows you how to make sourdough shokupan from beginning to end. You’ll discover everything in starter preparation, tangzhong making, and the right shaping methods that create Japanese milk bread’s signature fine crumb. The guide highlights significant steps that help you make perfect soft sourdough sandwich bread. Both new and seasoned bakers will find success with these techniques.
What is Sourdough Shokupan Bread?
Shokupan, the Japanese milk bread, stands as a remarkable blend of Asian baking traditions and modern techniques. This bread’s name combines “shoku” (food) and “pan” (bread). Portuguese influences shaped its development during the Meiji era (1868-1912).
Origins and characteristics of shokupan
Japanese modernization brought about shokupan, which evolved from Western-style bread to match Japanese priorities. This unique bread comes in two classic forms:
- Kakugata shokupan: Bakers use a lid to create this flat-topped loaf that delivers a moist, chewy texture
- Yamagata shokupan: This round-topped version doesn’t need a lid and gives you a lighter, softer texture
Shokupan’s exceptional qualities stem from its delicate texture and subtle sweetness. Bakers carefully blend milk powder, butter, and sugar to achieve these distinctive traits. A golden crust wraps around an interior white crumb that feels incredibly light and fluffy – many people say it feels just like biting into a cloud.
Benefits of using sourdough
Sourdough fermentation raises traditional shokupan to new heights with these key benefits:
-
Better Digestibility: Natural fermentation breaks down gluten proteins. This makes the bread easier to digest than regular varieties.
-
Extended Freshness: Proper storage keeps sourdough shokupan soft and moist for up to a week. The lactic acid from fermentation acts as a natural preservative.
-
Prebiotic Properties: Research shows that sourdough bread works as a prebiotic. It supports good gut bacteria and helps digestive health.
-
Reduced Gluten Content: Fermentation naturally cuts down gluten while keeping the bread’s texture intact.
Traditional shokupan methods combined with sourdough fermentation create something special. You get Japanese milk bread’s signature softness plus sourdough’s rich flavors. The result is a buttery loaf with gentle sour notes that works great for sandwiches and Japanese pizza toast.
The bread gets even better with special techniques like the yudane method. This East Asian technique cooks some flour with liquid before mixing it into the dough. The result is amazing moisture retention that keeps the bread soft much longer.
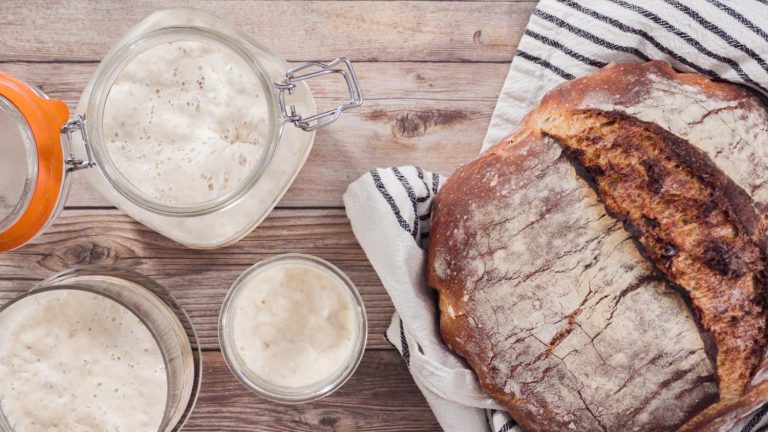
Preparing the Sourdough Starter and Tangzhong
A properly activated starter and perfectly prepared tangzhong are vital elements that form the foundation of exceptional sourdough shokupan bread. These essential components blend together to create this bread’s unique texture and distinctive flavor.
Activating and feeding the sourdough starter
A mature sourdough starter is the life-blood of this recipe. Your starter needs predictable rising and falling patterns that show consistent behavior after multiple feedings. The starter should show these key traits at its peak:
- It doubles in size within 3-4 hours at room temperature (27°C-30°C)
- You’ll see lots of bubbles and it should float
- A fresh, pleasant aroma fills the air with no liquid separation
Bakers who keep taking their starter will see better activity levels. The starter works best at its absolute peak to make shokupan. This happens 9-10 hours after feeding with milk, or a bit earlier with water. Your bread will have maximum leavening power and less sourness at this time.
Making the tangzhong paste
Tangzhong, a pre-gelatinized flour paste, is a vital component that makes bread exceptionally soft and helps it retain moisture. Making this paste requires cooking flour with liquid until it becomes a thick, gelatinized mixture. Here’s the quickest way to make it:
- Combine 31g flour with 122g milk in a medium saucepan
- Heat over medium-low heat while whisking continuously
- Cook for 4-6 minutes until the mixture thickens to a mashed potato consistency
- Remove from heat immediately when thickened
- Spread on a plate to accelerate cooling
- Let it cool completely before you add it to the dough
Science shows why tangzhong makes bread texture superior. Starch granules absorb up to 20 times their dry mass in water during gelatinization. This makes shared dough achieve 71% hydration while staying easy to handle.
Tangzhong starts significant enzymatic activities in the dough. The α-amylase and ß-amylase break down starch chains into maltose and other reducing sugars. These compounds work in several ways:
- Feed sourdough microorganisms
- Add natural sweetness
- Boost moisture retention
- Make bread stay fresh longer
The starter and tangzhong work together to create bread with amazing texture, longer shelf life, and balanced flavor. You should let the tangzhong cool completely before using it. The paste stays good in the refrigerator for up to 24 hours.
Mixing and Kneading the Dough
Making perfect sourdough shokupan depends on exact mixing and kneading techniques that develop the proper gluten structure and preserve the dough’s delicate texture. This significant step creates the foundation for the bread’s characteristic softness and structure.
Combining ingredients
You should start by organizing your ingredients carefully. A stand mixer with a paddle attachment works best for this recipe. Here’s how to mix everything together:
- Put flour, milk, egg, sugar, and salt in the mixer bowl
- Add your prepared levain and tangzhong
- Mix everything on low speed for 1-2 minutes until you can’t see any dry flour
- Change to the dough hook attachment
- Mix on medium speed for 4-5 minutes until the dough starts clinging to the hook
Your dough will be soft and might stick to the bowl’s sides. Let it rest for 10 minutes. This rest helps the flour absorb moisture completely and allows the gluten to relax before you add butter.
Kneading techniques
The kneading process turns the original mixture into a smooth, elastic dough. Room temperature butter needs to be worked in gradually after the dough rests. Each portion of butter should blend completely before adding more, and this usually takes 5-8 minutes.
The dough needs your full attention while kneading to reach its perfect texture. You’ll know your dough is ready when:
- It becomes more elastic with a nice shine
- The surface feels smooth and supple
- The butter blends in without any streaks
- The window pane test reveals a thin, translucent membrane
A stand mixer needs occasional stops to scrape the bowl’s sides. This ensures the dough develops evenly and keeps the motor from overheating. The process usually takes 10-12 minutes once you’ve added all the butter.
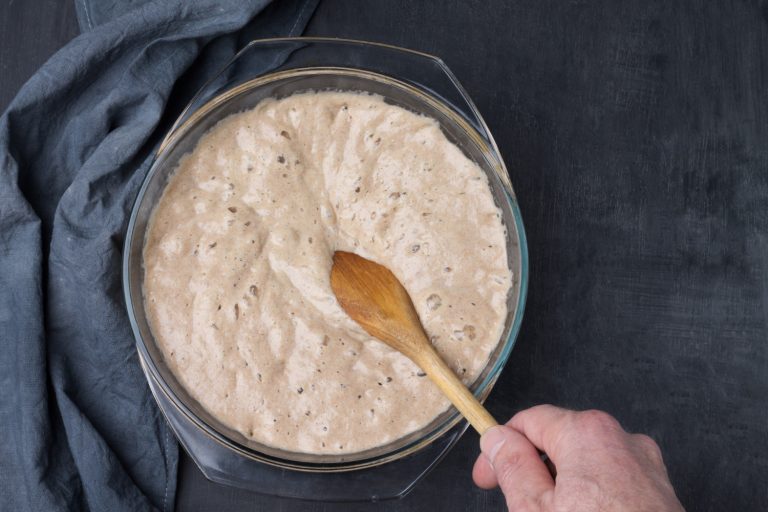
Bulk fermentation
Bulk fermentation is a vital phase that develops the dough’s structure and flavor. The process needs specific conditions to succeed.
Your dough needs to stay between 74-76°F (23-24°C) throughout bulk fermentation. This temperature range allows the process to complete in about 4 hours. The dough requires two strengthening sets during this time:
First Set (30 minutes after starting):
Stretch and fold the dough to create a rectangular shape in the bowl. This builds gluten structure and incorporates air.
Second Set (30 minutes after first set):
Take the dough to a clean counter and perform slap-and-fold movements until it tightens and smooths out. Shape it into a tight ball before placing it back in the fermentation container.
The dough becomes puffy and rises well during bulk fermentation. A simple poke test determines readiness. Press the dough with a floured finger – it should slowly spring back and leave a slight mark. This shows proper development and signals readiness for the next step.
Your kitchen’s environment plays a significant role in successful fermentation. Bakers can use a home dough proofer or extend fermentation time if temperatures drop below the recommended range. The dough should grow about 1.5 times its original volume in this phase.
Shaping, Proofing and Baking
Perfect sourdough shokupan’s final stages just need precision and careful attention to detail. The fermented dough becomes a masterpiece of texture and form. This significant phase shapes the bread’s signature appearance and internal structure.
Shaping the loaf
Your bread’s journey starts with careful portioning of the fermented dough. A lightly oiled work surface and bench scraper will help you:
- Divide the dough into three equal portions (200g each)
- Form each portion into taut rounds
- Rest the rounds under cover for 10 minutes
- Roll each portion into an oval shape (~1cm thick)
- Fold sides toward center to create envelope-like shapes
- Roll from top down while keeping moderate tension
- Set each piece seam-side down in greased Pullman pan
- Arrange pieces side by side with even spacing
Gentle handling during shaping helps preserve your dough’s gluten structure. Keep a bowl of water nearby to wet your hands and tools when the dough becomes sticky.
Final proofing
The Pullman pan hosts the shaped loaf during its final fermentation stage. This crucial phase creates the bread’s distinctive texture. Room temperature proofing takes about 3½ hours at 74-76°F (23-24°C), though ambient conditions might affect this duration.
The properly proofed dough shows these signs:
- Dough fills 80-90% of the pan’s height
- A smooth, slightly domed surface appears
- Light finger pressure leaves a small dent that recovers slowly
- The volume expands noticeably without overflow
Bakers can choose overnight proofing by refrigerating the shaped dough at 22°C (72°F) for 10-12 hours. This slow fermentation process builds complex flavors while the dough structure remains intact.
Baking temperature and time
Bakers can choose between two approaches to create shokupan, each producing slightly different results. The square-topped shokupan requires a preheated oven at 350°F (175°C) with the rack placed in the bottom third. Here’s what you need to do:
With Pullman Lid:
- Put the lid on before your dough reaches its full height
- Bake covered for 45 minutes
- Check if internal temperature hits 200°F/93°C
- Add 5 more minutes if needed
- Let the bread rest in pan for 10 minutes after baking
The domed-top version needs:
- Same preheating temperature
- A coating of egg wash (whole egg and milk mixture)
- 45 minutes of baking without the lid
- A quick check at 15 minutes
- Foil cover if the top browns too fast
Your finished loaf should have a light golden-brown crust and reach 200°F (93°C) inside. A gentle tap of the pan on the counter right after baking helps release trapped steam. A brush of melted butter or sugar solution on the warm crust will give it an attractive shine.
Cooling plays a crucial role in the bread’s final texture. The loaf needs a 10-minute rest in the pan before moving to a wire rack. Several hours of cooling time works best, and leaving it overnight allows the crumb structure to set perfectly.
Conclusion
Creating perfect sourdough shokupan demands attention to several technical aspects. Bakers must focus on starter maintenance and temperature control during fermentation. The blend of Japanese milk bread methods with natural fermentation produces bread that tastes and feels better than regular versions. A combination of tangzhong method, strategic dough development, and precise proofing creates incredibly soft bread. This bread stays fresh longer and provides better digestibility with more nutrients.
Home bakers can make bakery-quality sourdough shokupan with the right techniques. This versatile bread works great in sandwiches and creative toast options. The bread’s extended shelf life provides days of fresh taste. Bakers who want to begin a journey can improve their bread and pizza making with authentic artisanal sourdough starter from The Yeast We Can Do. Premium starter that gives exceptional results with perfect tangy flavor and signature crust is available – email john@theyeastwecando.com. Traditional methods and natural fermentation turn everyday bread into something extraordinary, as shown by sourdough shokupan’s success.