How to Get Sourdough Ear: A Foolproof Guide
A distinctive ear on a sourdough loaf is a true mark of exceptional artisan bread baking. With its dramatic uplift in the crust, this coveted feature shows both technical skill and proper fermentation. Your perfect sourdough ear needs several significant elements of the bread-making process.
The ear’s success depends on proper dough strength, optimal hydration levels, and precise scoring technique. This piece covers each significant step—from dough preparation and shaping to scoring patterns and steam management during baking. You’ll learn proven methods to help you create pronounced ears to boost your sourdough bread’s appearance and texture.
Understanding Sourdough Ear
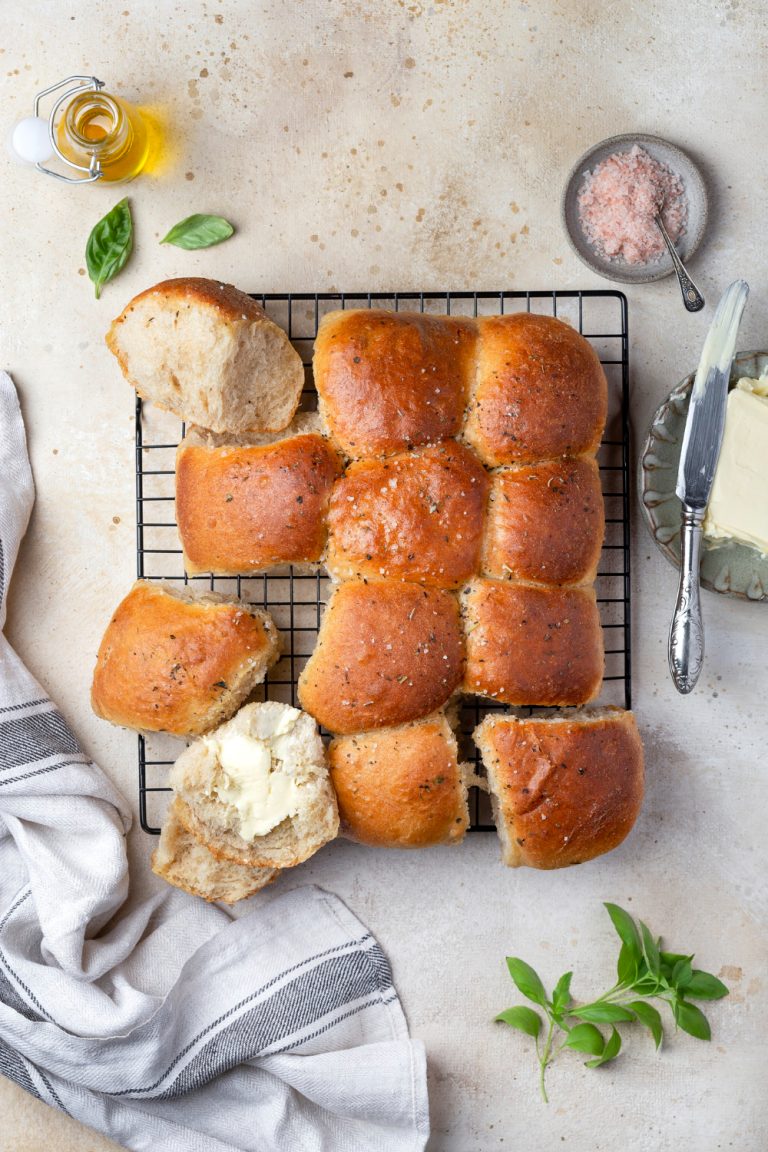
A sourdough ear is a distinctive raised crust flap that forms during baking. The bread develops this feature when the scored dough expands in the oven, creating a pronounced ridge that peels back from the loaf’s body.
What is a sourdough ear?
A sourdough ear develops from a carefully scored line that creates a dough flap. The flap lifts and peels back as the bread bakes. The bread’s outer layer stretches and splits along the score line, which lets the dough expand in a controlled way. The ear appears as a long ridge that runs across the loaf or creates several small decorative lifts on the surface.
Why is it desirable?
A well-formed ear looks beautiful and shows that the bread was made correctly. The baker’s skill becomes evident through several significant aspects:
- Getting the fermentation right
- Building proper dough strength
- Shaping the dough correctly
- Timing the proof perfectly
- Using the quickest way to score
Factors Affecting Ear Formation
A well-formed ear in bread requires several essential elements to work together perfectly. Proper fermentation creates the foundation, and the dough needs to be baked when it reaches 10-20% below complete fermentation. Steam is vital because it helps the dough’s surface stay pliable during the original baking stage, allowing maximum expansion before the crust hardens. The dough needs strong structural integrity from balanced hydration levels and strength development to support the ear’s growth. The scoring technique also shapes how dramatically the ear develops during baking, including the choice of blade, angle, and depth of the cut.
Perfecting Your Dough
A perfect sourdough ear starts with the basics of dough development, and well-prepared dough creates the desired lift during baking.
Achieving proper fermentation
A perfect fermentation process begins with a healthy sourdough starter that doubles consistently with regular feeding. The dough should develop sufficient gasses and build its gluten structure during bulk fermentation. You want to stop fermentation when the dough doubles in size, which takes 4-6 hours at room temperature. This will give enough power for the dramatic oven spring to form the ear.
Importance of dough strength
Dough strength development plays a significant role in supporting the ear formation process. A well-developed dough shows these characteristics:
- A smooth, cohesive appearance with a slightly shiny surface
- Knowing how to pass the windowpane test
- Strength to maintain its shape during shaping
- Proper gas retention capabilities
Bakers can build strength through strategic stretch and folds during bulk fermentation. Most doughs benefit from 3-4 sets spaced an hour apart.
Hydration levels for optimal ears
Beginners should start with 65-75% hydration because it provides better control, even though seasoned bakers often work with higher levels. The dough becomes more accessible to handle during shaping and scoring at moderate hydration levels, which still creates excellent ear development. Bakers can gradually increase hydration as their skills improve, and they should remember that different flour types need specific hydration adjustments. The sweet spot typically falls between 70-78% and perfectly balances workability and dramatic ear formation.
Mastering the Shaping Technique
Proper shaping technique is the lifeblood of achieving an impressive sourdough ear. Success depends on your attention to detail and understanding of tension development’s impact on the final result.
Creating surface tension
A well-developed surface tension creates exceptional ear formation. Bakers must create tight, smooth outer skin on their dough’s surface. This tension becomes skilled at creating dramatic lift and distinctive ears during baking, especially when you have batard (oval) shapes. The dough should look taut but not torn, and the tension should run smoothly from left to right across the top surface.
Pre-shaping and final shaping tips
Bread shaping happens in two essential stages. Bakers create a loose ball during pre-shaping that builds the original tension without overworking the dough. The final shaping starts after the dough rests for 30 minutes. These principles help achieve perfect shaping results:
- Use minimal flour to keep proper dough grip
- Handle the dough gently to protect fermentation gasses
- Create a square shape before the final form
- Apply consistent pressure while rolling to build even tension
- Seal all seams well to keep the structure intact
Common shaping mistakes to avoid
Over-flouring your work surface is a critical mistake that many bakers make. The excess flour makes it impossible to develop proper tension in the dough. Bakers often rush through the pre-shaping process, and this hurried approach leads to poor structure in the final loaf. You should handle the dough carefully because too much pressure will destroy the precious air pockets developed during fermentation. The key is to build surface tension while protecting the dough’s internal structure and fermentation progress.
Scoring for Success
The perfect sourdough ear starts by becoming skilled at scoring. A precise cut on the dough’s surface determines how the ear will develop during baking.
Choosing the right lame
A bread lame is a baker’s main scoring tool that consists of a razor blade mounted on a handle. Straight lames give excellent control to beginners, while curved lames create more dramatic ears as they peel under the dough’s surface. Everything in a quality lame includes:
- A lightweight handle that feels comfortable
- A simple blade replacement mechanism
- A minimal blade housing that ensures clean cuts
- A properly exposed blade edge
Proper scoring angle and depth
The optimal scoring angle should be between 30 and 45 degrees, which creates a flap that lifts during baking. Bakers must keep a consistent depth of about ½-inch (1cm) throughout the cut. A deeper score may result in an oversized ear, but a shallow cut will not provide enough lift. Swift and confident motions prevent the blade from dragging when working with high-hydration doughs.
Scoring patterns for pronounced ears
The most impressive ear formation comes from a single, decisive slash. Your cut should extend from end to end across the dough’s surface, slightly off-center. Expert bakers often use a gentle crescent or C-shaped motion while scoring, though straight lines work just as well. The best results come from scoring cold dough straight from the refrigerator because chilled dough resists better and creates cleaner cuts. Blade maintenance plays a significant role, and replacing razor blades after 10-12 loaves will give consistently clean scores.
Baking for the Perfect Ear
A sourdough’s signature ear develops when bakers master the perfect balance of temperature, steam, and precise timing in their ovens. The baker’s success depends on proper fermentation, shaping, and scoring techniques that create the foundation.
Optimal oven temperature
The right temperature balance plays a significant role in ear development. Many bakers support using hot ovens, but moderate temperatures often work better. The optimal temperature range has these settings:
- 425°F (218°C) for consistent, controlled spring
- 450-475°F (232-246°C) for standard loaves
- 500°F (260°C) for original preheat, then reducing
Using steam for oven spring
Steam helps form the bread’s ear by keeping the dough’s surface pliable during the significant first baking phase. A Dutch oven creates a perfect steam environment and traps moisture that the dough releases. Bakers can improve steam production by adding a few ice cubes or misting the dough before covering. The steam envelope raises the scored section, creating a pronounced ear before the crust sets.
Timing your bake for best results
Steam exposure affects ear development a lot. The first 15-20 minutes play a critical role, and the dough needs to stay covered to keep the steam inside. Once this phase ends, remove the Dutch oven’s lid so the crust can develop its final color and texture. A complete bake usually takes 30-35 minutes, though bigger loaves might need more time. Expert bakers sometimes open the oven door briefly at the 5-8 minute mark to rescore along the ear’s edge, but this technique needs practice to master properly.
Conclusion
Creating the perfect sourdough ear requires several technical elements that work together harmoniously. Proper fermentation builds strong dough development as the foundation, and hydration levels between 70-78% create ideal conditions. The dough’s surface tension from careful shaping and precise scoring at a 30-45 degree angle sets the perfect conditions for the bread to lift beautifully during baking. The bread rises gracefully when bakers manage steam and temperature properly, right before the crust sets.
Bakers regularly practice these techniques to turn simple bread into exceptional artisan loaves with distinctive ears and professional crusts. These elements help create bread that looks stunning and has superior texture. [Your bread and pizza will reach new heights with an authentic artisanal sourdough starter from The Yeast We Can Do. Our small-batch starter helps create exceptional bread and pizza with perfect tangy flavor and signature crust, whether you’re a passionate home baker or a restaurant owner wanting to add true sourdough’s unique character to your menu. Take your baking to the next level today. Email [email protected] to get your hands on our premium sourdough starter.] A baker’s ability to create perfect sourdough ears shows their mastery of artisan breadmaking’s core principles.
FAQs
What could be the reason my sourdough doesn’t develop an ear?
If your sourdough loaf is flat and the interior has a honeycomb-like texture, it’s likely overpriced. This means it was allowed to rise too long, preventing it from achieving the desired lift during baking.
What is the best way to score sourdough to ensure it forms an ear?
To score sourdough effectively and encourage the formation of an ear, use a lame to cut at an angle of 30-45 degrees. This angle helps the dough flap open as it bakes, which is crucial for forming an ear. A straight lame might make this technique easier to apply than a curved one.
How can I ensure my sourdough gets a good ear?
Achieving a pronounced ear on your sourdough involves several factors: avoid overproofing the dough as it leads to a lack of structure; prefer slight underproofing instead. Also, ensure your hydration levels are not excessively high, which can impact the dough’s ability to form an ear.
How do I start a sourdough starter?
To begin a sourdough starter, place some starter in a container and mix in 45 grams of all-purpose flour and an equal amount of room-temperature water. Let this mixture sit until it roughly doubles, indicating it’s active. If it doesn’t float after 24 hours, add more flour and water in equal pa