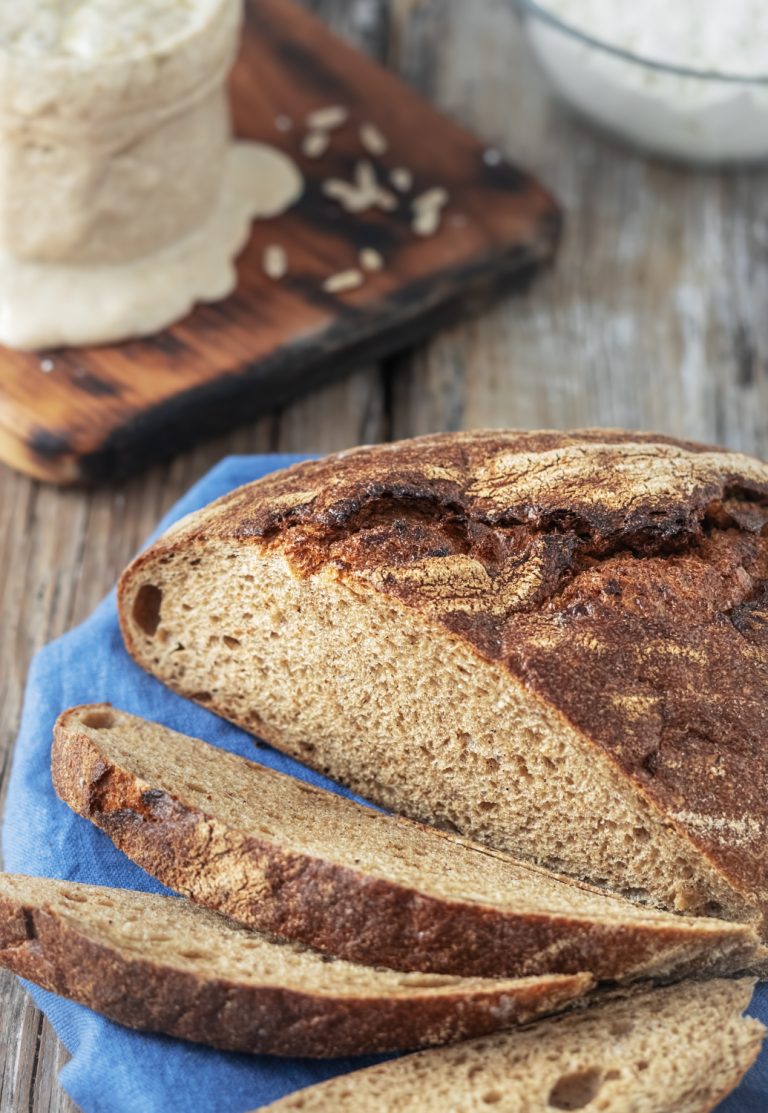
We’ll Help Your Sourdough Starter Rise to New Heights! [+ Quick Fixes]
Your sourdough starter refusing to rise? We’ve all watched our starters stubbornly sit there, testing our patience and passion for artisanal baking.
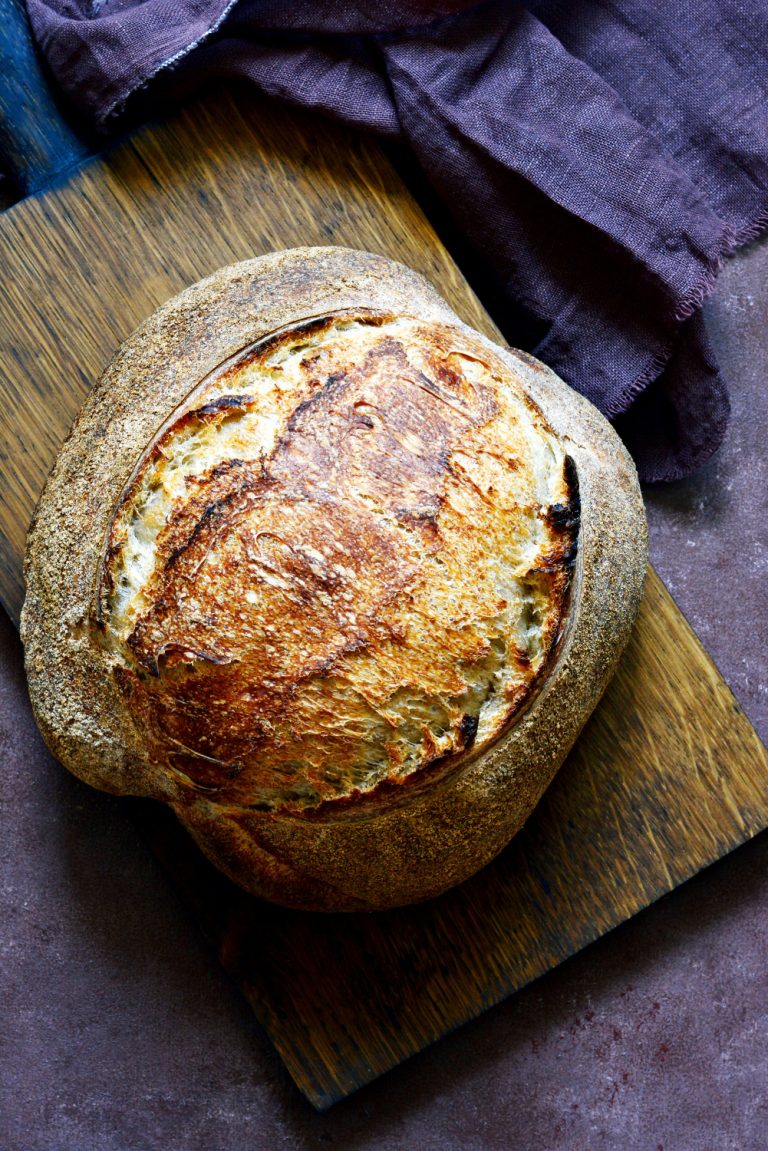
Let’s get straight to the truth about starter development! While many bakers eagerly expect results in 5-7 days, our experience shows that a truly vibrant starter needs at least 14 days to develop its full potential. Sometimes, this journey stretches to 4-6 weeks before your starter creates that perfect loaf. Rushing this process usually leads to dense, gummy bread that stays flat as a pancake!
The hallmark of a thriving starter? Consistent doubling within 4-6 hours after feeding. When your starter misses this crucial milestone, something’s amiss in your fermentation symphony. But don’t let your spirits fall flat! We’ve gathered the 10 most common starter struggles and their proven solutions. Together, we’ll get your sourdough dancing with wild yeast activity! 🍞
No Bubbles or Activity After Feeding

Image Source: Reddit
Staring at a bubbleless starter? Don’t let your spirits deflate! Our years of sourdough crafting have taught us exactly what brings those beautiful bubbles back to life.
What a Healthy Starter Should Look Like
Picture this: your perfect starter doubles or triples within 4-6 hours after feeding. Peek through the jar sides – you’ll spot a gorgeous honeycomb pattern of bubbles creating that spongy, aerated texture we all love. The crown jewel? A slightly domed surface with bubbles breaking through the top at peak activity.
The texture should remind you of warm, creamy peanut butter – stretchy and elastic, yet pourable like thick pancake batter. Here’s a little baker’s secret: your mature starter should greet you with pleasant, yeasty notes rather than sharp vinegar aromas.
Why Bubbles Matter
Those precious bubbles tell us our wild yeasts and beneficial bacteria are throwing quite the fermentation party! These tiny organisms work their magic together – yeasts munching on glucose and fructose, while bacteria feast on maltose. The result? Beautiful carbon dioxide bubbles that give your bread that perfect rise.
Quick Fix: Temperature Adjustment
Temperature plays a crucial role in keeping your starter happy! The sweet spot? 75-85°F (24-28°C). Try these proven temperature tricks:
Cozy up your starter in a warm spot between 78-82°F (25-26°C)
Feed with warm water (80-90°F) – think perfect bath temperature
Baker’s pro tip: Use a seed raising mat or proofing box for steady warmth
When to Be Patient vs When to Act
Mastering sourdough means knowing when to wait and when to jump into action. Give your starter at least 14 days to develop its personality. During this time, beneficial bacteria establish their delicious dominance.
Time to take action when:
Your starter shows zero signs of life for several days
Temperatures dip below 68°F (20°C)
Your mixture becomes soupy or cement-like
Here’s something remarkable – these little fermentation friends are tough cookies! Even after a year-long refrigerator snooze, they can bounce back with proper care and feeding. Remember: as long as mold hasn’t crashed the party, your starter can usually perk up with the right temperature and consistent feeding schedule.
Starter Smells Like Nail Polish or Vinegar

Image Source: The Sourdough Journey
That sharp nail polish aroma wafting from your starter jar? We’ve caught this distinctive scent many times in our sourdough journey. Let’s explore what your starter’s trying to tell you through these aromatic signals.
Understanding Starter Aromas
Your sourdough starter’s personality shines through its changing fragrances. Fresh starters begin their journey with gentle, sweet notes reminiscent of ripened fruits. As fermentation works its magic, these subtle aromas mature into pleasantly tangy undertones. While these scents might surprise newcomers to sourdough baking, they’re simply part of our starter’s natural symphony.
What Causes Bad Smells
Those nail polish (acetone) or vinegar aromas stem from specific conditions:
Starter Starvation: An unfed starter produces acetic acid, creating those sharp vinegar notes
Fermentation Marathon: Extended fermentation shifts our microscopic friends into overdrive
Temperature Troubles: Warmth above 80°F/27°C stresses our yeast companions, triggering acetone production
Water Woes: Excess hydration often leads to these aromatic challenges
How to Fix Unpleasant Odors
Here’s the good news – these scents signal your starter needs attention, not last rites. Our proven solutions:
Feed with Purpose: Embrace the 1:2:2 ratio (starter:flour:water) for balanced nutrition
Temperature Sweet Spot: Keep your culture cozy between 75-85°F (24-28°C)
Peak Performance: Feed right at maximum rise, saving just a small portion
Moisture Balance: Adjust water content if your starter seems too wet
Prevention Tips
Maintain those pleasant sourdough aromas with these baker’s secrets:
Consistent Care: Two daily feedings at room temperature ward off hunger-induced acetone
Proper Housing: Choose loose-fitting lids over airtight seals for healthy gas exchange
Quality Matters: Unbleached flour and filtered water make happy cultures
Environmental Harmony: Shield from direct heat while maintaining steady temperatures
Remember this sourdough wisdom: A touch of tang belongs in every jar – it’s what puts the “sour” in sourdough! Mature starters develop that perfect yogurt-like aroma. Here’s a comforting thought: Even if acetone appears temporarily, your bread won’t inherit these notes – they simply evaporate during baking.
Not Doubling in Size Within 8 Hours

Image Source: Reddit
Your starter’s sluggish rise might test your patience, but we’ll help you master the science of sourdough timing! Our years of baking wisdom reveal the perfect balance of time, temperature, and feeding ratios.
Expected Rise Times
A vibrant starter doubles between 4-8 hours after feeding. Here’s the fascinating part: your starter’s timeline changes based on how you feed it! A 1:1:1 ratio brings peak activity within 4-6 hours, while a 1:4:4 ratio needs 10-12 hours to reach its full potential.
Impact of Room Temperature
Temperature orchestrates your starter’s fermentation dance. At 76°F (24°C), your culture ripens beautifully every 12 hours. Think of it like this: warmer rooms create faster dancers, while cooler spots slow the rhythm.
Our baker’s secrets for perfect temperature:
Maintain 70-75°F (21-24°C) for steady fermentation
Adapt your feeding rhythm with seasonal changes
Pro tip: Use a proofing box for unwavering temperature control
Feeding Ratio Solutions
Your starter’s meal size shapes its rising performance. Let’s explore these time-tested ratios:
1:1:1 Ratio: The sprinter – peaks in 4-6 hours
1:2:2 Ratio: The steady marathoner – perfect for daily care
1:4:4 Ratio: The night owl – ideal for overnight proofing
Summer baking wisdom: Scale back to 5 grams of mature starter to tame rapid fermentation. Winter strategy? Bump up to 25 grams for consistent activity.
Container Size Considerations
Your starter’s home matters more than you might think! The perfect vessel should:
Welcome triple the volume expansion
Showcase straight sides for easy progress tracking
Keep temperatures steady through proper insulation
Watch out for these container pitfalls: Too much space lets your starter spread thin, weakening fermentation. Too little room? Prepare for overflow adventures!
A 3/4 liter jar (28.7 fluid ounces) hits the sweet spot for most home bakers. This goldilocks size handles various quantities while encouraging proper fermentation.
Here’s a clever trick: Mark your starter’s starting line with a rubber band. This simple gauge reveals when your starter reaches its peak – look for that beautiful domed top crowned with bubbles.
Liquid Layer Forming on Top (Hooch)

Image Source: Busby’s Bakery School
Spotted a mysterious liquid lounging atop your starter? Don’t let this common sight dampen your spirits. Your starter’s sending signals about its well-being, and we’re here to decode them.
What Hooch Indicates
That clear or dark liquid crowning your starter? We call it hooch – a blend of alcohol and water naturally produced during fermentation. Here’s the science: Wild yeasts create this liquid while feasting on your starter’s nutrients. The message? Your starter’s ready for its next meal.
Watch how hooch changes its wardrobe. Young starters dress in clear or cloudy liquid, while mature cultures might sport deeper shades from brown to black, sometimes even purple. Those darker hues? They’re especially common in starters enjoying extended refrigerator vacations.
How to Handle Hooch
Our sourdough community splits into two camps on hooch handling. Some bakers fold it back in, cherishing its flavor-enhancing qualities. Others prefer pouring it off, particularly when dealing with substantial amounts or darker varieties.
Our baker’s guide to hooch:
Pour away dark or excessive amounts for proper hydration
Stir in small portions of clear hooch for extra tang
Safety first: Always discard black hooch – it’s concentrated waste
Here’s a reassuring truth: Hooch might look scary, but it doesn’t spell doom. Your starter can bounce back beautifully, even after developing significant amounts of this liquid.
Adjusting Feeding Schedule
Let’s prevent hooch from crashing your sourdough party with these time-tested strategies:
First, embrace frequent feedings. Room temperature starters (around 76°F/24°C) thrive on 12-hour feeding cycles. Summer strategy? Use just 5 grams of mature starter. Winter wisdom? Bump it to 25 grams for steady activity.
Second, perfect your feeding ratio. Skip the 1:1:1 and level up to 1:2:2 or 1:4:4 (starter:flour:water) for proper nourishment. This ensures your culture stays well-fed between meals.
Third, master temperature control. Keep your starter cozy between 70-75°F (21-24°C). Warmer environments speed up nutrient consumption, potentially leading to more frequent hooch visits.
Pro tip for refrigeration: Feed your starter right before its cold storage retreat. This packs plenty of nutrients for the dormant period, keeping hooch at bay.
Remember: steady feeding prevents acid buildup, which can weaken your yeast community and impact your final loaf. Maintain these feeding rhythms, and you’ll nurture a starter that creates exceptional sourdough bread.
Starter is Too Runny or Too Thick

Image Source: The Pantry Mama
Ready to master the perfect starter consistency? Your starter’s texture speaks volumes about its happiness! Our countless hours of sourdough crafting have taught us the delicate dance of flour and water.
Ideal Starter Consistency
Picture warm, creamy peanut butter – that’s your starter’s sweet spot! Fresh after feeding, expect a slightly thicker mixture that blossoms into a dreamy, mousse-like texture at its peak. Here’s the magic: Your starter should pour smoothly while maintaining enough structure to trap those precious fermentation bubbles.
Hydration Level Fixes
The secret sauce? Your water-to-flour ratio! Beginners, stick with 100% hydration – equal parts flour and water create foolproof results. Let’s talk ratios:
Thick and sturdy: 75% hydration (1 cup flour, 6 tablespoons water)
Goldilocks zone: 100% hydration (1:1:1 ratio)
Loose and lively: Add a splash more water, but watch that fermentation speed!
Flour Type Impact
Different flours bring unique personalities to your starter party. Strong bread flour? Quick to drink but doesn’t hold its water. Meanwhile, those whole grain flours, especially our friend rye, take their time but hold onto moisture like champions.
Here’s something remarkable: rye flour hosts up to 30 different beneficial bacteria varieties, while other flours only welcome 3 to 14 bacterial friends. This diverse microscopic community creates unique fermentation patterns and textures.
Our texture-perfecting secrets:
Keep your starter cozy between 74-80°F (23-26°C) for steady fermentation
Summer strategy: Less starter. Winter wisdom: More starter
Try our favorite flour duet – whole grain and white flour dancing together
Want to know something fascinating? Your flour choice crafts more than texture – it composes unique aromatic symphonies. Amaranth brings meaty notes, while rye sings with fruit-like sweetness. Thank those unique bacterial communities for this flavor festival!
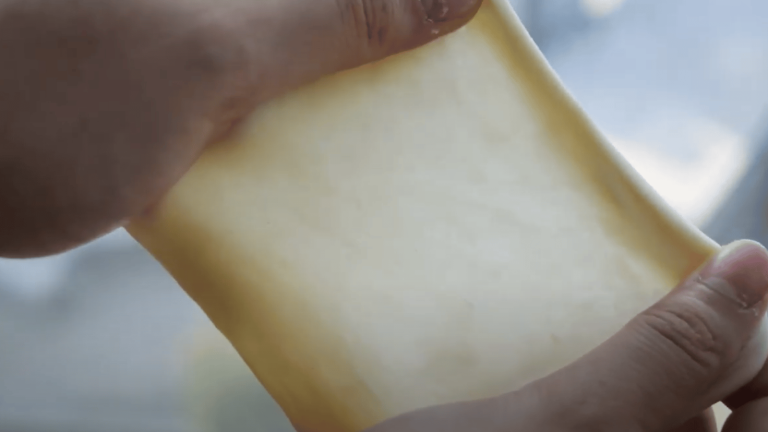
No Weblike Structure When Stretched

Image Source: Cultured Guru
Stretching your starter only to watch it tear like wet paper? We’ve seen countless bakers face this gluten development challenge. Let’s weave some strength back into your starter!
Signs of Gluten Development
A well-developed starter performs like an acrobat – stretchy yet strong. When pulled between your fingers, watch for that beautiful translucent membrane holding steady. This “windowpane” effect shows your protein bonds are ready to trap those precious fermentation bubbles.
Your starter should feel both elastic and extensible, like a perfectly tuned rubber band. Here’s what success looks like: peek through your jar to spot that gorgeous honeycomb pattern of bubbles climbing the sides.
Flour Quality Issues
Let’s talk flour power! High-protein bread flour (12-14% protein) builds stronger gluten networks than its all-purpose cousin (10-12%). Using low-protein flour? That’s like trying to build a brick house with sand!
Fresh-milled flour brings its own drama – those sharp bran particles act like tiny scissors, slicing through developing gluten. Whole grain flours? They’re just fashionably late to the gluten party, needing extra autolyze time to show their full potential.
Fixing Weak Gluten Structure
Our time-tested strategies for stronger gluten:
First, perfect your feeding ratio. The 1:5:5 magic number (starter:flour:water) gives your culture plenty of protein-rich food for gluten development. Think of it as strength training for your starter!
Second, mind your temperatures. Keep your starter cozy between 74-76°F (23-24°C). Too hot or cold? Your gluten development might throw a tantrum!
Third, gentle stretching during feeding helps align those gluten strands. Think of it as giving your starter a morning stretch – no need for Olympic gymnastics here.
Here’s some sourdough wisdom: Time works wonders for gluten. Even without our help, gluten develops during autolyze. Try extending this rest period to 60-90 minutes.
Struggling with structure? Our favorite flour blend combines 70% bread flour with 30% whole grain. This dynamic duo creates the perfect balance of strength and fermentation fun.
Remember: gluten development is more marathon than sprint. Watch, feed, and maintain consistent schedules for that perfect web-like structure.
Fails the Float Test Repeatedly

Image Source: The float test for yeast dough and sourdough starter | King Arthur …
The famous float test – friend or foe? While many bakers swear by this classic technique, our years of sourdough crafting reveal a more nuanced story about starter readiness.
Understanding the Float Test
Here’s the traditional method: drop a spoonful of unstirred starter into room temperature water. The theory tells us floating indicates sufficient trapped carbon dioxide for proper leavening. This gas capture showcases active fermentation within your starter’s glutenous matrix.
Why Starters Sink
Don’t let a sinking starter sink your spirits! Several factors affect buoyancy:
Hydration Levels: Higher hydration starters often dissolve in water, regardless of vitality
Flour Type: Rye and other low-protein flours struggle to trap gases effectively
Handling: Even the gentlest touch can release precious gas bubbles
Timing: Test too late, and weakened gluten structure means certain sinking
Here’s something fascinating: Studies show partially risen dough and developing starters sometimes float without being truly ready. Talk about misleading!
Alternative Testing Methods
Our seasoned bakers prefer these reliable indicators:
Visual Clues:
Surface bubbles dancing like tiny champagne pearls
That beautiful honeycomb structure climbing jar walls
The predictable rise and fall rhythm post-feeding
Physical Signs:
Consistent doubling within 6-8 hours after feeding
Peak performance shows a level rather than domed top
Watch for that subtle center depression as activity winds down
Aroma Signals:
Mature cultures develop complex, rounded sour notes
Your nose knows – smell indicates bacterial harmony
Here’s a liberating truth: Some of our most successful bakers work with starters that never ace the float test. The real key? Steady feeding patterns and proper temperature control between 74-80°F (23-26°C).
Inconsistent Rising Pattern

Image Source: Reddit
Cracking the code of your starter’s rising rhythm? Our sourdough journey reveals the artistry behind predictable fermentation patterns.
Tracking Rise Times
Your starter should gracefully double within 4-8 hours after feeding. Here’s our favorite tracking trick: slip a rubber band around your jar right after feeding. This simple gauge reveals your starter’s peak moment – watch for that perfect dome crowned with bubbles.
Your feeding ratio orchestrates the rising dance:
1:1:1 ratio – the quick waltz, peaking in 4-6 hours
1:2:2 ratio – the steady foxtrot, taking 6-8 hours
1:4:4 ratio – the slow tango, stretching 10-12 hours
Environmental Factors
Temperature plays a pivotal role in your starter’s daily performance. At 75°F (23°C), your culture ripens beautifully every 12 hours. Summer wisdom: scale back to 5 grams of mature starter. Winter strategy: boost to 25 grams for steady activity.
Your starter’s home matters too! A 3/4 liter jar hits the sweet spot for most home bakers. Watch out: oversized containers let your starter spread thin, weakening its rising power.
Establishing Routine
Predictable rises demand steady rhythms. Peak-to-peak feeding – refreshing right at maximum height – creates reliable fermentation cycles.
Our recipe for consistency:
Schedule feedings like clockwork
Keep your kitchen cozy between 70-75°F (21-24°C)
Stay loyal to your flour blend and ratios
Here’s a fascinating experiment: Track two starters for one day – one fed at 1:1:1, another at 1:2:2. These parallel cultures reveal your starter’s unique personality, helping you plan perfect baking days.
Mold or Unusual Colors Appearing

Image Source: The Pantry Mama
Spotted something fuzzy that doesn’t belong in your starter? Our hearts sink too when unwanted colors crash our sourdough party. Let’s learn to spot these uninvited guests before they spoil the fun!
Identifying Harmful Growth
Those fuzzy patches ranging from white to greenish-brown spell trouble in your starter. Here’s the crucial difference: Mold wears a distinctly fuzzy coat, unlike other harmless formations. Watch out! Pink or orange streaks signal Serratia marcescens bacteria making an unwelcome appearance.
Red flags demanding immediate action:
Fuzzy spots in dark green, brown, or black shades
Velvety white patches playing dress-up
Yellow or blue uninvited guests
Pink or orange streaks crashing your starter party
Immediate Actions Needed
Spotted mold? Time for swift action! First things first: Don’t try scraping off visible mold – those sneaky thread-like hyphae have already spread their underground network throughout your starter. Next up: Give your jar a thorough spa treatment, since mold loves hanging out on those moist, warm jar walls.
Starting Fresh Safely
Keep your new starter pure as flour with these strategies:
Environment Control: Play food safety detective – check for overripe fruit and other mold magnets nearby
Container Management: Treat your starter to a fresh jar monthly and keep those tools sparkling clean
Quality Ingredients: Only the finest flour and filtered water deserve an invitation to this party
Temperature Regulation: Keep things cozy between 70-75°F (21-24°C) – too warm and mold crashes your starter soirée
Here’s some sourdough science: Mature starters naturally ward off party crashers with their acidic environment. Even better? Regular feeding schedules strengthen this natural bouncer system – beneficial bacteria maintain a pH below 4.6, creating a “No Harmful Microbes Allowed” zone.
Starter Dies After Refrigeration

Image Source: The Perfect Loaf
Found your starter sleeping too deeply after its refrigerator retreat? Our years of sourdough nurturing have revealed the secrets of successful cold storage revival.
Proper Storage Methods
Success starts before the chill. Feed your starter at a 1:2:2 ratio (one part starter, two parts each of flour and water) before its winter nap. This generous meal provides strength for the dormant period.
Your starter’s cold-weather home needs:
A jar with straight, gently tapered sides
Only filled halfway – room to breathe
Loose-fitting lid for gentle gas exchange
A cozy spot in the back where temperatures stay steady
Here’s something remarkable: A well-tended starter survives up to two months of refrigeration without feeding. Still, weekly check-ins create the most reliable results.
Reviving Cold Starter
Wake your starter gently with these proven steps:
First, let it adjust to room temperature for 1-2 hours. Then, stir to blend any separated liquid back into the mix. Keep 25g of starter and feed with 50g each of flour and water.
Maintain your awakening culture between 78-82°F (25-26°C). Patient bakers know: 2-3 regular feedings bring back full vitality.
Maintenance Schedule
Your starter thrives on routine, even during cold storage:
Feed right before refrigeration. Schedule wellness checks every 7-10 days. Approaching the two-week mark? Time to refresh or consider drying for storage.
Our favorite sourdough secret: Mature starters show incredible staying power. Many bounce back beautifully even after months in cold storage. Yet nothing beats the steady rhythm of regular feeding for consistent baking success.
Your Sourdough Starter Troubleshooting Guide
Here’s your complete roadmap to sourdough success! We’ve gathered all our baker’s wisdom into one handy table.
What’s Wrong? | How It Looks | Why It Happens | Our Quick Fix | Happy Starter Signs |
|---|---|---|---|---|
No Bubbles or Activity | Zero bubbles, starter looks sleepy | Low temperature, hungry starter | Cozy warm spot (78-82°F/25-26°C) | Beautiful honeycomb bubbles, doubles in 4-6 hours |
Smells Like Nail Polish/Vinegar | Sharp acetone or vinegar notes | Starter needs feeding, over-fermented | Feed 1:2:2 ratio | Pleasant yogurt-like tang |
Not Doubling in 8 Hours | Sluggish rise | Temperature blues, feeding ratio off | Switch to 1:1:1 ratio | Doubles in 4-8 hours at 70-75°F (21-24°C) |
Liquid Layer (Hooch) | Clear to dark liquid pooling on top | Hungry starter needs feeding | More frequent meals | Uniform texture, no liquid topping |
Too Runny/Thick | Texture troubles | Water-flour balance off | Balance at 100% hydration | Smooth like warm peanut butter |
No Weblike Structure | Tears like wet paper | Weak flour, poor gluten | Use high-protein bread flour (12-14%) | |
Fails Float Test | Sinks like a stone | Too wet, bad timing | Watch visual cues instead | Doubles reliably within 6-8 hours |
Inconsistent Rising | Unpredictable peaks | Temperature swings, irregular feeding | Steady feeding schedule | Rises like clockwork every 4-8 hours |
Mold/Unusual Colors | Fuzzy spots, strange streaks | Poor hygiene | Start fresh, stay clean | Pure, uniform color |
Dies After Refrigeration | No signs of life after cold storage | Poor pre-storage prep | Feed 1:2:2 before chilling | Survives 2 months with proper care |
Your Sourdough Success Story Starts Here!
Ready to master your starter’s mysteries? Our years of sourdough crafting reveal three golden keys: temperature mastery, feeding rhythm, and patient nurturing. While a struggling starter might dampen your spirits, these remarkable cultures bounce back beautifully with proper care.
Temperature stands as your starter’s best friend – keep your culture cozy between 70-85°F (21-29°C) for perfect fermentation. Here’s our baker’s wisdom: Pair this ideal warmth with steady feeding schedules, and watch your starter grow stronger each day. Remember, rushing creates chaos – give your starter at least 14 days to develop its full personality.
Our sourdough journey teaches us to trust our eyes more than any single test. Those bubbles, that silky texture, the predictable rise and fall – they tell the true story of your starter’s health. Even challenges like hooch or inconsistent rising become valuable signals, guiding our care routine.
Here’s something magical: Each starter develops its own unique character, like a treasured family member. Through gentle observation and consistent love, you’ll learn your starter’s special dance – its peaks, valleys, and perfect moments. Trust your instincts, embrace the process, and soon you’ll craft spectacular sourdough that makes your heart sing! 🍞
FAQs
Q1. Why isn’t my sourdough starter rising? A lack of rise in your sourdough starter could be due to several factors, including low temperature, incorrect feeding ratio, or chlorinated water. Try placing your starter in a warmer spot (around 75-85°F), adjusting your feeding ratio to 1:1:1 or 1:2:2, and using filtered or dechlorinated water. Patience is key, as it can take up to 2-3 weeks for a new starter to become fully active.
Q2. How often should I feed my sourdough starter? For most home bakers, feeding once a day is sufficient. If you live in a warmer climate or your kitchen is particularly warm, you may need to feed twice daily. However, feeding too frequently can dilute the culture. Pay attention to your starter’s behavior and adjust accordingly. A mature starter kept at room temperature (around 70-75°F) typically needs feeding every 12-24 hours.
Q3. What’s the ideal consistency for a sourdough starter? A healthy sourdough starter should have the consistency of thick pancake batter or warm peanut butter. If it’s too runny, it may not trap gasses effectively and won’t rise well. If it’s too thick, it might not have enough water for proper fermentation. Adjust your flour-to-water ratio to achieve the right consistency, typically aiming for 100% hydration (equal parts flour and water by weight).
Q4. What does it mean if my starter smells like nail polish or vinegar? A strong acetone (nail polish remover) or vinegar smell usually indicates that your starter is hungry and has been left unfed for too long. This smell is caused by the production of acetic acid during fermentation. To fix this, increase your feeding frequency or amount, and make sure you’re keeping your starter at an appropriate temperature (ideally between 70-80°F).
Q5. How can I tell if my sourdough starter is ready to use? A mature, active starter should consistently double in size within 4-8 hours after feeding. It should have a pleasant, slightly tangy aroma and be full of bubbles throughout. When you do the “float test” (dropping a small amount in water), a ready starter should float. However, visual cues and regular rising patterns are often more reliable indicators than the float test alone.