The Ultimate Guide to Sourdough Gluten-Free Bread: Complete Recipe & Tips
A surprising 95% of people with gluten intolerance miss bread more than any other food.
The search for delicious gluten-free bread that matches traditional sourdough’s taste and texture seemed impossible. Store-bought options were dry, crumbly, or dense as bricks. The good news? We discovered how to make amazing gluten-free sourdough bread right in your kitchen.
Traditional sourdough contains gluten, but we developed a reliable way to recreate that signature tangy flavor and chewy texture with gluten-free ingredients. This recipe blends sourdough fermentation’s ancient techniques with modern gluten-free baking methods.
This detailed guide walks you through each step to create perfect gluten-free sourdough bread. Beginners and experienced bakers will learn everything – from starter creation to achieving that perfect crusty exterior and soft crumb. We’ve included every detail you need.
Are you ready to bake the most delicious gluten-free sourdough bread you’ve ever tasted? Let’s begin!
Understanding Gluten-Free Sourdough Basics
Let’s tuck into what makes gluten-free sourdough special in the world of bread-making. The science and everything in bread making come together to create this delicious, easy-to-digest bread.
What Makes Sourdough Different from Regular Bread
Sourdough’s magic comes from its unique fermentation process. Regular bread uses commercial yeast, but sourdough needs a special starter – flour and water fermented by wild yeast and lactic acid bacteria. This natural process gives the bread its tangy flavor and chewy texture that we all love.
The bread takes longer to ferment than regular bread. This extra time allows beneficial bacteria to break down the dough’s carbohydrates. The result is bread that tastes better and sits easier in your stomach.
Benefits of Gluten-Free Sourdough
We’ve found that gluten-free sourdough comes with amazing benefits. The fermentation gives the bread a lower glycemic index than regular bread. Your blood sugar levels stay more stable throughout the day.
The fermentation in our gluten-free sourdough creates some great nutritional benefits:
- Better nutrient absorption
- Healthier gut from beneficial bacteria
- Easier digestion as complex compounds break down
Essential Equipment and Ingredients
Perfect gluten-free sourdough bread needs specific tools and ingredients. Good equipment makes a big difference in your baking results.
Essential Equipment:
- Bread banneton proofing basket to raise the dough
- Digital cooking thermometer to control temperature
- Dutch oven or bread cloche to generate steam
- Dough whisk to mix ingredients
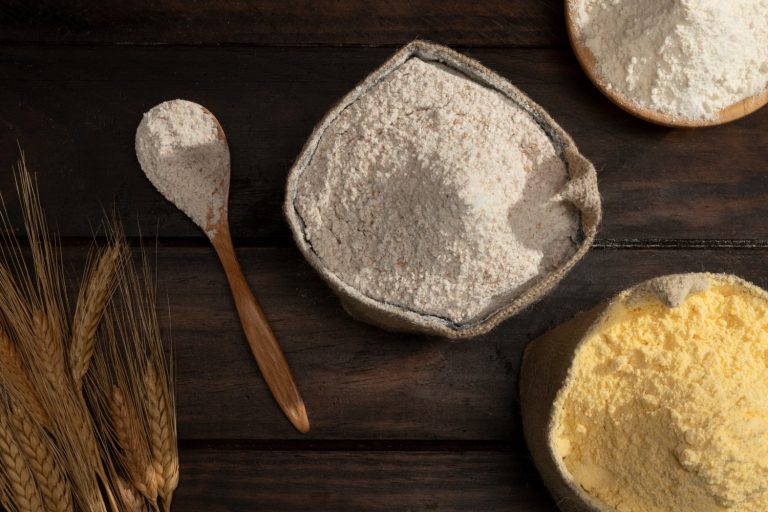
The best gluten-free flour combinations usually include:
- Brown rice flour
- Sorghum flour
- Millet flour
- Psyllium husk (works as our gluten substitute for binding)
Note that traditional sourdough contains gluten, but these carefully picked gluten-free ingredients help us create something just as good. Success comes from understanding how these ingredients work together.
Creating Your Gluten-Free Sourdough Starter
A gluten-free sourdough starter needs attention and care, just like a pet. The right environment and regular feeding help it thrive. This piece will walk you through the rewarding process that builds the foundations of your sourdough experience.
Step-by-Step Starter Creation Guide
Your starter begins with basic ingredients: gluten-free flour and filtered water. The proven process takes about 7-10 days:
- Day 1: Mix 1 cup (120g) gluten-free flour with ½ cup plus 1 tablespoon (128g) cool water in a clean glass jar
- Day 2: Discard half the starter, then feed with the same amounts of flour and water
- Days 3-5: Continue daily discard and feeding routine
- Days 6-7: Switch to feeding every 12 hours instead of 24
Feeding Schedule and Maintenance
Your starter’s health depends on proper maintenance after it becomes 7-10 days old. Room temperature storage requires feeding every 24 hours. Refrigeration works well if you don’t bake often – weekly feeding suffices in this case.
The feeding process uses a simple ratio: equal amounts by weight of starter, water, and gluten-free flour. Filtered or spring water works best because chlorine can inhibit bacterial growth.
Signs of a Healthy Starter
A healthy gluten-free sourdough starter shows distinct characteristics. Look for these signs:
- Visual Signs: Doubles in size within 2-3 hours after feeding
- Bubble Activity: Consistent bubble formation throughout
- Aroma: Pleasant, slightly sweet smell that becomes more sour before feeding
- Texture: Achieves pancake batter consistency
- Peak Activity: Forms a domed shape on the surface
Glass containers make monitoring these visual indicators easier. The starter develops best at temperatures between 70-80°F (21-27°C).
A dark liquid on top (called “hooch”) shouldn’t cause alarm. This indicates your starter needs feeding. You can pour it off or stir it back in before the next feeding.
Mastering the Perfect Flour Blend
Getting skilled at the perfect flour blend is vital to making successful gluten-free sourdough bread. We found that the right combination of flours can make the difference between a dense, gummy loaf and one that rivals traditional sourdough.
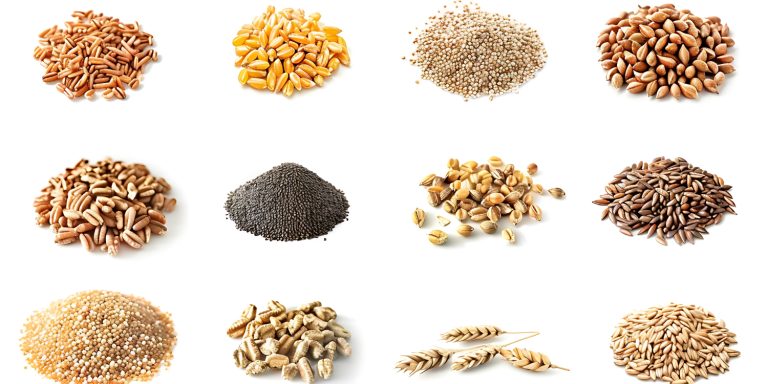
Best Gluten-Free Flours for Sourdough
Our extensive testing has identified the most reliable flours for gluten-free sourdough baking. The best results come from combining these key ingredients:
- Brown Rice Flour: A mild flavor and versatile base
- Sorghum Flour: A slightly sweet, earthy taste
- Buckwheat Flour: A nutty flavor and complex taste profile
- Teff Flour: Unique flavoring and nutritional benefits
- Millet Flour: Excellent texture and structure
Creating Custom Flour Mixes
Store-bought blends often contain too many starches and can yield gummy results. Making your own mix works better. Your ideal blend should include:
- Base Flours: 70-75% of your total mix
- Protein-Rich Flours: 15-20% of your mix
- Starches: No more than 15% for proper structure
Start with a combination of brown rice flour and sorghum as your base to develop your custom blend. You can then experiment with different ratios to find your perfect mix.
Understanding Protein Content and Hydration
The relationship between protein content and hydration is the sort of thing I love about gluten-free sourdough baking. Gluten-free breads need hydration levels over 100%, compared to about 60% for regular breads. This higher hydration matters because:
- Gluten-free flours absorb water differently
- Hydrocolloids (gluten replacers) need substantial water to work properly
- The absorption capacity varies based on:
- Flour brand
- Grain variety
- Milling fineness
A total protein content between 12-14% in the flour blend creates that perfect sourdough texture. This matches strong bread flour’s protein content.
Here’s a helpful tip we found: cassava flour needs more hydration because it’s especially “thirsty”. Tigernut or sorghum flour might need less water to avoid a soupy dough.
Note that water activity affects shelf life substantially. Using flours that absorb more water can help your bread stay fresh longer by leaving less free water for bacterial growth.
The Science of Fermentation
The science of fermentation has changed the way we make gluten-free sourdough bread. Let’s dive into the world of microorganisms that make our bread possible.
Temperature and Time Factors
Temperature drives successful gluten-free sourdough fermentation. Wild yeast and bacteria work best together between 76-78°F (24-26°C). These temperatures create the perfect balance of:
- Consistent gas production to rise properly
- Optimal flavor development
- Balanced bacterial activity
- Proper enzyme function
The fermentation slows down a lot when dough temperature falls below 70°F. High temperatures in the 80s can make fermentation too fast, which leads to overly sour taste and potential overproofing.
Understanding pH Levels
The pH changes in gluten-free sourdough tell an interesting story. The process starts with a neutral pH around 6.0-6.7, but fermentation brings it down by a lot. The best results come when pH reaches between 4.3 and 4.6, which reduces phytic acid content by more than 70%.
Lactic acid bacteria become dominant at concentrations of >108 cfu/g during fermentation. Yeasts stay one to two logarithmic cycles lower. This balance creates ideal conditions to develop flavor and achieve proper rise.
Bacterial and Yeast Development
Bacterial and yeast growth in gluten-free sourdough follows a unique pattern. Wild yeast and lactic acid bacteria work together in perfect harmony. The process works like this:
Yeast helps bacteria break down proteins into absorbable peptides. Bacteria release extra glucose and turn ethanol into acetic acids. The whole process takes about 10 days to set up properly.
Gas production changes a lot based on fermentation time. Research shows that bread made with properly fermented sourdough has 16% more volume and better crumb firmness than non-fermented versions.
Fermentation time controls the sourness of gluten-free sourdough bread. Longer preferment stages create stronger sour flavors. A teaspoon of apple cider vinegar in the bread dough can make it tangier.
Careful monitoring of these factors helps achieve that perfect mix of rise, texture, and flavor in exceptional gluten-free sourdough.
Essential Techniques for Success
Creating perfect gluten-free sourdough depends on becoming skilled at a few basic techniques. Our team spent countless hours testing these methods to help you bake the perfect loaf.
Proper Mixing Methods
Perfect gluten-free sourdough starts with proper mixing. A stand mixer with a dough hook running for 5 minutes at medium-high speed creates the best consistency. A Danish dough whisk works well too if you don’t have a stand mixer.
Here’s our tested mixing process:
- Combine unfed starter with flour and water
- Mix until all ingredients blend together
- Add salt and mix until smooth
- Look for thick cake batter consistency
- Mix until no loose flour remains
Shaping and Scoring Tips
Gluten-free sourdough needs a different shaping approach than regular bread. Psyllium husk works as our gluten substitute and provides the binding properties needed for proper shaping.
Your bread will turn out best if you:
- Cut deep scores at least 1-inch into the dough
- Use a sharp bread lame or razor to make clean cuts
- Score right before the dough goes in the oven
- Start with simple decorative patterns
Pro Tip: The bread rises best when proofed seam-side up in a covered basket.
Managing Dough Hydration
The right hydration level makes gluten-free sourdough successful. Gluten-free bread dough needs substantially more water than wheat dough. Our tests show that soft, flexible sandwich loaves need 120% to 130% hydration.
The proper hydration level changes based on:
- Your choice of gluten-free flour
- The flour blend’s protein and fiber content
- Room temperature and humidity
- The bread structure you want
Bean flours like garbanzo hold more moisture and feel stickier than rice or oat flour. A tall-sided baking tin (4+ inches) supports your wet dough best during baking.
Important: The poke test tells you if your dough is ready. Dough that shrinks or collapses after poking usually means wrong hydration, not over-proofing. Well-hydrated dough keeps its shape after a gentle press.
Baking Methods and Equipment
Making the perfect gluten-free sourdough bread needs the right ingredients, baking environment, and equipment. We tested many methods to give you reliable techniques that will help you bake a perfect crusty loaf.
Dutch Oven vs Traditional Baking
Our extensive testing shows a Dutch oven works best for baking gluten-free sourdough bread. The reason makes sense – it creates an ideal enclosed space that traps steam and gives you that perfect crust. A 5.5-quart Dutch oven works great because it gives enough space for the dough to rise and expand.
You can still bake great bread without a Dutch oven. A cast-iron skillet with aluminum foil works well, but expect a darker and thicker crust. We got good results using a pizza stone or baking steel with proper steam.
Temperature Control Techniques
The right temperature will give a perfect gluten-free sourdough. Here’s what works best:
- Preheat oven to 500°F with Dutch oven inside for 30 minutes
- Reduce temperature to 450°F when adding dough
- Bake covered for 40 minutes
- Lower temperature to 425°F and remove lid
- Continue baking for 40 more minutes uncovered
An oven thermometer helps verify your oven’s temperature calibration. Altitude can change baking times and temperatures by a lot, so adjust as needed.
Steam Generation Methods
We’ve become skilled at several ways to create the perfect steamy environment:
Dutch Oven Method: A preheated Dutch oven with a lid naturally creates steam from the bread’s moisture. This method gives you a wonderful crusty exterior and tender crumb.
Alternative Steam Methods:
- Place a shallow pan on the bottom rack with boiling water
- Add ice cubes between parchment paper and Dutch oven sides
- Use a pizza stone with a water tray beneath
Your finished bread’s internal temperature should reach at least 210°F. Steam generation during the first 20 minutes of baking is vital for achieving professional-quality oven spring.
A baking stone or steel needs 45-60 minutes of preheating. This gives even heat distribution and helps make up for heat loss when you open the oven door.
Pro Tip: If you’re taking time to transfer your dough to the oven, preheat to 450°F instead of 425°F to make up for heat loss. This small change can improve your final result.
It’s worth mentioning that cooling plays a big role. Let your bread cool on a rack for about five hours. This patience helps distribute moisture evenly and creates perfect texture in your gluten-free sourdough bread.
Troubleshooting Common Issues
Gluten-free sourdough bread can challenge even the most skilled bakers. Here are our best solutions to help you tackle common problems and bake exceptional loaves consistently.
Fixing Dense or Gummy Bread
Our gluten-free sourdough sometimes turns out dense or gummy due to moisture content issues. A dense loaf usually means you need more liquid – your gluten-free dough should look like thick brownie batter instead of traditional bread dough.
Here’s what works to fix gummy bread:
- Your baking time needs to be longer than regular bread
- Set the oven to 275°F for 75 minutes, then take the bread out of the tin and bake 15 minutes more
- Let the bread cool completely – this takes several hours
- Check your oven’s actual temperature with a thermometer
Addressing Rise Problems
Rise issues usually come from several factors working together. If your bread won’t rise properly, look at these important points:
- Starter Health: Your starter should double in size 2-3 hours after feeding
- Water Temperature: Keep your proofing water under 110°F
- Proofing Time: Shape your dough before the main rise – gluten-free dough only rises well once
- Over-proofing Signs: Look for dough that deflates like a balloon when scored
A collapsed loaf during baking points to excess liquid or over-proofing. Longer bulk fermentation helps create an even crumb structure and stops the bread from collapsing.
Crust and Crumb Solutions
The perfect crust-to-crumb ratio takes skill with gluten-free sourdough. Steam generation plays a vital role in crust development. Dutch oven baking often creates a tough crust, but you can reduce this by:
Temperature Management:
- Heat your oven to 425°F before starting
- Keep the temperature steady while baking
- Add steam for the first 20 minutes
Moisture Control:
- A soft crust after cooling means too much moisture inside
- Cool your bread in the turned-off oven with the door slightly open
- Wait 4-6 hours before slicing
Proper fermentation makes a big difference in crust quality. Dough that hasn’t fermented enough often stays pale and won’t brown well. The best results come when your dough passes the window pane test after stretch and folds.
Pro Tip: A gummy bottom? Try using 10-30 grams less water, especially with coarser rice flours. Swapping brown rice flour for teff, millet, or oat flour also helps reduce gumminess.
Note that gluten-free sourdough needs different expectations than regular bread. While it might be denser than wheat bread, the right technique and patience lead to tasty results. A very sour starter often means a denser loaf because yeast gets weaker in acidic environments.
Storage and Serving Tips
The perfect moment to start storing your gluten-free sourdough bread is right after it comes out of the oven. We found that there was a direct connection between post-baking steps and the perfect texture and flavor. These steps are just as significant as the baking process itself.
Proper Cooling Methods
The cooling process needs more patience than you might think. Your gluten-free sourdough needs to cool completely – this step is vital and rushing it can ruin even a perfectly baked loaf. The best results come from letting the bread cool about five hours.
Here’s why proper cooling matters:
- It allows the crumb to set properly
- Will give a good moisture distribution
- Prevents gummy or dense texture
- Makes slicing easier and cleaner
Pro Tip: The bread should go on a cooling rack right after you take it from the Dutch oven. This creates proper air circulation and stops condensation from forming on the bottom of the loaf.
Storage Solutions
Gluten-free sourdough bread needs different storage based on your timeline. Room temperature storage works well for 2-3 days if you plan to eat it soon. But we found that there was a better way – freezing actually works best for gluten-free bread.
Our tested storage methods include:
- Room Temperature: Use a linen bread bag or cotton towel
- Freezer Storage: Slice before freezing for convenience
- Refrigerator: Not recommended as it can cause premature staleness
The freezing process follows specific steps. The loaf must be completely cool. Next, slice the whole loaf and put small pieces of wax paper between each slice to prevent sticking. This lets you thaw only what you need.
Reheating Techniques
Several reheating methods can bring back that fresh-baked quality to stored bread. Toasting frozen slices directly works perfectly. But a whole loaf needs this precise method:
- Remove the frozen loaf and let it defrost inside its bag
- Preheat oven to 300°F (150°C)
- Place the bread directly on the oven shelf
- Cover with a large pot to prevent drying
- Bake for 10 minutes covered
- Remove the pot and continue baking until the crust is crisp (about 5 more minutes)
Important Temperature Note: The internal temperature should reach 210°F to reheat properly. This temperature ensures your gluten-free sourdough keeps its perfect texture.
Day-old bread stored at room temperature can be refreshed with a quick 10-minute stint in a 300°F oven. This simple trick makes the bread taste almost fresh-baked again.
Moisture management plays a vital role during storage. Regular bread handles plastic bags well, but gluten-free sourdough needs to breathe. Breathable materials like cotton or linen work better than plastic containers.
People living in humid climates might need to shorten room temperature storage time. These conditions make it best to slice the entire loaf after cooling and freeze what won’t be eaten within 24 hours.
Freezer Storage Tip: Gluten-free sourdough can last for months in the freezer, but eating it within 4-8 weeks gives the best quality. This timeframe preserves that wonderful sourdough flavor and texture you worked hard to create.
It’s worth mentioning that different types of gluten-free sourdough bread might need different storage approaches. Soft sandwich-style loaves do well in airtight containers, while crusty artisan-style breads need more breathing room. The storage method should match the specific type of bread you’ve baked.
Conclusion
Delicious gluten-free sourdough bread demands dedication, patience, and the right knowledge. This complete guide covers every vital aspect of the process. You’ll learn everything from creating your starter to achieving that perfect crusty exterior and tender crumb.
The fundamentals lead to exceptional results. A healthy starter combines with proper flour blend, correct fermentation, and right baking techniques to create outstanding gluten-free sourdough bread. Each loaf becomes a learning opportunity that refines your skills and deepens your understanding.
These techniques, tips, and flexible solutions will help you create amazing gluten-free sourdough bread that rivals traditional wheat-based versions. Your bread will improve with each loaf as you continue baking and learning.
FAQs
Q1. Why isn’t my gluten-free sourdough bread rising properly? There are several reasons your bread might not rise well. Ensure your starter is active and doubles in size within 2-3 hours after feeding. Keep proofing water temperature below 110°F, and be careful not to over-proof the dough. Remember, gluten-free dough typically only gets one good rise, so shape it before the main rise.
Q2. What’s the secret to making great gluten-free sourdough bread? The key is mastering the right techniques. Use a proper flour blend with a protein content between 12-14%. Maintain higher hydration levels (120-130%) compared to regular bread. Bake at a higher temperature and for longer than traditional bread. Allow for proper fermentation and cooling time to achieve the best texture and flavor.
Q3. Which flours work best for gluten-free sourdough? A combination of flours typically yields the best results. Consider using brown rice flour, sorghum flour, buckwheat flour, teff flour, and millet flour. Create a custom blend with about 70-75% base flours, 15-20% protein-rich flours, and no more than 15% starches for proper structure.
Q4. How should I handle gluten-free sourdough dough differently from regular dough? Gluten-free sourdough dough doesn’t require traditional kneading or extensive stretching and folding. Instead, focus on proper mixing to achieve a consistency similar to thick cake batter. Use a stand mixer or Danish dough whisk for best results. Shape the dough gently, as it won’t have the same elasticity as wheat-based dough.
Q5. What’s the best way to store and reheat gluten-free sourdough bread? For short-term storage (2-3 days), keep the bread at room temperature in a linen bread bag or wrapped in a cotton towel. For longer storage, slice the bread and freeze it with wax paper between slices. When reheating, toast frozen slices directly or warm a whole loaf in a 300°F oven for about 15 minutes. Avoid refrigerating, as it can cause premature staleness.