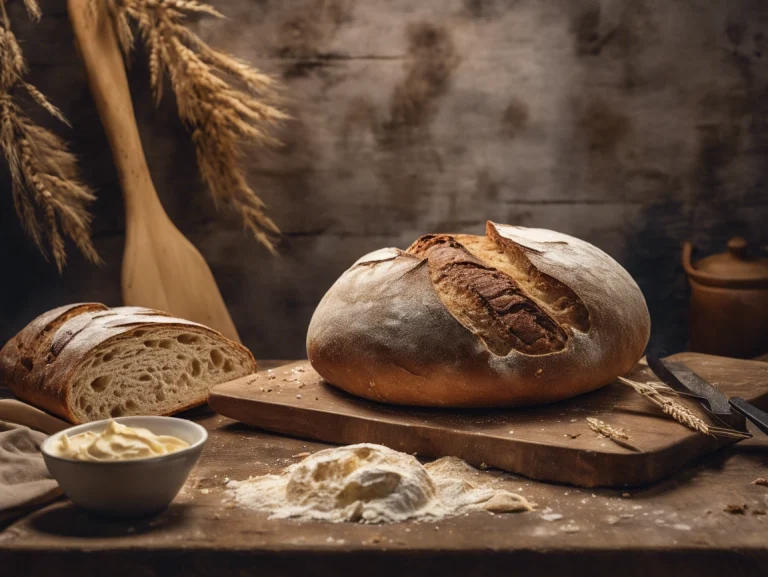
How to Make Easy Sourdough Sandwich Bread: A Simple Guide
Baking your own sourdough sandwich bread is one of the most rewarding projects in home baking. This bread perfectly balances the complex flavors of traditional sourdough with a practical shape that works great for daily sandwiches. Home bakers will find they need just a few ingredients to make their own sourdough sandwich bread, and the results are incredibly satisfying.
This complete guide shows you the key steps to make soft sourdough bread in your kitchen. You’ll learn about keeping a healthy sourdough starter, becoming skilled at bulk fermentation, and shaping the perfect sandwich loaf. The steps take you from original mixing to final baking, helping both beginners and experienced bakers create their own delicious sourdough sandwich loaf successfully.
Ingredients and Equipment Needed
Your success at making easy sourdough sandwich bread depends on having the right ingredients and equipment ready. A quality workspace with proper materials will give you consistent results and make your baking process enjoyable.
List of ingredients
A perfect sourdough sandwich loaf requires these key ingredients:
| Ingredient | Amount | Notes |
|---|---|---|
| Active sourdough starter | 100g | Keep at 100% hydration |
| All-purpose flour | 512g | Best when unbleached |
| Water | 430g | Room temperature |
| Olive oil | 2-3 tbsp | Use light variety |
| Honey | 2 tbsp | Switch to maple syrup if vegan |
| Kosher salt | 10g | Brand affects amount needed |
Tools and equipment you need
You need these basic tools to start your sourdough trip:
- Digital Scale: You need this to measure ingredients accurately to 1 gram
- Clear Container: A straight-sided container helps you watch your dough rise
- 9×4″ Loaf Pan: This pan creates the perfect sandwich bread shape
- Bench Scraper: This tool helps handle and shape your dough
- Danish Dough Whisk: The best tool to mix your dough at the start
- Parchment Paper: Your bread will come out easily
- Bread Knife: This knife cuts clean slices through crusty bread
Sourdough starter tips
A healthy starter forms the foundation of great sourdough bread. The optimal fermentation requires temperatures between 75°F and 85°F. Bakers can use a dedicated proofer or their kitchen’s warm spot to maintain steady temperatures. Clear, straight-sided containers make it easy to track the starter’s growth and activity.
The starter needs feeding 8-12 hours before you mix the dough. Tap water should sit for 24 hours so chlorine can dissipate. Humid conditions require reducing water by 20-30g to achieve proper dough consistency. Your starter becomes more predictable and active with consistent feeding schedules and temperature control, which results in superior bread.
Refrigeration slows fermentation during periods without daily baking. A two-container system works well – one holds the refrigerated starter while the other portion gets fed before baking. This approach helps you maintain a vigorous culture and reduces waste effectively.
Preparing the Dough
A perfect easy sourdough sandwich bread experience starts with proper dough preparation. The process demands careful attention to mixing, kneading, and fermentation that builds the foundation for a soaring win.
Mixing the ingredients
Let’s start by combining ingredients in the right order. This sequence ensures your dough develops perfectly. Here’s everything in the mixing process:
- Use your fingers or a Danish dough whisk to dissolve the active sourdough starter in warm water
- Pour in olive oil and honey, then whisk until they blend completely
- Mix in the flour and salt
- Keep mixing until you get a shaggy dough
- The mixture needs a 30-minute rest so the flour absorbs water properly
Kneading techniques
Bakers can choose between hand kneading or machine kneading methods. The slap-and-fold technique works best with wet dough when kneading by hand. This method requires you to lift the dough, slap it on the counter, and fold it over itself repeatedly until you create a smooth, cohesive mass.
A stand mixer with a dough hook attachment works great at low speed (speed 3) for 8-10 minutes. Your dough should become shiny and supple, showing proper gluten development. Traditional hand kneading achieves similar results in 8-10 minutes if you don’t have a stand mixer.
Bulk fermentation process
Bulk fermentation plays a vital role that shapes the dough’s structure and flavor. The fermentation time depends on temperature ranges:
| Temperature | Fermentation Time |
|---|---|
| 68-72°F (20-22°C) | 10-12 hours |
| Above 72°F (22°C) | 4-5 hours |
| Below 68°F (20°C) | 12+ hours |
The dough needs stretch and fold sessions to build strength during bulk fermentation. Here’s how to do this technique:
- Grab one corner of the dough
- Pull it upward without tearing
- Fold it toward the center
- Turn the bowl and repeat
You’ll need two to three sets of stretch and folds with 30-minute gaps between them. Your dough signals readiness for the next phase when it:
- Looks relaxed and puffy
- Shows a gentle dome on top
- Has a smooth texture with visible bubbles
- Feels light and airy like a pillow
Room temperature should stay steady throughout the process to achieve the best results. A proofing box helps maintain proper temperature in cool environments. Another option is to place the dough in an oven with just the light on.
Shaping and Proofing the Loaf
The perfect sourdough sandwich loaf emerges from a well-fermented dough through precise shaping technique and careful proofing. These significant steps shape the bread’s texture and appearance.
Shaping the dough
The dough needs proper shaping after bulk fermentation. This step creates an even crumb structure that works great for sandwiches. Follow these steps to shape your dough:
- Remove dough onto a lightly floured surface
- Press down gently to release air bubbles
- Shape the dough into a rectangle
- Fold two-thirds of the dough over itself
- Roll the dough into a tight log
- Seal by pinching the seams
- Put it seam-side down in the loaf pan
Pro tip: Your dough’s shape will hold better during baking if you create a tight outer skin. The right shaping technique builds more strength after bulk fermentation and helps the dough rise perfectly.
Proofing methods
Bakers have two main choices when proofing their dough – room temperature or cold proofing. Each method brings unique advantages to the final bread.
| Proofing Method | Duration | Benefits |
|---|---|---|
| Room Temperature | 1.5-3 hours | Faster process, same-day baking |
| Cold (Refrigerator) | 8-16 hours | Better flavor, flexible schedule |
| Combined Method | 1 hour room + 8-12 hours cold | Best of both worlds |
The right proofing conditions make a huge difference. You can achieve great results with an electric proofing box that controls temperature. Another option is a simple plastic bin turned upside down with warm water that creates humidity. The oven light provides gentle warmth and works well too.
How to tell when proofing is complete
The poke test is a reliable way to check proper proofing. A gentle press with a floured finger should make the dough:
- Spring back slowly
- Leave a slight indentation
- Feel soft and alive
Visual indicators of proper proofing include:
- Dough risen 1-inch above the pan rim
- Smooth, slightly domed surface
- Visible bubbles just beneath the surface
- Light and puffy appearance
Bakers need to spot signs of both under and overproofing. Underproofed dough looks dense and springs back fast. Overproofed dough becomes weak, deflates easily, and shows little spring-back.
Temperature plays a significant role in proofing time. The process speeds up in warmer environments (75-85°F), and cooler temperatures need longer proofing periods. Sandwich bread’s dough should increase in volume by 50-75% during the final proof to achieve optimal results.
Proper proofing builds the bread’s structure and enhances its flavor profile. Cold proofing creates a more complex taste and better digestibility, though it takes longer. The traditional poke test becomes less reliable with cold proofing because the dough’s state is firmer and colder.
Baking and Storing Your Sourdough Sandwich Bread
The last step to create perfect sourdough sandwich bread needs precise baking techniques and good storage methods that keep it fresh. The right temperature and timing combined with ideal storage conditions will give a perfect loaf every time.
Oven preparation
The ideal baking environment needs careful preparation. Preheat the oven to 375°F (190°C) with these steps:
- A baking sheet on the bottom rack ensures even heat distribution
- The main rack should sit in the center of the oven
- 6-8 ice cubes in a heat-safe pan create steam
The perfect crust develops when you spray the loaf’s surface lightly with water before baking. This moisture enhances the crust during the original baking phase.
Baking times and temperatures
A perfect sourdough sandwich loaf needs specific temperature and timing guidelines:
| Baking Phase | Temperature | Duration | Notes |
|---|---|---|---|
| Original Bake | 375°F (190°C) | 35-40 minutes | Lid on/steam phase |
| Final Bake | 375°F (190°C) | 5-10 minutes | Lid off/browning |
Important indicators tell you when your bread is ready:
- A deep golden-brown crust
- The bread’s internal temperature reaches 206-210°F (97-99°C)
- The bottom produces a hollow sound when tapped
- The surface browns evenly
Your bread needs careful attention, especially when you switch from covered to uncovered baking. The first 20 minutes are crucial – never open the oven during this time. Steam escapes quickly and your bread’s crust won’t develop properly.
Cooling and storage tips
The bread’s texture and longevity substantially depend on proper cooling and storage. Your cooling process starts right after taking the loaf from the oven:
- Remove bread from the pan within 5 minutes
- Place on a wire rack to allow air circulation
- Allow minimum 30 minutes cooling before slicing
- Let it cool completely (1-2 hours) before storage
Different storage methods work best based on your timeline and needs:
Counter Storage (2-3 days):
- Store in airtight container or bread bag
- Keep at room temperature
- Place cut-side down on cutting board
- Cover with clean tea towel
Freezer Storage (up to 3 months):
- Cool completely before freezing
- Slice bread before freezing to make it convenient
- Wrap tightly in plastic wrap
- Place in freezer-safe bag
- Label with date
Bread Box Storage (4-5 days):
- Creates perfect humidity balance
- Lets air circulate properly
- Keeps crust crispy longer
- Prevents early staleness
Professional tip: Toast frozen bread slices directly from the freezer to get the best texture. This helps maintain the bread’s fresh-baked quality and reduces waste.
Your sourdough sandwich bread will stay fresher longer if you avoid refrigerator storage, which speeds up staling. Freeze any portions you won’t eat within 2-3 days. Room temperature storage in a bread box or cloth bag works best for daily use and maintains the perfect balance between moisture and crust quality.
Cut loaves stay fresh when you place the cut side down on the cutting board and cover them with a clean tea towel. This simple technique prevents the exposed surface from drying out while letting air circulate. You might find it helpful to slice the whole loaf before freezing, so you can easily grab individual portions later.
Temperature and humidity considerations change how long you can store bread:
- Warm climates need shorter room-temperature storage
- Paper bags work better in humid environments
- Dry climates might need plastic bag storage to prevent drying
You can make stored bread taste fresh again by spritzing it with water and warming it in a 300°F (150°C) oven for 5-10 minutes. This method brings back the crust’s crispiness and refreshes the bread’s texture, making it taste like it just came out of the oven.
Conclusion
Learning to make sourdough sandwich bread gives home bakers practical skills and lasting rewards. Each step builds on the last – from maintaining an active starter through proper fermentation, shaping, and baking techniques. The bread’s quality depends on careful temperature control and timing, and this systematic approach creates sandwich bread that tastes better than anything from the store while offering more nutrition.
Sourdough expertise unlocks endless baking possibilities, which makes the original learning curve worth every minute for passionate bakers. You’ll feel proud to create wholesome, flavorful bread as part of your kitchen routine, and proper storage techniques help preserve your hard work. Want to raise your bread and pizza game? Get an authentic artisanal sourdough starter from The Yeast We Can Do. Email john@theyeastwecando.com for our premium starter that helps create exceptional bread with perfect tangy flavor and signature crust. Quality ingredients, proper techniques, and the right knowledge will start your experience toward sourdough excellence today.
FAQs
Q: How do I adapt my sourdough bread making for sandwich loaves?
A: If you prefer sandwich-shaped sourdough bread, you can proof your dough overnight and shape it to fit into bread pans in the morning. After a final rise, the dough benefits from the support of the pan sides, which helps achieve a good rise even if the dough isn’t perfect. This method allows for a more consistent shape suitable for sandwiches.
Q: What can I do to achieve a more consistent sourdough sandwich bread recipe?
A: To enhance consistency in your sourdough sandwich bread, focus on precise measurements and ingredient ratios. Experiment with different flours like spelt or rye to find the perfect balance between chewiness and whole grain flavor. Adjusting these elements can help you achieve the desired crumb texture without the denseness or excessive softness that some recipes produce.
Q: How can I prevent my sourdough sandwich bread from becoming too dense or cake-like?
A: To avoid a dense or cake-like texture in sourdough sandwich bread, be cautious with ingredients like butter, which can significantly alter the bread’s texture. Aim for a tighter crumb to prevent condiments from seeping through, but avoid making the bread too dense. Experimenting with different types of flour and their proportions can also help you achieve the right texture.