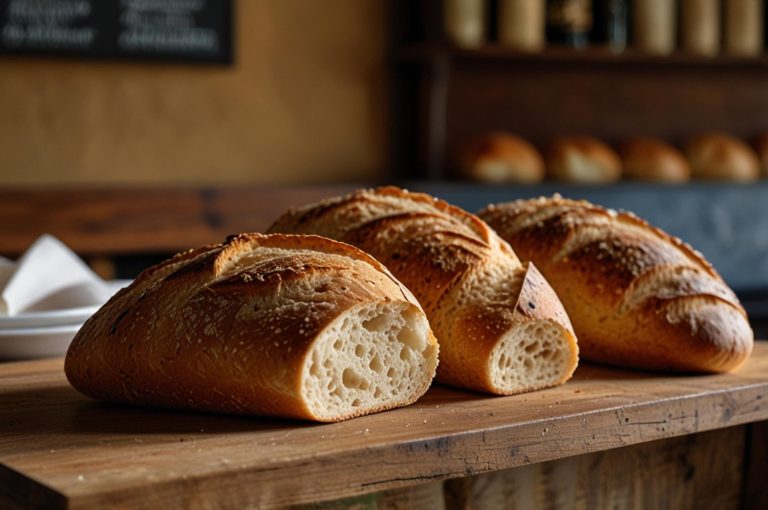
How to Determine Sourdough Rise Time: A Complete Beginner’s Guide
Getting the right rise time for sourdough remains a most important challenge for home bakers. Your bread’s final texture, flavor, and success depend on the perfect rise. Many beginners struggle to know if their dough needs more time or has reached its peak. Bakers can achieve consistent, professional results by knowing the best sourdough rise times.
This complete guide explains everything that affects bulk fermentation and dough development. You will learn to check your starter’s activity, watch dough temperature, spot visual signs, and do simple tests that show perfect rise times. These proven methods help bakers create tasty sourdough bread with ideal texture and flavor consistently.
Understanding Sourdough Fermentation
Sourdough fermentation is a fundamental biological process that turns a basic mix of flour and water into a vibrant, living dough. Wild yeasts and lactic acid bacteria (LAB) create a perfect partnership and work in harmony. Their interaction produces the distinctive rise, flavor, and texture that makes sourdough bread unique.
What is sourdough fermentation?
Natural microorganisms create sourdough fermentation by breaking down flour’s starches and proteins. Wild yeasts transform simple carbohydrates into carbon dioxide and ethanol. Lactic acid bacteria generate organic acids that give the bread its characteristic tangy flavor. These microscopic organisms maintain a delicate balance. LAB populations usually exceed yeasts by a ratio of 100 to 1.
The magic starts the moment flour touches water. Amylases, special enzymes, transform complex starches into simple sugars. This sugar becomes food for the microorganisms. The enzymatic activity builds a foundation that supports successful bulk fermentation and proper rise time.
Factors affecting fermentation rate
These factors control how quickly or slowly sourdough ferments:
- Temperature (primary factor)
- Hydration level
- Flour type and quality
- Starter strength
- Salt concentration
Temperature is a vital element in fermentation speed. Sourdough fermentation works best between 75°F and 80°F (24°C to 27°C). Both yeasts and bacteria thrive at these temperatures, though each prefers a slightly different range:
| Microorganism | Optimal Temperature |
|---|---|
| Yeasts | 80°F (27°C) |
| Bacteria | 89°F (32°C) |
Dough’s hydration level substantially affects its fermentation rate. Doughs with higher water content ferment faster because moisture helps enzymes and microorganisms move freely through the dough. This is why wet doughs need shorter bulk fermentation times.
Flour’s enzyme content determines how it affects fermentation. British flours have higher natural enzyme levels because of their maritime growing environment, which leads to faster fermentation. Whole grain flours ferment more quickly than white flours due to their higher enzyme and nutrient content.
The starter culture’s strength and quantity in the dough determine fermentation speed. A mature, active starter creates more vigorous fermentation than a weak or newly fed one. Using more starter in the dough speeds up the fermentation process.
Assessing Your Sourdough Starter
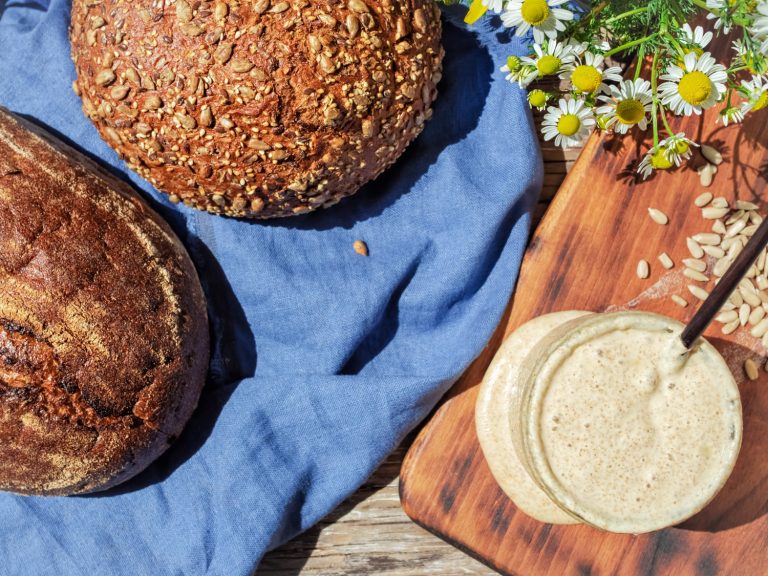
Your sourdough starter that you managed to keep properly will determine your bread making success. Successful bakers need to recognize the signs of an active, healthy starter that leads to perfect rise times and fermentation results.
Signs of an active starter
Your sourdough starter shows several clear signs that tell you it’s ready to use in baking. A healthy starter doubles in volume 4-6 hours after you feed it. This predictable pattern shows your starter’s strength and vitality.
These signs tell you your starter is ready:
| Characteristic | Description |
|---|---|
| Volume | Doubles or triples 4-6 hours after feeding |
| Surface Texture | Bubbles break through the domed surface |
| Consistency | Similar to warm peanut butter – stretchy yet pourable |
| Aroma | Fresh and yeasty without harsh or cheese-like smells |
| Appearance | Honeycomb bubbles visible through the jar |
A quick look at the jar’s side reveals your starter’s spongy texture. The starter becomes light and airy with a mousse-like texture when it reaches its peak.
The float test
The float test gives you a quick picture of your starter’s readiness, though it’s not the final word. This simple test shows you how well your starter traps gas bubbles that indicate fermentation activity. You can do it this way:
- Fill a glass with room temperature water
- Gently scoop a small amount of unstirred starter
- Carefully drop the sample into the water
- Watch if it floats or sinks
Important considerations: You should run the float test when your starter hits its peak rise. The results won’t be accurate if you test too early or after the starter starts to fall. On top of that, starters made with low-gluten flours like rye or whole wheat might not float even when they’re perfectly active.
Young starters under 14 days old might give false positives, while mature starters past their peak could show false negatives. That’s why you should use the float test as just one of several ways to check your starter’s readiness.
Your starter needs at least two weeks of consistent feeding to develop reliable strength. The right temperature (75-80°F) and regular feeding schedule help build a reliable microbial community that gives consistent leavening power.
Monitoring Dough Temperature
Temperature control is the life-blood of successful sourdough bread making and directly influences fermentation speed and dough development. Bakers achieve consistent results and optimal rise times in their sourdough experience through proper temperature monitoring.
Ideal temperature range
Sourdough fermentation works best between 75°F to 82°F (24°C to 28°C). This range creates the perfect environment where wild yeast and beneficial bacteria flourish together. The result is a balanced fermentation process that develops excellent flavors.
Different temperature ranges produce varying results:
| Temperature Range | Effect on Fermentation |
|---|---|
| Below 70°F (21°C) | Substantially slower fermentation, extended rise time |
| 75-78°F (24-26°C) | Optimal fermentation rate, balanced flavor development |
| 80-82°F (27-28°C) | Accelerated fermentation, faster rise time |
| Above 85°F (29°C) | Risk of over-fermentation, excessive sourness |
Bakers can adjust their dough if temperatures stray from the ideal range. A quick 15-30 minute refrigeration helps cool down warm dough. The cold dough needs a warmer spot to reach the target temperature.
Using a thermometer
A digital probe thermometer helps you measure temperature accurately. Unlike infrared thermometers that only read surface temperature, probe thermometers tell you exactly how hot your dough is inside.
Here’s what you need to know about checking temperatures properly:
- The most accurate readings come from the dough’s center
- Your first check should be right after mixing to know the final dough temperature
- Keep checking during bulk fermentation, especially when you fold and stretch
- Write down temperatures in your baking journal to spot patterns and bake more consistently
You can adjust your ingredients’ temperature, especially water, to get the dough temperature you want. Warm water balances out cool flour or room temperature. Cold water helps when your kitchen runs hot.
Bakers need to check temperatures regularly throughout the bread-making process. This watchfulness prevents problems like dough that ferments too fast or rises too slowly. Regular checks during bulk fermentation let you adjust quickly and get more predictable results.
Professional bakers typically keep several thermometers handy – one for their starter, another to check proofing conditions, and extras to track dough temperature in cold storage. This detailed approach to tracking temperatures helps them get consistent results at every stage of baking.
Visual Cues for Proper Rise
Bakers can determine perfect rise times by identifying visual indicators of proper fermentation instead of watching the clock. These natural signs are the foundations of monitoring bulk fermentation. The baker’s ability to spot these reliable markers leads to better decisions about dough development.
Dough Volume Increase
Dough volume change gives you the clearest sign of how fermentation progresses. Bakers need to watch for specific volume increases during bulk fermentation that show the dough’s proper development:
| Stage | Volume Increase | Characteristics |
|---|---|---|
| Early Bulk | 20-30% | Dough begins to show life |
| Mid Bulk | 40-50% | Optimal for most recipes |
| Full Bulk | 75-100% | Maximum rise before shaping |
Most recipes need a 50% volume increase during bulk fermentation, though recipes and desired outcomes can change this target. Temperature directly relates to how fast your dough rises. Warm dough (80°F/27°C) rises about 20% each hour. Cooler dough (70°F/21°C) rises more slowly at 10% per hour.
You can track your dough’s progress with a straight-sided container that has volume markings. Taking photos at set times also helps monitor the rise. The perfect dough should look inflated but stable and stay strong without collapsing.
Surface Texture Changes
The dough’s surface shows distinct changes that signal proper development during fermentation:
- Smoothness Development
- The original rough texture becomes smooth with an almost shiny surface
- Gluten strands and webbing become visible
- The surface feels slightly tacky but not sticky
Small bubbles appear just beneath the surface, especially along the sides of clear containers. These bubbles show active yeast fermentation at work, giving the dough what bakers call a pillow-like appearance.
A well-fermented dough’s surface texture reveals its gluten development through:
- Small bubbles spread evenly across the surface
- A smooth, unified look when you lift it
- A subtle dome shape from pressure inside
- A slight jiggle from trapped gasses
These visual signs combine to show proper fermentation. Dough with a smooth surface and slight dome shape that has visible but moderate bubble formation usually creates an even crumb structure in your final loaf. A rough texture or large, uneven bubbles might point to under-fermentation or poor gluten development.
Temperature plays a key role in these visual changes. Warmer doughs change faster than cooler ones. Note that slower fermentation often creates better flavors, even though it takes longer to see visual changes. Bakers should adjust their timing based on their dough’s temperature.
The Poke Test Method
Bakers rely on the poke test as their most dependable way to check if sourdough has reached optimal fermentation. This straightforward technique works well and lets bakers assess dough development through touch, while supporting other methods like temperature monitoring and visual checks.
How to perform the poke test
The poke test needs precise execution to get accurate results. Bakers should follow these steps:
- Dust your finger lightly with flour or add a bit of water to prevent sticking
- Push your finger firmly into the dough until you reach the second knuckle
- Keep steady pressure as you test
- Watch how fast and fully the dent bounces back
- Check several spots to ensure even results
Your dough should be at room temperature to get the best results. The test won’t work well with cold dough straight from the fridge because cold temperatures change the dough’s bounce and stretch.
Interpreting the results
Your dough tells you its fermentation status through how it reacts to the poke test:
| Dough State | Response to Poke | Characteristics |
|---|---|---|
| Underproofed | Springs back quickly and completely | Dough feels dense and resistant |
| Properly proofed | Slowly springs back, leaving slight indentation | Dough feels aerated and jiggly |
| Overproofed | Doesn’t spring back, holds deep impression | Dough feels fragile and may deflate |
Temperature Considerations
Temperature changes make the poke test trickier to read. Cold dough bounces back faster than usual, even when it’s properly proofed. Here’s what you need to know:
- Cold dough (below 65°F/18°C) needs extra attention
- Room temperature gives you the most accurate results
- Warm dough might seem more developed than it really is
Advanced Assessment
Expert bakers use the poke test with other signs to get the full picture. A well-proofed dough should:
- Feel very puffy when touched
- Have a light, aerated texture
- Show the same feel at different test spots
The poke test works best during final proofing. Bulk fermentation makes the dough stickier with different structural properties, so the test isn’t as reliable then.
Common Pitfalls
Your test results might vary because:
- High hydration doughs don’t spring back as much
- Whole grain flour changes the dough’s elasticity
- Protein quality affects how the dough responds
- Humidity levels change the dough’s surface tension
You’ll get better results by testing multiple spots on your dough, especially near the end of proofing time. This method, combined with visual checks and temperature readings, helps you know exactly when your dough is ready.
The poke test is a great tool, but it works better as part of your overall assessment. Watch for changes in dough temperature, volume, and surface texture too. These signs together help you make smart choices about your dough’s progress.
Timing Your Sourdough Rise
Bakers achieve consistent, high-quality results when they master the exact timing of sourdough fermentation. Standard recipes might suggest fixed timeframes, but experienced bakers adapt these guidelines as ingredients and environmental conditions change.
Typical rise times
Sourdough fermentation happens in two main phases: bulk fermentation and final proofing. Each phase needs specific timing:
| Fermentation Phase | Temperature | Typical Duration | Volume Increase |
|---|---|---|---|
| Bulk Fermentation | 75°F (24°C) | 4-4.5 hours | 50-75% |
| Bulk Fermentation | 78°F (25°C) | 3.5-4 hours | 50-75% |
| Bulk Fermentation | 80°F (26°C) | 3-3.5 hours | 50-75% |
| Final Proof | Room temp | 1-4 hours | 25-30% |
| Cold Proof | 40°F (4°C) | 8-15 hours | 25-30% |
Temperature changes create predictable patterns in fermentation rates. The fermentation speed doubles with every 15°F (8°C) temperature increase. The process takes twice as long with every 15°F drop.
Your dough should reach optimal development in 3.5 to 4.5 hours during a standard room-temperature bulk fermentation at 75-80°F (24-27°C). Note that time is just one way to track fermentation progress. Visual cues and the poke test we discussed earlier are equally important indicators.
Adjusting for different recipes
Each recipe and condition needs careful timing adjustments. These factors affect how long fermentation takes:
Starter Percentage
- Higher percentages (>20%) speed up fermentation
- Lower percentages (<15%) make fermentation take longer
- Time adjustments should match your starter amount
Flour Type
- Whole grain flours work faster
- High-protein flours need more time
- Rye flour makes fermentation move by a lot faster
Temperature control plays a vital role in recipe adaptation. Bakers use less starter and lower temperatures for overnight bulk fermentation. A recipe that needs 20% starter at room temperature might only need 5-10% starter overnight at 65°F (18°C).
Recipe Adjustment Guidelines:
Overnight fermentation (8-12 hours):
- Cut starter to 5-10% of flour weight
- Keep temperature under 68°F (20°C)
- Add a bit more salt (2.2% instead of 2%)
Same-day baking (4-6 hours):
- Add 15-25% starter
- Keep temperature at 75-78°F (24-26°C)
- Use standard salt amount (2%)
Bakers should understand how temperature affects fermentation time. A dough that takes 4 hours to ferment at 75°F (24°C) will need about:
- 8 hours at 60°F (16°C)
- 2 hours at 90°F (32°C)
Temperature changes affect more than just timing. Anything above 82°F (28°C) can cause too much bacterial growth and make bread more sour. Temperatures below 65°F (18°C) might not develop enough flavor even with proper fermentation.
High-hydration doughs (>80% water) ferment faster because enzymes work better. These doughs usually need:
- 15-20% less fermentation time
- Lower temperatures
- More frequent checks
Enriched doughs with fats, sugars, or eggs need more time to ferment. These ingredients slow down yeast activity, so you’ll need:
- 25-50% more bulk fermentation time
- Warmer proofing temperatures
- More starter in your mix
Your dough should rise 25-30% in volume before you start baking, regardless of the proofing temperature. The dough takes 1-4 hours to proof at room temperature. You can also proof it in the refrigerator for 8 to 15 hours. This longer, cold fermentation process adds complex flavors and gives you more flexibility with your baking schedule.
Conclusion
Getting the perfect sourdough rise just needs a balanced mix of temperature control, visual assessment, and tactile testing. Expert bakers know that the best fermentation comes from monitoring dough temperature between 75-82°F. They also watch for key signs like increased volume and changes in the dough’s surface texture. These methods combine with well-timed poke tests to create a detailed system that delivers consistent, professional results.
Regular practice and close observation help you develop a natural feel for your dough’s behavior, which leads to better timing and superior bread. Bakers who perfect these techniques create exceptional sourdough with ideal texture and rich flavor profiles. You can start your experience toward better bread and pizza with an authentic artisanal sourdough starter from The Yeast We Can Do. Email [john@theyeastwecando.com to get our premium sourdough starter that helps create outstanding bread and pizza with that perfect tangy flavor and signature crust.
FAQs
How long should a sourdough starter be allowed to rise?
A sourdough starter should rise until it doubles or triples in size, which typically takes between 4 to 8 hours after feeding, depending on the ambient conditions and the type of flour used. The starter is considered ready for baking when it reaches its peak rise, often referred to as ripe, fed, or mature.What is the duration for the initial rise of sourdough?
Initially, sourdough should be allowed to rise at room temperature, covered, for about 3 to 4 hours. Alternatively, you can start the proofing at room temperature and then refrigerate it for 12 to 15 hours. To expedite the process, a proof box, warm cooler, or slightly warm oven can be used.How long does bread typically need to rise on the first proofing?
Most bread recipes require the dough to double in size, which can take anywhere from one to three hours. This duration varies based on factors like temperature, moisture content, gluten development, and the ingredients used. A warm and humid environment generally promotes faster rising.What are the expected characteristics of a sourdough starter on day 4?
On the fourth day, a sourdough starter might not show much rise and could have only a few bubbles on the surface. It may emit odors similar to old cheese or other unusual smells.