How to Make Sourdough Brioche: Tips for Rich, Buttery Success
Sourdough brioche beautifully combines traditional French-enriched bread with natural fermentation techniques. Bakers can create a unique and flavorful version of this classic bread that blends the rich, buttery texture of brioche with the complex tang of sourdough. This advanced baking project delivers exceptional results to those who remain patient.
Success depends on several elements. You need an active sourdough starter, proper butter incorporation, and precise ferment temperature control. This guide shows you everything about creating enriched sourdough bread, from preparing the levain to mastering the final proof. You will discover proper shaping methods, the best fermentation times, and the ideal baking temperatures to make perfect sourdough brioche buns and loaves.
The Science Behind Sourdough Brioche
The science behind sourdough brioche shows a remarkable interaction between microbial activity and protein chemistry. Traditional brioche depends on commercial yeast, but sourdough brioche controls a complex ecosystem of wild yeasts and beneficial bacteria. This natural fermentation process boosts the bread’s flavor and makes it easier to digest.
Wild yeast fermentation
Sourdough brioche’s unique character comes from its rich microbial community. Traditional breads rely on a single type of baker’s yeast, but sourdough creates what scientists call a “Serengeti” of microorganisms. This thriving ecosystem includes:
- Lactic acid bacteria (outnumbering yeasts 100:1)
- Multiple strains of wild yeasts
- Beneficial acid-producing bacteria
These microorganisms create a perfect symbiotic relationship. Wild yeasts use enzymes to convert flour starch into sugars; bacteria transform these sugars into lactic and acetic acids. This natural fermentation process creates the signature tangy flavor and:
- Makes gluten easier to digest
- Eliminates flour’s anti-nutrients
- Breaks down FODMAPs and complex starches
- Improves nutrient absorption
Gluten development
Gluten development in sourdough brioche is vital because of its enriched nature. Flour proteins (glutenin and gliadin) create intricate bonds that form the gluten network as they meet water. This process becomes more complex in brioche because of its high butter content.
The development happens in distinct stages:
| Stage | Process | Characteristics |
|---|---|---|
| Original Mix | Protein hydration | Dough appears shaggy |
| Pre-butter Kneading | Gluten formation | Dough becomes cohesive |
| Butter Integration | Lipid coating of gluten strands | Dough becomes softer |
| Final Development | Strengthening of gluten bonds | Achieves windowpane effect |
Temperature is a significant factor in this process. The dough should stay around 25-27°C (77-80°F) while mixing. Cold ingredients help because mechanical mixing can raise the dough temperature substantially and potentially damage the gluten structure.
Sourdough brioche’s fermentation needs precise temperature control and timing. The dough builds strength and flavor through wild yeasts and bacteria during the bulk fermentation. Room temperature fermentation typically takes several hours, followed by cold fermentation lasting 8 to 48 hours. This allows maximum flavor development and maintains dough stability.
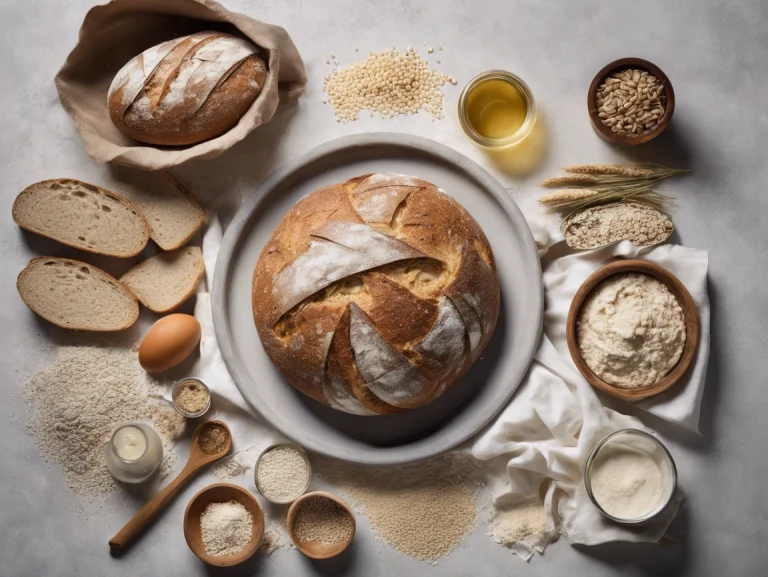
Gathering Your Tools and Ingredients
The right tools and quality ingredients are essential for the perfect sourdough brioche. A kitchen with proper equipment and carefully selected ingredients are the foundations that give this enriched bread its unique texture and flavor.
Essential Equipment
Making sourdough brioche requires several significant tools. A digital kitchen scale is the most basic equipment you’ll need. It ensures precise measurements and consistent results. Your scale should have gram measurements and a tare function to measure accurately.
A strong stand mixer with a dough hook attachment makes all the difference. Hand-kneading won’t work well because the dough needs extensive mixing to develop proper gluten structure and mix in the butter. Most professional bakers suggest mixers with at least a 5-quart capacity and powerful motors. KitchenAid Artisan models work great for this.
| Essential Tool | Specifications | Purpose |
|---|---|---|
| Bread Loaf Pan | 9×5 inches | Even baking and shape |
| Pastry Brush | Natural bristles | Egg wash application |
| Dough Scraper | Stainless steel/plastic | Dough handling |
A proofing box can help better control fermentation, though you don’t need one. This tool helps maintain steady temperature and humidity – two vital factors that affect your sourdough’s development.
Choosing the Right Flour and Butter
Your choice of flour affects the final product substantially. High-protein bread flour contains about 12.7% protein content and provides the gluten strength needed for proper structure. Premium brands like King Arthur deliver consistent quality with reliable protein content, creating brioche’s characteristic texture.
The butter’s quality and handling are vital to the bread’s richness and texture. Your ideal butter should have the following:
- 82-86% butterfat content
- Cool room temperature pliability
- Unsalted composition
- Cultured variety (if available)
The butter’s temperature control is a key factor during incorporation. Bakers aim for the “Goldilocks zone” – a sweet spot where butter blends smoothly while staying cool enough to maintain the dough structure. Your butter should be:
- Cool to touch (around 65°F/18°C)
- Soft enough to leave an indentation when pressed
- Free from signs of melting or oiliness
Winter butter from hay-fed cows works best for laminated doughs, but finding it outside professional bakery suppliers can be tough. Home bakers can get excellent results with high-quality European-style butter, especially those with higher butterfat content.
To ensure the dough develops properly, keep the remaining ingredients—eggs, milk, and salt—at cool room temperature. A kitchen thermometer helps you maintain exact temperature control throughout the mixing process.
Preparing and Maintaining Your Sourdough Starter
A sourdough starter you managed to keep is the lifeblood of exceptional brioche making. You establish a reliable starter culture that handles the needs of the enriched dough.
Creating a levain
A brioche levain needs specific ratios and consistent preparation. Bakers need to keep a stiff levain at 50% hydration. This works especially well with enriched doughs. The stiffer texture helps you control how fast butter-rich doughs ferment.
Here’s how to build your levain:
- Start with 30g mature starter
- Mix in 60g bread flour
- Add 30g warm water (80°F/27°C)
- Mix everything really well
- Let it ferment for 4-5 hours at 75-80°F
Feeding schedule for brioche
A sourdough starter for brioche production needs a steady feeding schedule. The feeding ratio will affect the starter’s performance and the final bread quality. Here’s a complete breakdown of feeding ratios and their effects:
| Feeding Ratio | Time to Peak | Best Use Case |
|---|---|---|
| 1:2:2 | 4-6 hours | Daily maintenance |
| 1:3:3 | 6-8 hours | Weekend baking |
| 1:5:5 | 8-10 hours | Overnight builds |
| 1:10:10 | 10-12 hours | Extended fermentation |
Bakers should keep their starter at room temperature (approximately 70°F/21°C) and feed it every 12-24 hours to get the best brioche. If they don’t bake often, the starter can be stored in the refrigerator with weekly feeds.
Several signs indicate a ready-to-use starter. A mature starter doubles in volume within 4-6 hours after feeding and passes the float test. The starter needs extra strength for enriched doughs like brioche because it must work against the dough’s high-fat content.
Temperature plays a vital role in starter care. During active feeding, the best range sits between 75-80°F (24-27°C). Higher temperatures speed up fermentation but might create more acetic acid. Lower temperatures slow things down but can develop better flavors.
Bakers must refresh their refrigerated starter with two feeding cycles at room temperature before making brioche. This step wakes up the yeast and bacterial cultures that will give optimal fermentation in the enriched dough. The last feed should happen 8-12 hours before mixing the dough so the starter reaches peak activity.
Regular care leads to reliable brioche production. Save 20g of starter during each feed and stick to a 1:2:2 ratio for daily feeding. This approach helps balance the yeast and bacteria while stopping too much acid from building up, which could hurt the brioche’s delicate flavor.
Mastering the Dough-Making Process
You just need to become skilled at a precise dough-making process and maintain proper temperature control to create the perfect sourdough brioche. The experience of transforming separate ingredients into a cohesive, enriched dough just needs careful attention and patience.
Mixing Wet and Dry Ingredients
The first step to making sourdough brioche involves combining all ingredients except butter. The mixing process requires:
- Combining cold eggs and milk with the mature starter
- Mixing flour, sugar, and salt in a separate bowl
- Adding wet and dry ingredients together gradually
The dough needs 5-7 minutes of mixing at low speed to achieve a thick, slightly sticky consistency. This significant first step builds the foundation for proper gluten development before adding butter.
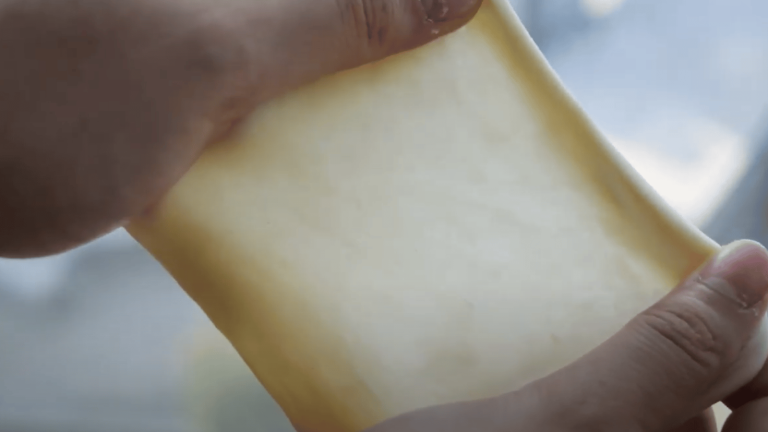
Incorporating Butter Properly
Temperature control plays a crucial role in butter incorporation. Bakers aim for the “Goldilocks zone,” where butter remains cool but pliable at 65-70°F (18-21°C).
| Stage | Temperature | Duration |
|---|---|---|
| Original Mix | 65-70°F | 5-7 minutes |
| Butter Addition | 65-70°F | 10-15 minutes |
| Final Development | 75-78°F | 5-10 minutes |
The butter should be added gradually in small pieces. Each piece needs to blend completely before adding the next portion. This methodical process takes 10-15 minutes, turning the dough from a shaggy mass into a smooth, cohesive structure.
Kneading Techniques
Making enriched sourdough needs patience and proper technique. A stand mixer with a dough hook attachment helps bakers watch several important stages:
- Original Development: Mix at medium-low speed until the dough comes together
- Butter Integration: Keep speed steady as you add butter bit by bit
- Final Development: Mix until the dough looks smooth and elastic
The windowpane test shows if your dough has developed properly. A well-kneaded dough stretches into a thin, see-through membrane without breaking. If it tears easily, your dough needs more mixing time.
Long mixing sessions can warm the dough from friction. Short breaks help cool the dough and stop butter separation. The dough’s gluten strands also relax and reorganize during these breaks, creating a stronger structure.
Bakers should skip adding extra flour while mixing because it leads to dry, dense bread. A quick 5-10 minute chill in the refrigerator helps sticky or warm dough regain its texture without affecting hydration.
Mixing usually takes 20-30 minutes, depending on your mixer’s power and room temperature. Your dough is ready when it looks smooth and shiny and cleanly pulls away from the bowl. The texture should feel soft yet strong, with a slight stickiness that goes away when touched with clean, dry hands.
Fermentation, Shaping, and Proofing
Making perfect sourdough brioche requires precise steps and careful attention. The dough changes through distinct stages of fermentation, shaping, and proofing, which create the bread’s unique texture and rich flavor profile.
Bulk Fermentation Tips
The bulk fermentation phase starts right after mixing the enriched dough. This significant period allows the dough to develop strength and flavor through controlled fermentation. The dough’s temperature management is a vital part of this process:
| Temperature Range | Fermentation Time | Notes |
|---|---|---|
| 74-76°F (23-24°C) | 4-5 hours | Ideal range |
| 78-80°F (26-27°C) | 2-3 hours | Faster, less flavor |
| Below 70°F (21°C) | 6+ hours | Slower, more flavor |
Bakers need to watch for these key indicators during bulk fermentation:
- Volume increase by one-third
- Dough’s texture becomes smooth and elastic
- Air bubbles appear on the surface
- Slight dome forms on top
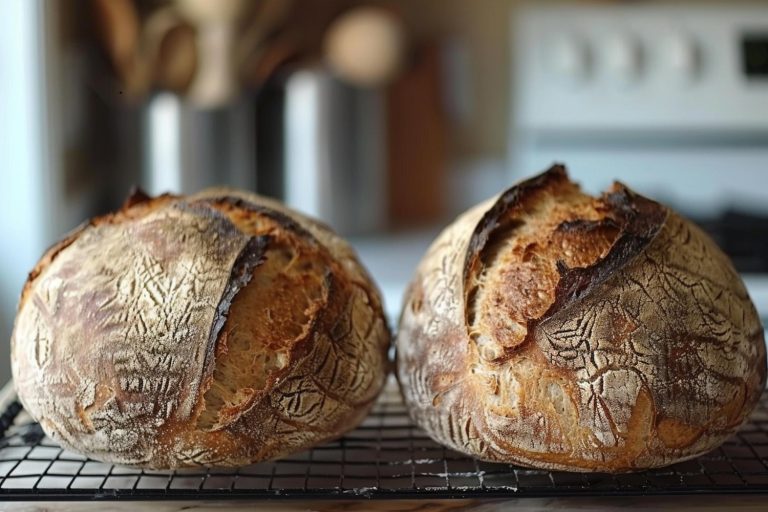
The dough needs 12-24 hours of cold retardation in the refrigerator after bulk fermentation. This step improves flavor development and makes the butter-rich dough more manageable during shaping.
Shaping Methods for Brioche
Cold brioche dough can be shaped in many ways, and each shape needs its own special technique. Here’s how to make traditional brioche loaves:
- Take the cold dough and cut it into equal pieces (50g makes perfect rolls, 500g works best for loaves)
- Work each piece on a surface with light flour dusting
- Roll gently to create tension on the surface
- Place the shaped pieces in your prepared pans based on your style choice
- Put plastic wrap over your shaped dough
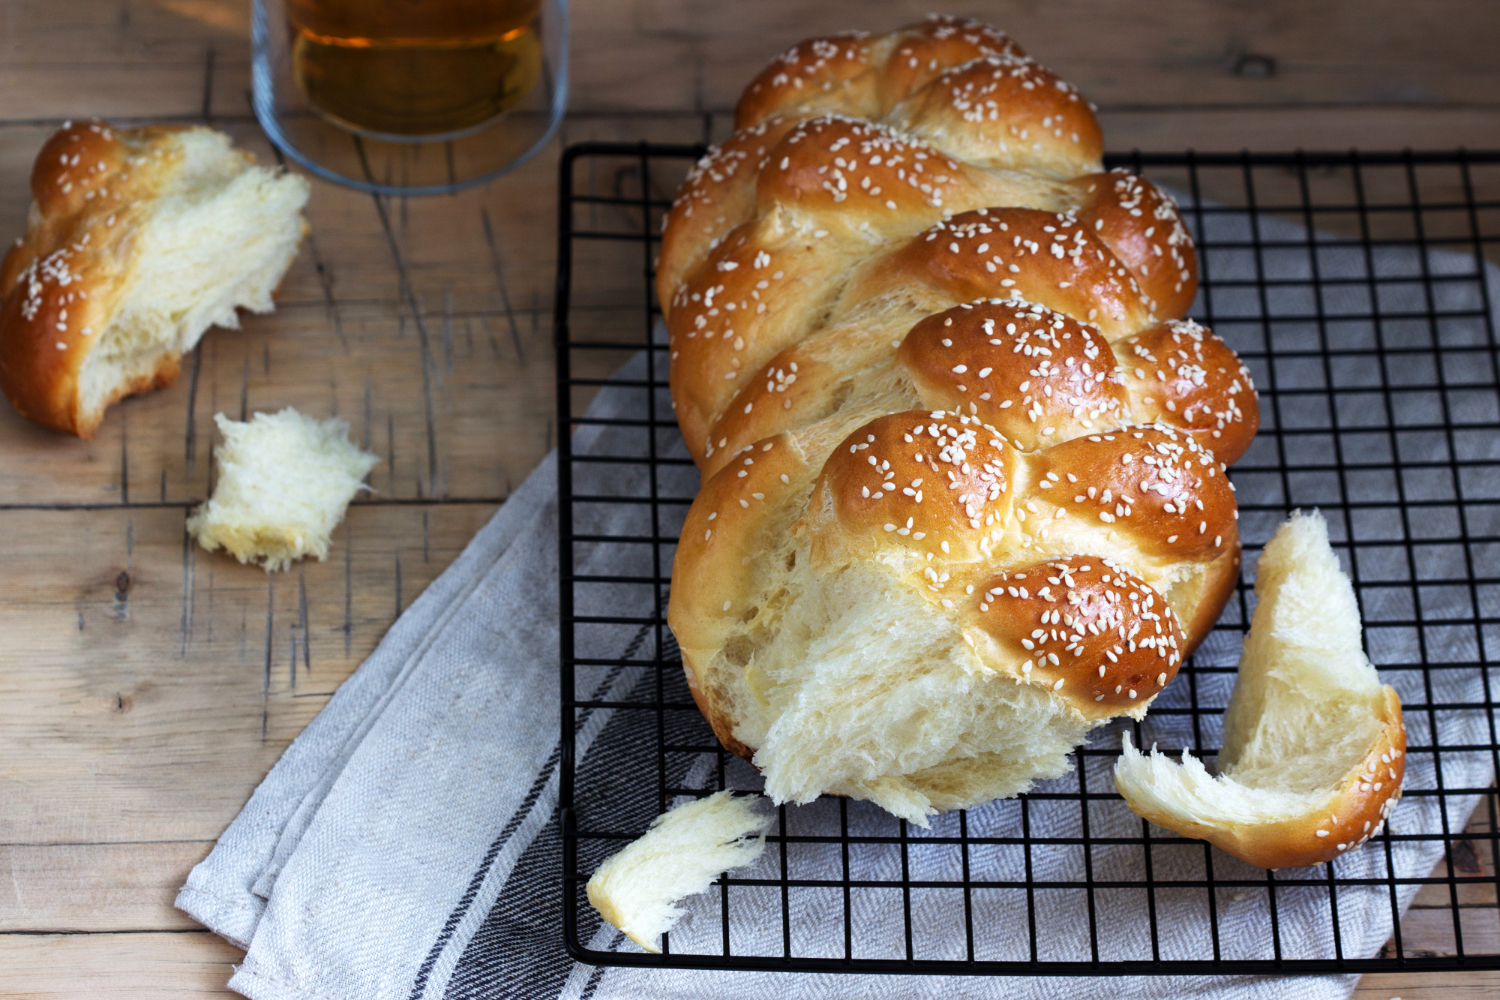
Classic Shaping Styles include:
- Traditional braided loaf
- Nanterre style (multiple rolls in a pan)
- Brioche à tête (classic French style)
- Star pattern (decorative presentation)
Final Proof Indicators
Successful bread baking depends on patience and attention to detail during the final proofing stage. The proofing process takes 3-5 hours at 78°F (25°C). Bakers need to watch several indicators that show when their dough is ready to bake:
Visual Indicators:
- Dough reaches slightly above the pan rim
- Surface appears puffy and rounded
- Small bubbles visible under the surface
- Volume increases by 75-100%
The poke test provides the quickest way to check if your dough has proofed enough. Your properly proofed dough should respond to a gentle press with a floured finger in these ways:
- Leave a slight indentation
- Slowly spring back halfway
- Maintain the partial depression
- Feel light and aerated
Temperature control plays a significant role during final proofing. Expert bakers suggest keeping a steady environment between 75-80°F (24-27°C) with moderate humidity. Home bakers can create ideal conditions using a proofing box or a turned-off oven with a light on.
Enriched sourdough brioche needs longer fermentation and proofing times than traditional bread because its high fat content slows yeast activity. Ambient conditions significantly affect fermentation rates, so bakers should watch their dough’s characteristics rather than follow strict time guidelines.
Baking Perfect Sourdough Brioche
Perfect sourdough brioche needs precise temperature control and careful timing at the final stage. You can turn a well-proofed dough into a golden, buttery masterpiece that perfectly balances crispy crust and tender crumb.
Oven Preparation
Proper oven preparation is essential for the optimal baking environment for sourdough brioche. Your oven needs to be preheated to 400°F (200°C). This higher original temperature helps achieve proper oven spring, though you’ll reduce it during baking.
The work to be done includes:
- Place racks in the oven’s middle
- Check calibration with an oven thermometer
- Mix egg wash by whisking one egg with water
- Keep a pastry brush ready to apply wash
Baking Temperature and Time
Your brioche needs specific temperature changes throughout the baking process to turn out perfect:
| Baking Stage | Temperature | Duration | Purpose |
|---|---|---|---|
| Initial Heat | 400°F (200°C) | Preheat only | Oven spring |
| Main Bake | 350°F (175°C) | 30-45 minutes | Even cooking |
| Final Stage | 160°C (320°F) | As needed | Prevent over-browning |
The brioche’s success depends on quick temperature adjustment. You should lower the temperature to 350°F (175°C) right after putting the brioche in the oven. This temperature ensures even baking and prevents the crust from getting too dark. Your brioche will need 30-45 minutes to bake completely, based on its size and shape.
Achieving Golden Crust
Creating a perfect golden crust depends on several important factors:
Egg Wash Application
- Apply a thin, even coat before baking
- Ensure complete coverage without pooling
- Use gentle strokes to avoid deflating the dough
Temperature Management
- Monitor crust coloring during baking
- Cover with foil if browning too quickly
- Adjust oven temperature as needed
Proteins and sugars interact under heat during baking through the Maillard reaction. This natural process creates a golden-brown color and develops flavor compounds that make the brioche appealing.
Skilled bakers look for these signs in properly baked sourdough brioche:
- Internal temperature reaching 195-205°F (90-96°C)
- Hollow sound when tapped on the bottom
- Even golden-brown coloration
- Lightweight relative to size
Brushing hot brioche with melted butter right after it leaves the oven will improve its appearance. This step adds shine to the crust and contributes to the bread’s signature richness. Let the brioche cool in the pan for 5-10 minutes before moving it to a wire rack.
Temperature monitoring is vital throughout the baking process. Sourdough brioche can quickly go from perfectly baked to overcooked, which leads to a dry interior and overly hard crust. Bakers should watch carefully and respond to visual cues, especially during the final baking stages.
The brioche dough’s enriched nature makes it burn quickly because of its high butter and sugar content. If it browns too fast, a quick solution is to cover the top with aluminum foil and reduce the oven temperature to 160°C (320°F). This approach lets the interior finish cooking while protecting the crust.
Professional bakers suggest using an instant-read thermometer to check doneness. Visual indicators alone might not show the actual internal temperature. This precise approach gives consistent results and helps avoid underbaking and overbaking, which are common issues with enriched sourdough breads.
Conclusion
Making a perfect sourdough brioche requires several technical elements to work together. Temperature control is crucial, from getting the right butter consistency during mixing to creating perfect fermentation conditions. Quality ingredients, precise measurements, and careful timing work with proper starter maintenance to produce the signature rich, tender crumb and golden crust of exceptional brioche. These elements reshape simple ingredients into an enriched bread that shows off traditional French baking skills and natural fermentation benefits.
Your success with sourdough brioche starts with foundational knowledge and grows as you perfect each step. Bakers who become skilled at these techniques will find a rewarding way to create uniquely flavorful, naturally leavened enriched bread. Home bakers and restaurant owners can begin their trip toward authentic sourdough bread and pizza with a premium small-batch starter from The Yeast We Can Do. You can contact [email protected] for this essential foundation for exceptional baking. Patient practice and attention to detail will help bakers develop skills to consistently make sourdough brioche with both visual appeal and remarkable taste.
FAQs
Why does my sourdough brioche taste so sour?
The sour taste in your sourdough brioche originates from the bacteria in the starter. This starter consists of wild yeast and bacteria that ferment the dough, giving it that distinctive sour flavor.
What could be the reason my sourdough brioche isn’t rising?
If your sourdough brioche isn’t rising, the issue might be with your starter. A lack of active wild yeast in the starter can result in a dense loaf with uneven air pockets and a gummy texture, even if the starter appears bubbly and active.
What are some effective tips for making excellent sourdough bread?
To improve your sourdough bread, consider these tips: use your starter when it’s most active, moisten the dough surface before baking to enhance the rise, handle the dough gently, use sifted flour for less dense bread, pre-soak your flour for a lighter loaf, and simply adding water can make your sourdough softer.
Why is it important to add butter slowly when making brioche?
Incorporating butter into brioche dough should be done gradually, about one tablespoon at a time. This method helps preserve the developed gluten structure, ensuring the butter integrates slowly and the dough remains stretchy.